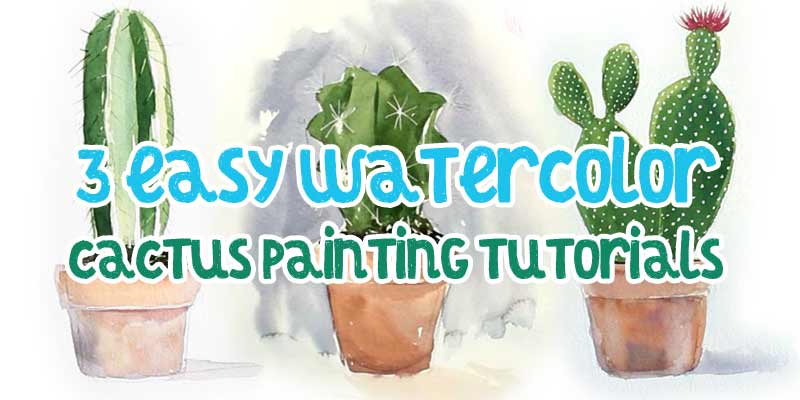
This easy watercolor cactus painting tutorial is perfect for beginners. The simple geometric shapes of cacti make it an interesting subject and it’s a great opportunity to try out some essential techniques.
- Wet on dry: Thin consistency watercolor paint on dry paper creating hard edges.
- Wet into wet: Wet paint on wet paper creating colour blends and blooms.
- Glazing: Painting thin consistency paint over dry colors to create darker colours or to create new colours (e.g. painting yellow over blue to create green).
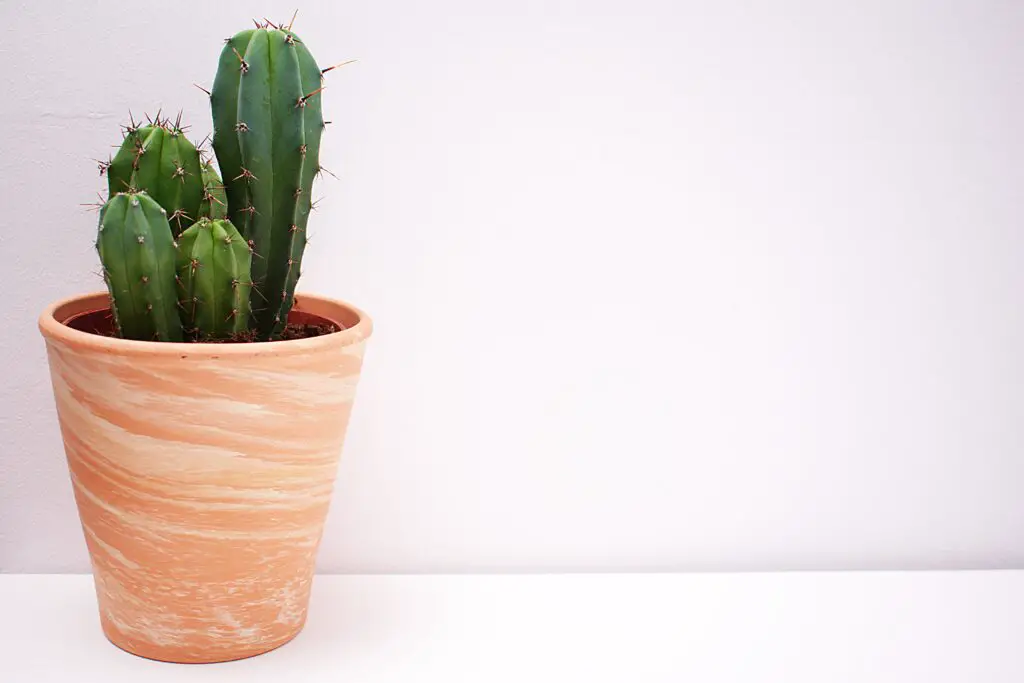
Cacti come in all shapes and sizes, from the towering Saguaro cactus of the Sonoran desert to the tiny “Sea Urchin” type that you can grow in a pot. In this post we’ll take a look at painting three different kinds of cactus.
Watercolor is a mostly transparent medium therefore the challenge as always is how to create white. This is traditionally done by leaving areas of unpainted white paper. Sometimes the white areas can simply be painted around but sometimes this isn’t practical and it’s necessary to find another way, such as using masking fluid.
I’m not a huge fan of masking fluid, as it can be tricky to apply and difficult to remove, so in the examples that follow I’ve avoided that in a couple of different ways, but more on that later.
Materials List
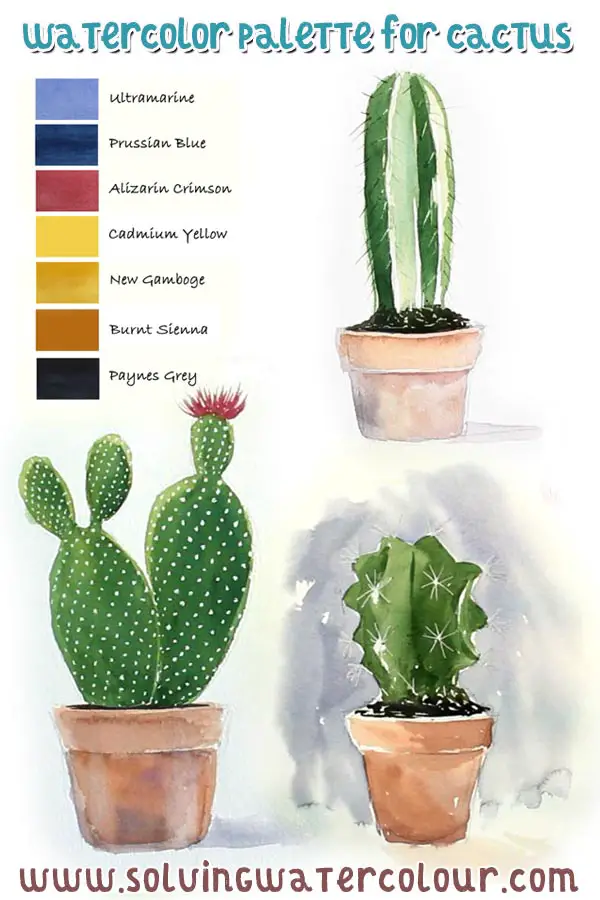
Ultramarine Blue: Winsor & Newton | Daniel Smith
Prussian Blue: Winsor & Newton | Daniel Smith
New Gamboge: Winsor & Newton | Daniel Smith
Cadmium Yellow: Winsor & Newton | Daniel Smith
Burnt Umber : Winsor & Newton | Daniel Smith
Alizarin Crimson: Winsor & Newton | Daniel Smith
Paynes Gray: Winsor & Newton | Daniel Smith
Burnt Sienna: Winsor & Newton | Daniel Smith
Brushes
No. 2 Squirrel Hair Mop Brush Buy from Amazon
Rigger Brush ( For thin lines) Buy from Amazon
Princeton round detail brush 9650R-2 Buy from Amazon
Winsor & Newton Series 150 Bamboo Round #6 Buy From Amazon
Paper
Arches Watercolor Paper Block, Cold Press, 9″ x 12″, 140 pound Buy from Amazon
Miscellaneous
Uni Ball Signo White Gel Pen Buy from Amazon
Pebeo Palette Knife Buy from Amazon
Easy release painters masking tape Buy from Amazon

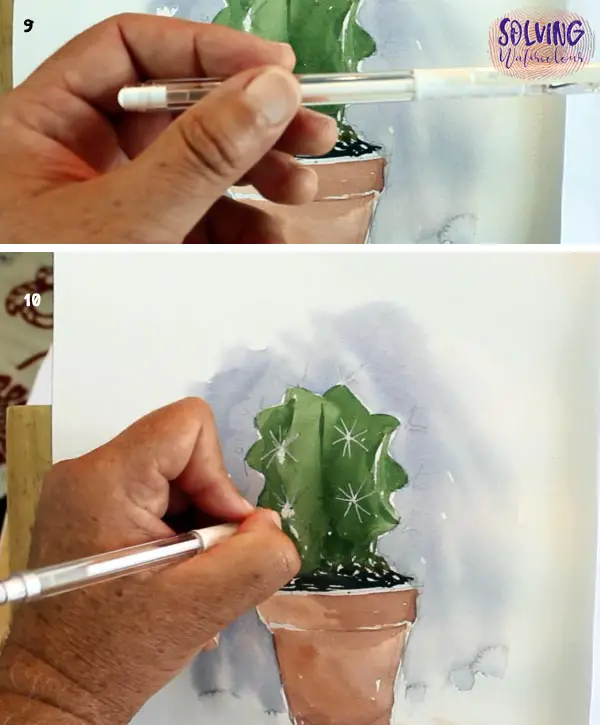
The three examples shown below were all painted on a desktop easel angled at approximately 60 degrees. Working at an angle and painting from top to bottom means that your paint will always flow down in a fairly predictable way, not sideways or up.
Mixing Greens
Cacti are predominantly green. They can be other colors of course but let’s focus on the greens. There is a wide range of possible greens that we could mix.
The greens for the following examples were all mixed from blues and yellows, with the occasional spot of Paynes Grey ( Which is actually a blue /grey). Pre-mixed tube greens can often look acidic and unnatural and it’s hard to judge this until it’s on the paper.
The whole subject of colour mixing and colour bias can be a complex one but to put it simply, Warm greens lean closer to yellow and cool greens lean closer to blue.
For more info on mixing greens take a look at this post.
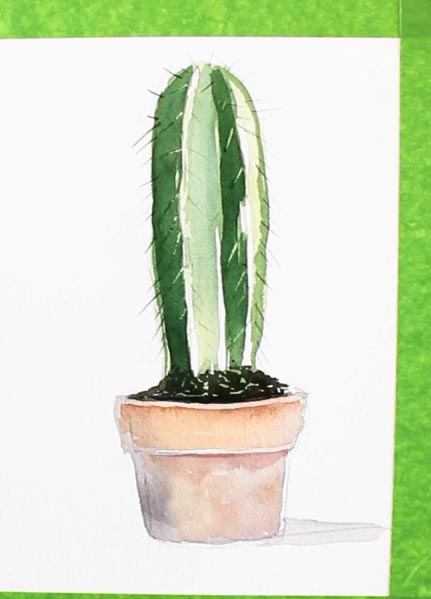
Example 1: Melocactus
The Melocactus comes in different forms but it tends to be quite squat and barrel shaped with star-shaped clusters of needles spaced at regular intervals.
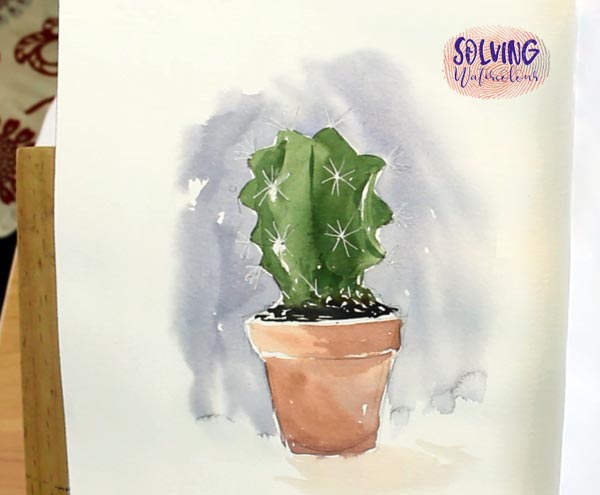
I wanted a mid-green for this particular cactus, so I used a combination of Cadmium Yellow and Ultramarine, warmed up slightly with some Gamboge Hue.
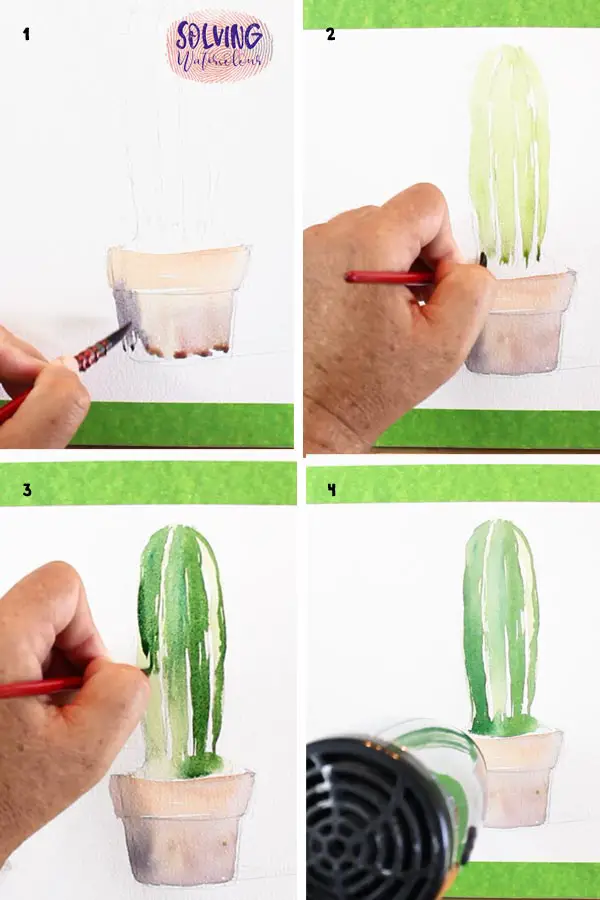
Steps 1 – 4
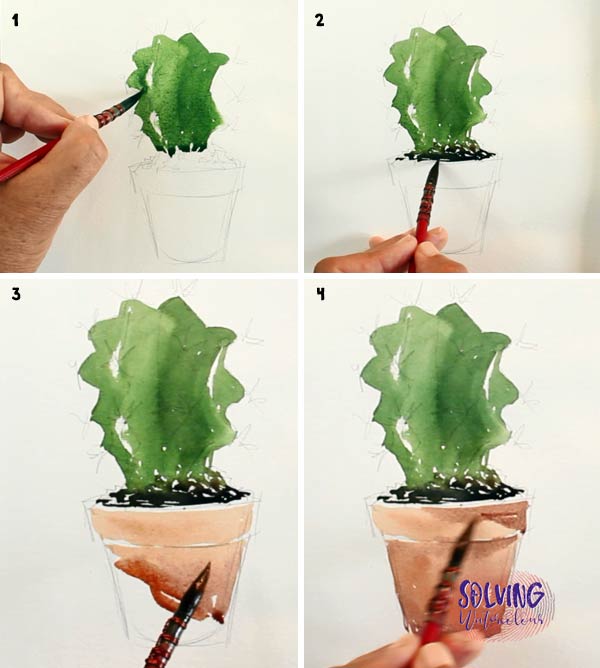
Steps 1 & 2: Painting The Cactus & Soil
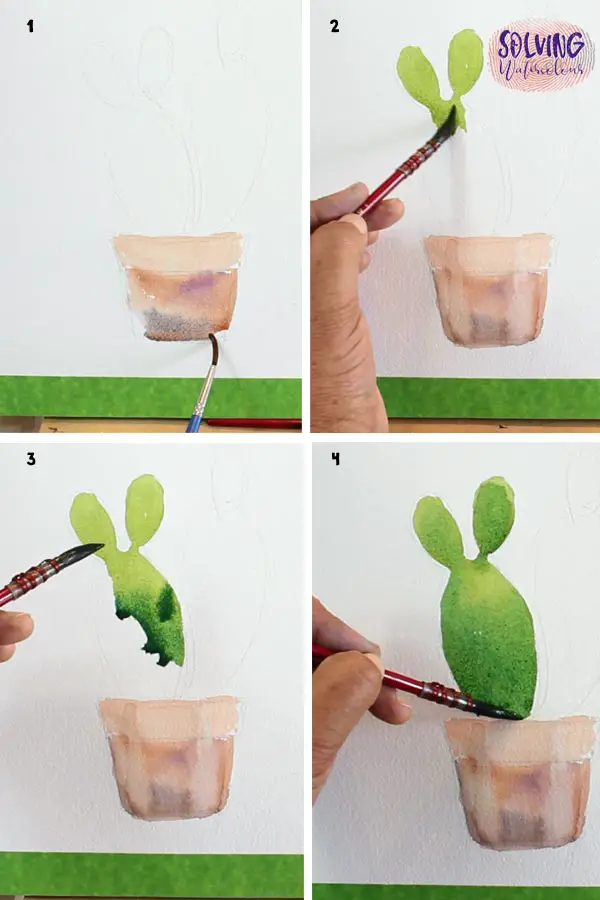
I began with a very minimal outline sketch and painted the basic shape of the cactus with my mop brush. The mop brush is a natural hair brush which forms a sharp point, holds plenty of paint and can produce a wide range of strokes.
Note that I didn’t paint an even flat wash of color. I was paying attention to where the shadows fell and lifted out some of the paint on the lighter left hand side (Have a paper towel handy to wipe off excess paint). I also left a few small unpainted areas for the highlights.
The transition of the green cactus to the warm dark grey of the soil, was done while the paint was still wet, allowing the two colors to blend rather than have a clean separation between the two.
Steps 3 & 4: Painting The Plant Pot
I did want a clean hard edge separating the soil from the pot. So leaving the gap of white paper between the two serves as a highlight along the rim of the pot and separates the one from the other.
For the main pot colour I used a pale wash of Burnt Sienna. (Pic 3) I added a small amount of Dioxazine Purple for the shadows. Allowing the two colors to blend together wet in wet, creates a smooth transition from shadow to light.
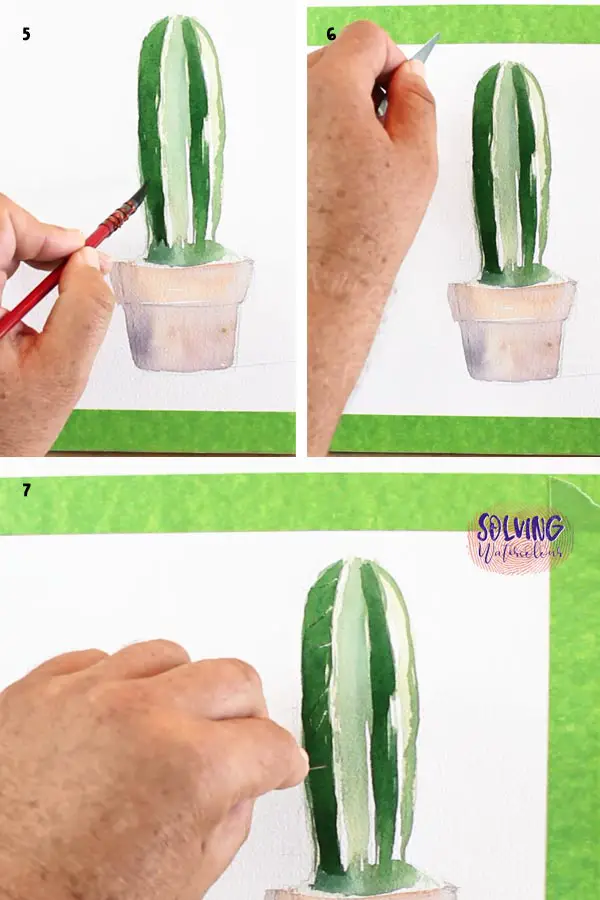
Steps 5 – 8: Glazing In Shadows
Before the paint had completely dried, I added a line down the center of the cactus where the segments meet. Painting the line in before the paint dried allows the line to just diffuse slightly and not completely blend out.
(pic 5) The cactus segment on the left needed to be darkened to show that it was in shadow. I took my small round brush and glazed a thin wash of green over the top of the now dry paint.
To make the whites stand out a bit more I decided to but in a background colour. Just a blended out warm grey mixed from Paynes Grey, Ultramarine and Alizarin Crimson nothing that would clash distract too much from the main subject.
To do this I brushed some clean water around the cactus. (Be careful to make sure that the subject is completely dryand only wet up to the edges or the background and the subject will start bleeding into each other uncontrollably). Once that was done it was easy to drop in some of my colored grey mix which only flows where the water is.
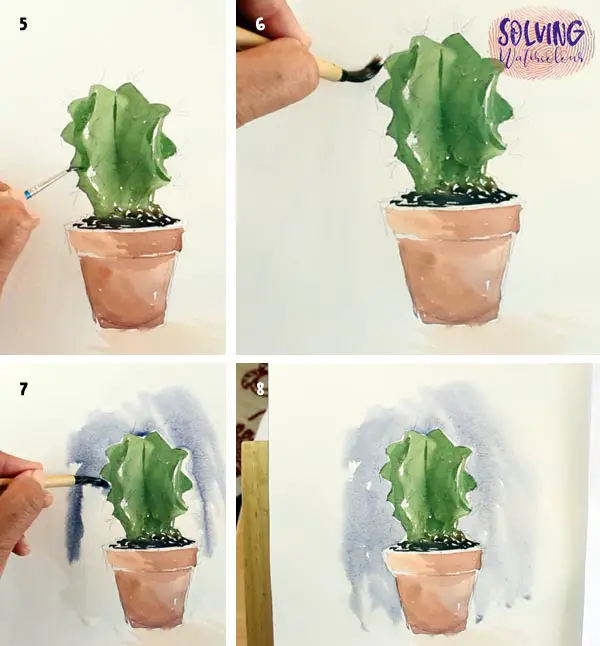
Steps 9 & 10: Adding Whites
For the thin white clusters of needles, painting around them wasn’t an option I could have used masking fluid but masking fluid is thick and blobby and difficult to apply. I could have used a rigger brush and Titanium White but as I’ve mentioned, watercolor is a transparent medium and even white has to be applied quite thickly to be opaque. However a white gel pen creates nice thin opaque white lines, so it’s the perfect compromise in this case. O.K. If you’re a watercolor purist it’s a bit of a cheat. Shh, don’t tell the watercolor police!
Example 2: Blue Columnar Cactus
I painted the pots on all three paintings in essentially the same way, so there’s no need for me to elaborate on that again.
This cactus, while not exactly blue, is a cooler green than the previous example, so I used more blue than yellow in the mix.
Steps 1 – 4: Painting The Light Greens
The painting process was slightly different this time as there was a much bigger variation in the range of greens.
(Pics 1 & 2) Start with the palest greens and leave white paper for the white highlights.
(Pics 3 & 4) While the paint is still wet you can start to blend in some darker mid greens. The white highlights also create a separation between sections of the cactus so the darker color won’t flow uncontrollably across those gaps.
Allow the painting to dry, (Or use a dryer).
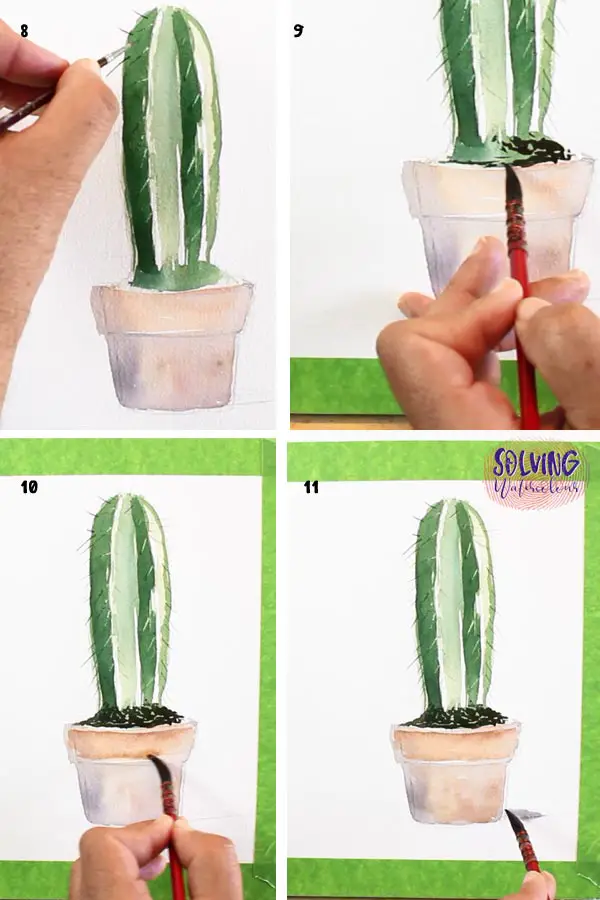
Pics 5 – 7: Creating The Needles
After the painting is dry you can glaze on the darkest greens.
On this cactus, the needles are not the same pure white as in the previous example. They form a light contrast against the darker greens and a dark contrast against the pure white background. The highlights can be scraped out of the dark paint and dark needles painted in with a thin brush, like a rigger elsewhere.
Timing is essential to successfully scraping out highlights. Once the dark greens have been added, wait until the shine just starts to go off the wet paint but don’t wait for it to dry completely. Then you can use a palette knife, or something similar (As long as it has a thin firm but flexible edge it should work). Scrape out some needle shaped highlights. You could of course just use the gel pen, but I rather like the mark that the palette knife makes.
Steps 8 – 11: Adding The Darks
I never use black in my paintings, I don’t even own a tube of black paint. Many watercolor painters avoid it, as it can make your paintings look dull and lifeless, though some like Rowland Hilder have used it successfully. Burnt Umber, mixed with Ultramarine makes a nice warm dark neutral that works well for very dark earth colors such as the soil in the plant pot.
I was unable to blend the soil wet in wet with the cactus like I did in the first example, as the painting is dry now. So, instead, I simply painted the soil wet on dry which works fine but leaves a harder edge which I’m not so fond of but it’s not a major issue. I’ve left some specks of green underneath showing through here and there to create the effect of tiny pieces of grit and light colored earth.
For the dark needles. Use a small round brush, or a rigger. Place it where you would like the base of the needle to be and pull the brush up and away in one smooth motion this will create a short straight line that tapers to a sharp point.
To finish the painting I added some final touches to the plant pot. The shadow cast by the pot was the last thing to do. Shadows lean more to the blue side of the color wheel so a little Paynes Grey warmed with a tiny amount of Dioxazine Purple ( Again no black needed) creates a believeable shadow that anchors the subject in 3d space by creating the suggestion of a flat surface.
Example 3: Bunny Ears Cactus
The “Bunny Ears” is so called for obvious reasons and it’s probably the easiest one to paint of the three examples shown here.
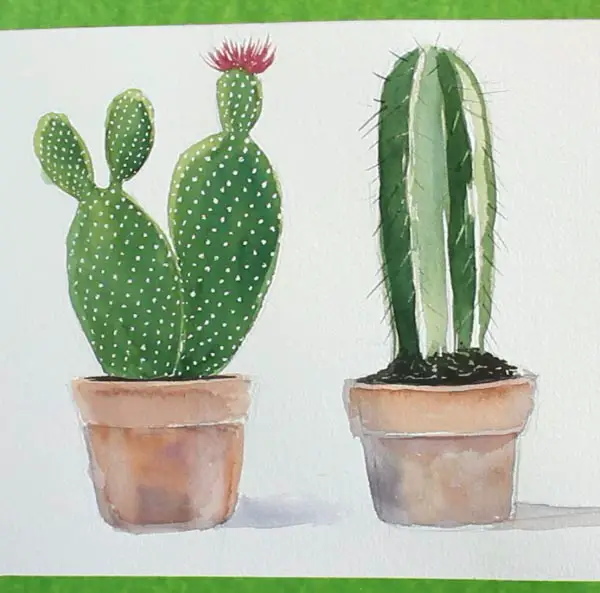
For a bright warm green mix Gamboge Hue with Ultramarine. This can be used for the lighter initial wash. Drop in Prussian Blue wet in wet to create a blended transition from dark to light. This rounds out the form making it look more three dimensional (Pic 4).
(Pic 6) The bright red flowers, can be flicked in with a small round brush.
(Pic 7) Remember that watercolor paint dries twenty five percent lighter than it is when wet. So you may find you need to adjust the values by glazing another layer over the top as I had to do here (Pic 8 – 10).
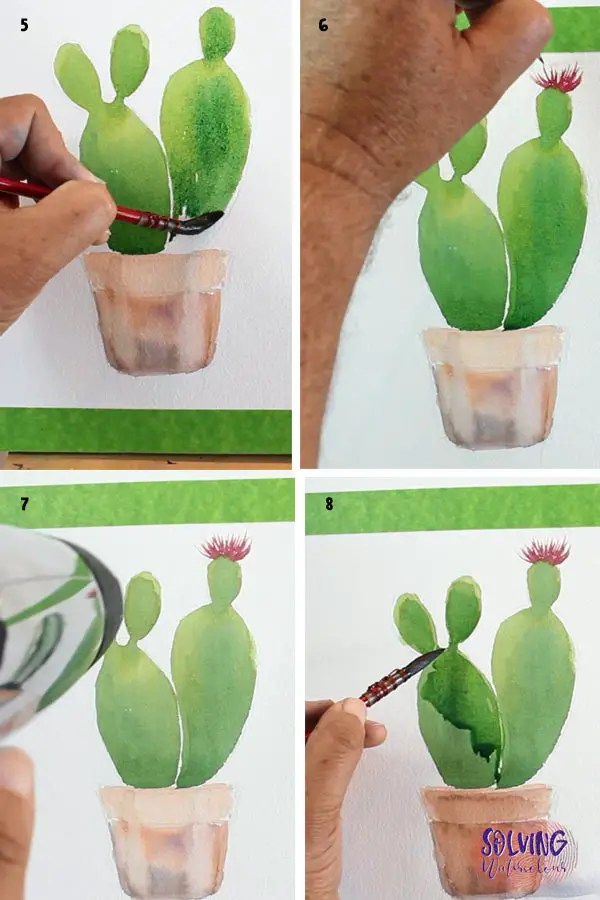
Small clusters of prickles on this cactus, form a polka dot pattern. The gel pen again works really well for this but make sure that the paint is completely dry first. An alternative that I had some success with was using a damp cotton bud to lift out small spots from relatively wet paint.

I hope that gives you some ideas for cactus paintings of you own, Try painting some different varieties. If you happen to own some potted Cacti so much the better, try painting them in different lighting conditions if not, then Pexels and Pinterest are a great source of photo reference.

I did not think I would be interested in painting cacti until I read through your lesson! It would give me good practice in mixing greens, and using new techniques. Thank you!
Thanks Carol!