
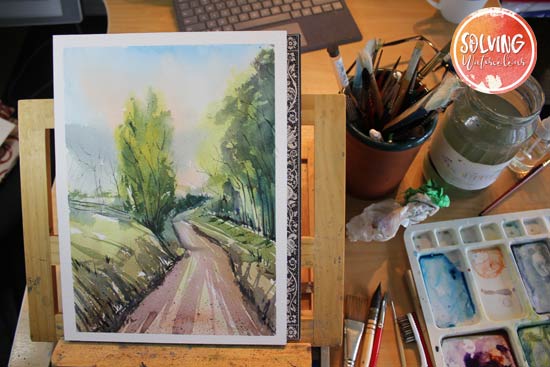
Let’s look at how to paint a loose watercolor landscape. The goal is to capture the essential elements of a landscape scene without getting obsessively focused on realism or details.
Loose watercolor painting is closely related to abstract watercolor painting and impressionism. Abstraction is all about capturing the essence of a scene as opposed to creating a realistic rendering. Impressionism was a painting movement that began in France in the 1860s and focused on the fleeting effects of light and color and capturing the feeling of a moment.
Materials List
Ultramarine Blue: Winsor & Newton | Daniel Smith
Pthalo Blue: Winsor & Newton | Daniel Smith
Dioxazine Purple: Winsor & Newton | Daniel Smith
New Gamboge: Winsor & Newton | Daniel Smith
Burnt Umber : Winsor & Newton | Daniel Smith
Burnt Sienna: Winsor & Newton | Daniel Smith
Paynes Gray: Winsor & Newton | Daniel Smith
Brushes
Winsor & Newton Series 150 Bamboo Round #6 Buy From Amazon
Rigger Brush (For thin tree branches etc) Buy from Amazon
1″ Hake Brush Buy from Amazon
Princeton Synthetic Kolinsky Mop Brush Buy from Amazon
Paper
Arches watercolor paper block, cold press, 9″ x 12″, 140 pound Buy from Amazon
Miscellaneous
Easy release painters masking tape Buy from Amazon
Adjustable desktop easel Buy From Amazon

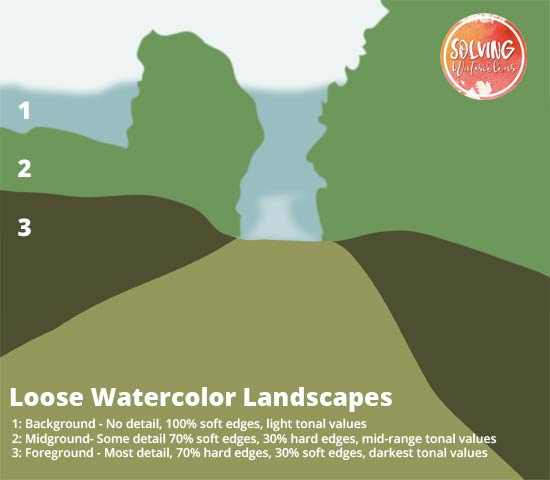
In this blog post about landscape painting I showed how it can be beneficial to break down your painting into three basic planes. Background, Midground and Foreground. Assigning a tonal value to each plane helps to create a sense of depth in your landscapes.
Note how the converging lines of the path lead the eye into the painting and also help to create the illusion of depth.
When you paint a loose impressionistic landscape it will help to establish the three planes and also assign a level of detail to each plane. In general it would make sense to reserve the most detail for the foreground plane of your landscape, with less detail in the midground and minimal detail in the background as that is how we would naturally perceive it in real life.
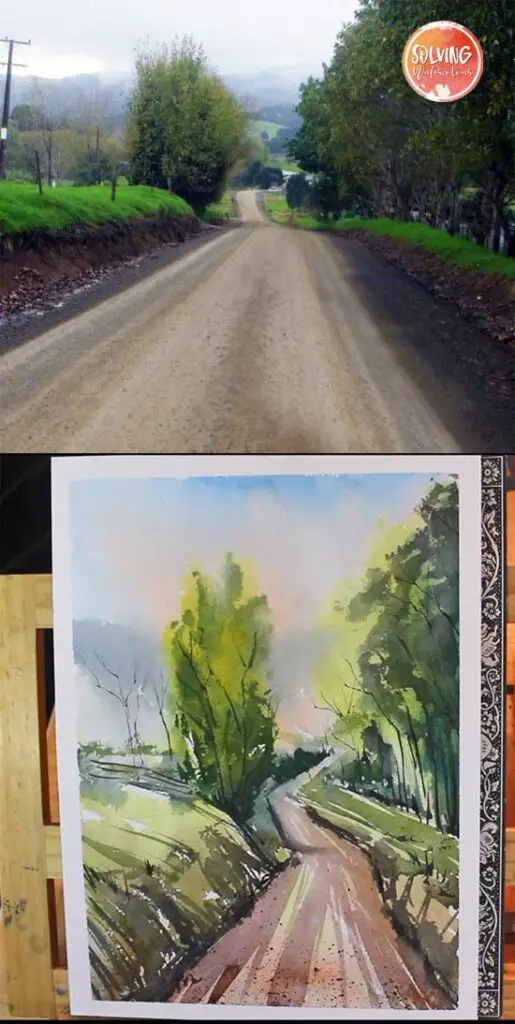
In the image above, you can compare my original reference photo to the finished loose landscape painting. You can see that the painting has no detail in the background at all just a hazy wet in to wet wash which gives a suggestion of the distant hills. Moving into the midground, there is some detail in the tree foliage but I didn’t attempt to show individual leaves, just broad areas of color, with some dark hard-edged lines to indicate tree trunks and branches. The foreground contains the most detail and is characterized by bolder, hard edged lines of color on the path and on the grassy banks. Even then, I have kept my brush strokes simple and bold.
The diagram below illustrates the general breakdown of the painting into the three basic planes.
How To Paint A Loose Watercolor Landscape
We will paint this landscape with a foundation of loose wet in to wet washes, creating a big semi-abstract splash of color. It’s important to relax and allow the paint to do it’s own thing in the initial stages, without getting too anxious about the outcome.
Loose watercolors don’t necessarily have to be painted quickly but a bold confident attitude will serve you much better than a cautious, tentative approach. Once the overall mood has been established, we’ll use some strong darks and hard-edged details to pull the whole thing together.
Total Time: 40 minutes
Step 1: Wet The Paper
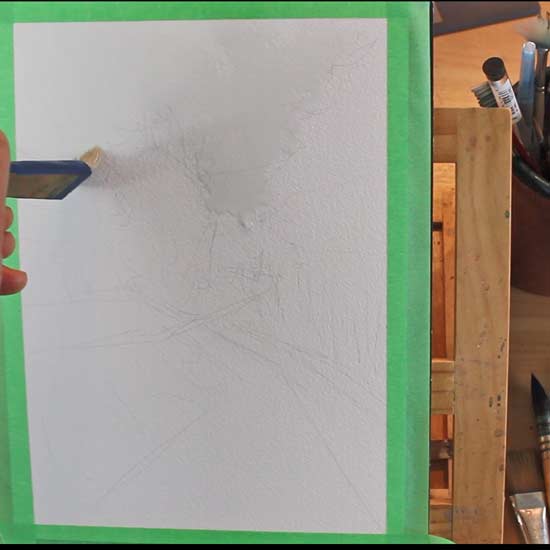
I’ve used a Hake Brush to wet the paper. In order to control the flow of paint. Paint can only flow where the paper is wet. Wet the paper in sections, just in the area where the initial washes will go. The sky and distant hills will be the lightest part of the painting so that’s where we’ll start.
Step 2: Painting The Sky
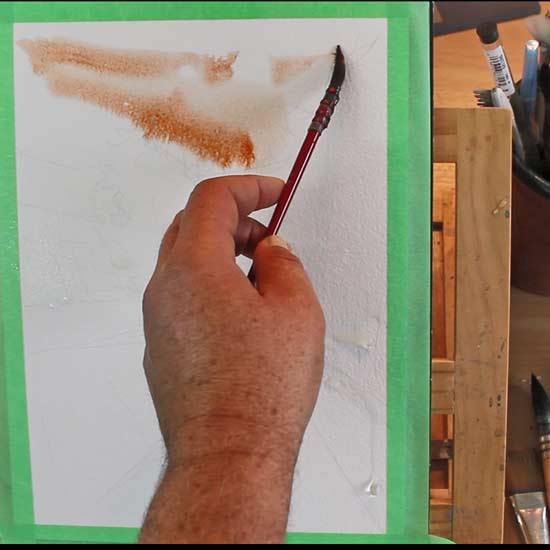
I’ve started the sky with a Mop brush using an initial wash of Burnt Sienna. This may seem like a strange choice for a sky color but remember that watercolors lose a lot of their initial strength as they dry. Wet Burnt Sienna is a bold earthy brown, but this initial wash will fade back nicely to a warm golden glow as it dries.
Step 3: Sky And Foreground
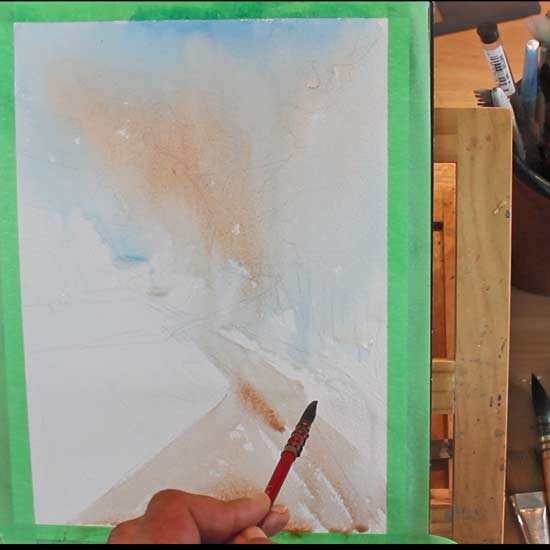
I’ve added some Pthalo Blue to the sky now. Pthalo Blue is a highly staining pigment that can be overpowering and artificial looking if not used cautiously. So mix it to a weak tea consistency and apply it sparingly. Allow the color to naturally run and blend into the Burnt Sienna but resist the temptation to do a lot of brushing as Pthalo Blue and Burnt Sienna are very close to being complementaries which means they will create “mud” if mixed too vigorously.
Extend the initial sky wash down into the foreground painting the lightest tones for the pathway.
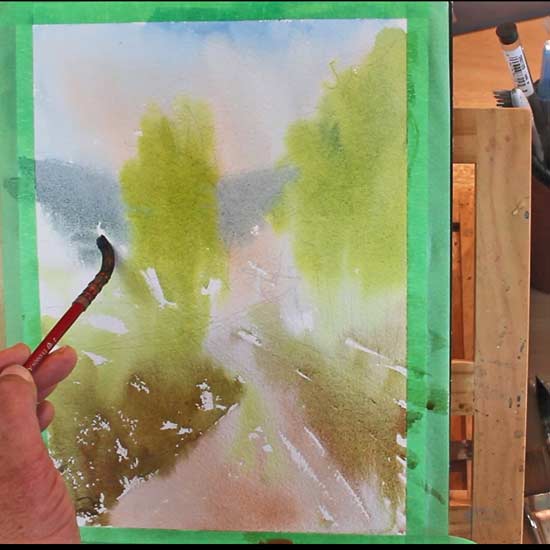
Step 4: Painting The Trees & Grass
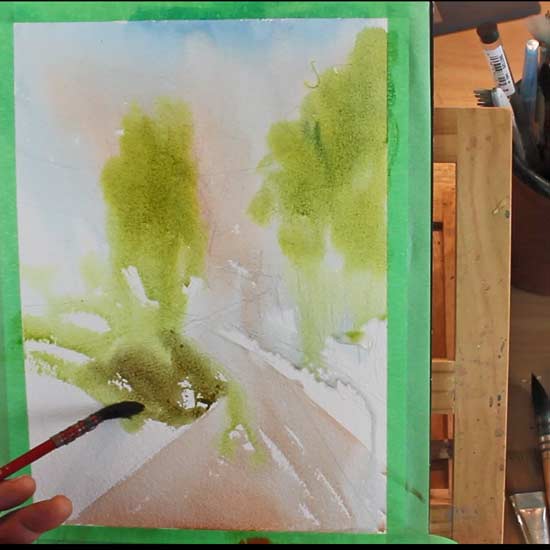
New Gamboge and Ultramarine combine to create a warm mid to light green. This is a perfect base color for the trees, grassy banks and foliage. Start with the midground trees and work into the foreground. In the picture above, where darker greens are required I am adding Burnt Umber and mixing it directly on the paper.
Step 5: Adding The Background Hills
With a clean brush and while the paper is still wet, add some distant hills between the two trees. Due to atmospheric conditions, objects tend to appear paler and bluer the further away they are. So for the distant hills, I’ve added Ultramarine and Paynes Grey to my warm green to push it more towards blue. As long as the paper is still wet, the paint will spread and blend out nicely.
Step 6: Adding Darker Greens
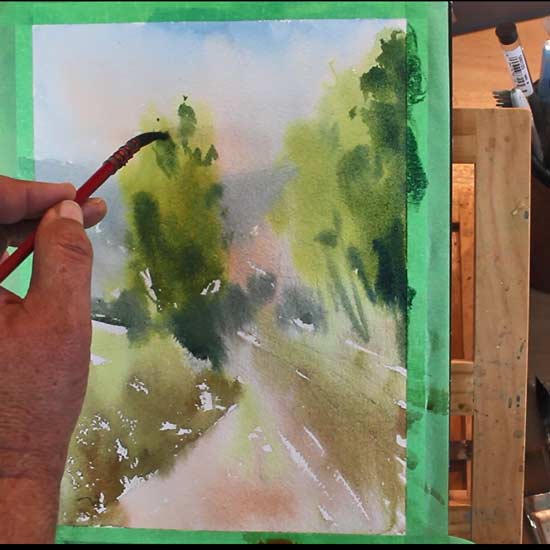
As I general I like to paint trees and foliage with a least three distinct greens i.e. Light Green, Mid Green and Dark Green as this gives a broad enough range of tonal vales to create a convincing representation of the range of values found in nature. For a detailed tutorial on how to mix your own natural looking greens, see this blog post.
Step 7: Using A Spray Bottle
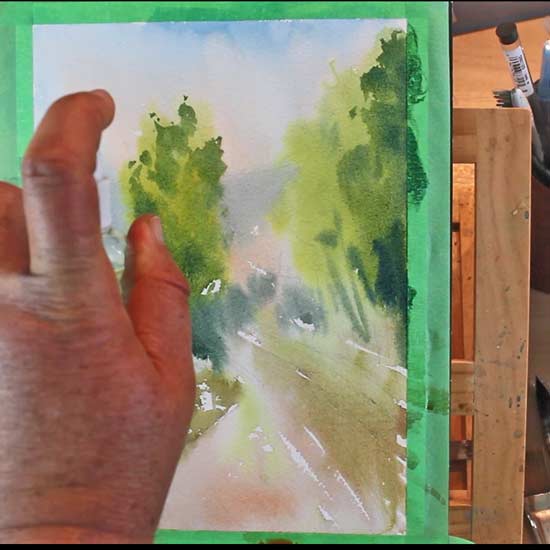
The paper had almost become dry at this point, so, in order to moisten the paper and soften the hard edges of the tree foliage that I just painted, I lightly sprayed the paper with some clean water from my spray bottle.
Step 9: Painting The Pathway
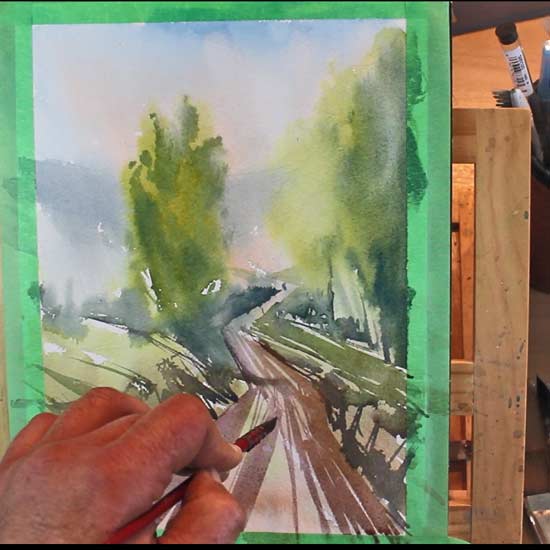
Green, can easily dominate and overpower a landscape painting, so I like to try and balance it out by adding areas of warmer color where appropriate. Paynes Grey, mixed with Burnt Umber and Dioxazine Purple makes a vibrant warm-colored neutral that is perfect for the color of the darker areas of the dirt pathway.
Step 10: Adding The Darkest Values
Watercolor painting generally works best when you paint methodically from the lightest tones to the darkest. And although this has been a loose painting, I have still strictly kept to that process. The painting is 95% there now so it’s just a matter of adding the final darkest tones to bring it all together.
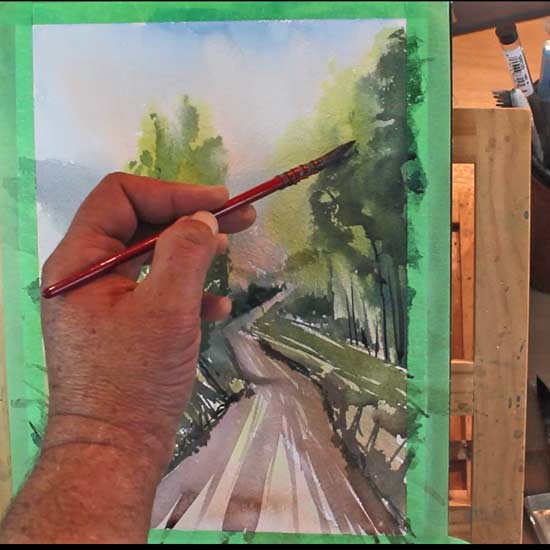
In the image above, I’m adding the darkest bits of foliage to the foreground trees by dragging with the edge of my mop brush. I’m using a strong mixture of Paynes Grey and green that is almost, but not quite black.
Take a rigger and use it to flick in thin tree branches. You can drag it on it’s side to create a whole range of textures but in a loose painting such as this one it’s always good to err on the side of doing too little rather than too much.
Step 11: Final Details

To add a little texture to the foreground and give the impression of bits of grit and stones on the path, I’m flicking dark paint on carefully with an old toothbrush. I’m using my free hand as a shield to stop the flecks of paint going where I don’t want them too. e.g. The sky.
I think it’s time to call this painting done!
Pro Tips For Painting Loose Watercolor Landscapes
- Loose painting doesn’t have to be fast painting. Make sure you pause and take a step back at regular intervals to assess what you’ve done and plan what you’re going to do next.
- Use natural hair brushes such as Hakes and Mop brushes,as these facilitate loose lively brush marks.
- Find the essence of a complex scene by half-closing your eyes and just trying to see the big shapes and major tonal values.
- Use only minimal, light sketchy marks for your pencil sketch.
- Use larger brushes than you might normally paint with. This forces you to keep it simple.
- Keep your brush strokes to a minimum. Play a game with yourself to try and see how few brush strokes you can get away with.
- Bold brush strokes are best. If you lack the confidence to make bold brush strokes. Try doing warm up brushstrokes on scrap paper.
- Don’t try and “Fix” mistakes by adding more paint, less is usually better.
- Practice your painting at postcard sizes before doing the real thing, this way you can anticipate problems ahead of time.
- Do 75% – 90% of the painting with only the wet in to wet technique.
- Use a spray bottle to keep your paper wet and to soften hard edged brush strokes.
- Bring your soft painting into “Focus” with minimal wet on dry brush strokes at the very end.
- Spontaneity is good but give yourself more thinking time by working out your color palette and mixing your colors in advance.
- Hold your brush at the tip of the handle as opposed to gripping it tightly near the ferrule. In this way the brush will feel more lively and become an extension of your arm.
- Don’t be afraid to paint the same scene over and over again, it gets easier every time.
Learn More: Landscape Painting Course
If you’d like to learn more about watercolor landscape painting check out my course Successful Watercolor Landscapes. Free previews available.
- 15 Video Lessons (2.5hrs total) plus pdf worksheets & Reference photos
- An overview of the necessary equipment and materials you need to get started
- Essential painting techniques
- How to create beautiful paintings with simple but effective colour schemes
- Preparation and planning essentials to set yourself up for success
- How to free yourself to paint in a more loose & experimental way
- Real time landscape painting demos with step by step explanations
- How to turn average photos into great paintings
- Understanding and applying the rules of composition
- Beginner through to advanced painting techniques
- Access to me personally via email if you need help or advice
Watch The Video

Book Recommendations For Loose Watercolor Painters
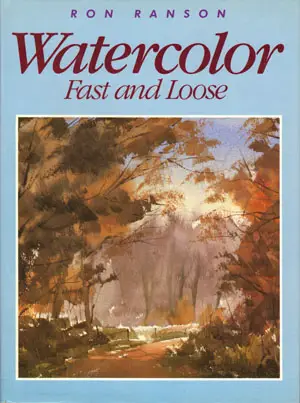
Buy “Watercolor Fast & Loose” from Amazon
Buy “How To Make A Buy “How To Make A Watercolor Paint Itself” on Amazon

Buy Jean Haines’ World of Watercolour” from Amazon
If you enjoyed this tutorial you may also like
Paint A Glowing Autumn Watercolour Landscape
Paint Winter Landscapes In Watercolour
