
Materials List
Paints
Ultramarine Blue: Winsor & Newton | Daniel Smith
New Gamboge: Winsor & Newton | Daniel Smith
Alizarin Crimson: Winsor & Newton | Daniel Smith
Cadmium Red: Winsor & Newton | Daniel Smith
Brushes
No. 2 Squirrel Hair Mop Brush Buy from Amazon
Princeton Neptune Synthetic Squirrel Round Brush Buy From Amazon
Princeton round detail brush 9650R-2 Buy from Amazon
Winsor & Newton Series 150 Bamboo Round #6 Buy From Amazon
Paper
Strathmore Visual Art Journal Buy from Amazon
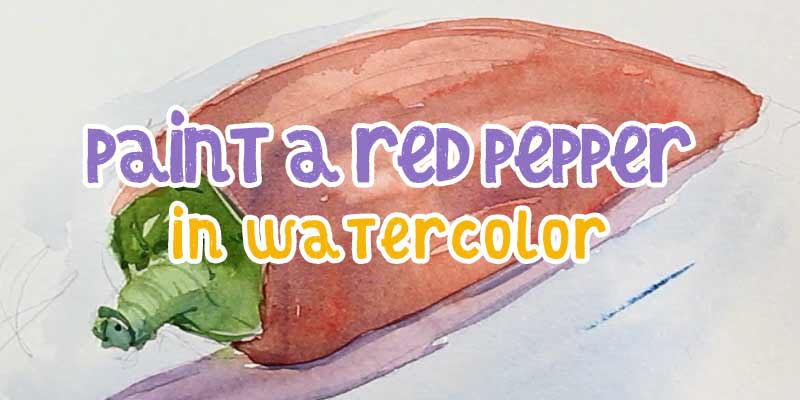
Continuing with the theme of going back to basics that I began in my previous post about cacti let’s look at how to paint a red pepper in watercolor.
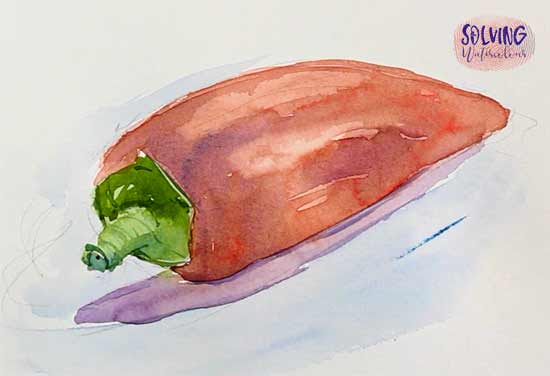
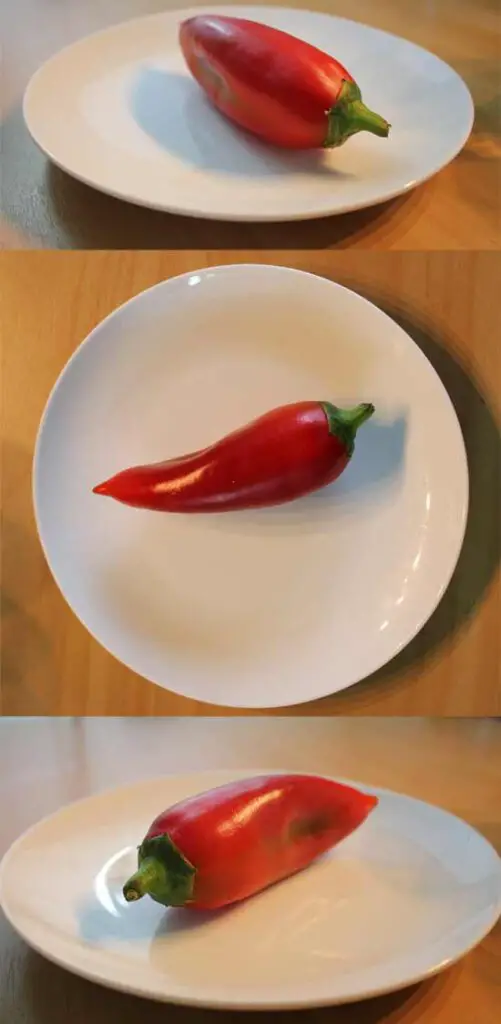
The red pepper is a simpler shape to draw than some of the more bizarre looking cacti but it also requires that juggling a surprising number of painting techniques and I’m going to go over those in detail. Feel free to use my photos (Below) as reference for your own painting.
In this tutorial we’ll look at how to paint a red pepper in watercolor step by step with:
- Flat Washes
- Wet into Wet
- Lifting Out
- Color Harmony
- Glazing
- Drying Times
Steps 1- 4
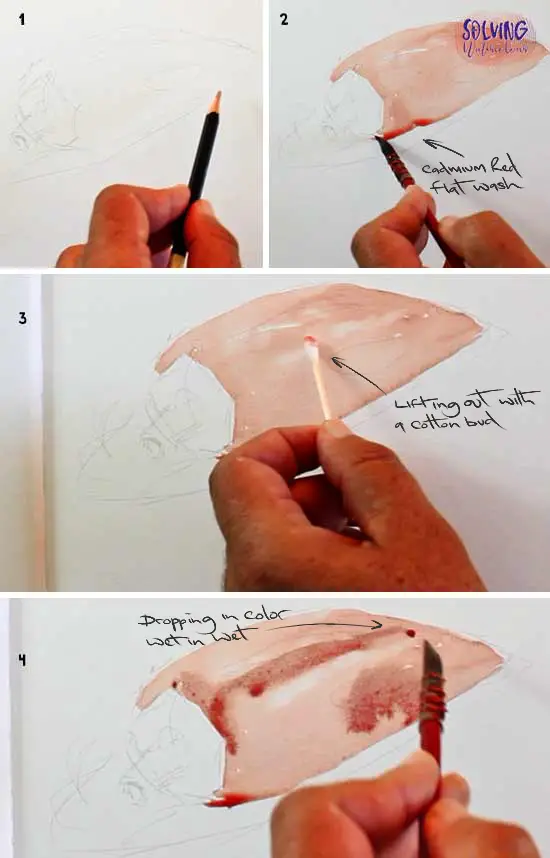
Step 1: Drawing
I can’t over emphasize how important your initial sketch is to the overall success of your painting. Even if it’s a very loose sketch like mine. Think of it like the timber frame of a house. If the frame isn’t built correctly, nothing that you add on top can fix it afterwards.
In your initial sketch, focus on the basic overall shape and remember that you’re drawing a three dimensional object not a flat cutout. It may help you to visualize a collection of simpler geometric shapes connected to each other. In this case, you could think of it as a red cone capped with a green hexagon, and a small protruding cylinder or tube (The stem) on the end.
Step 2 & 3: Flat Wash and lifting Out
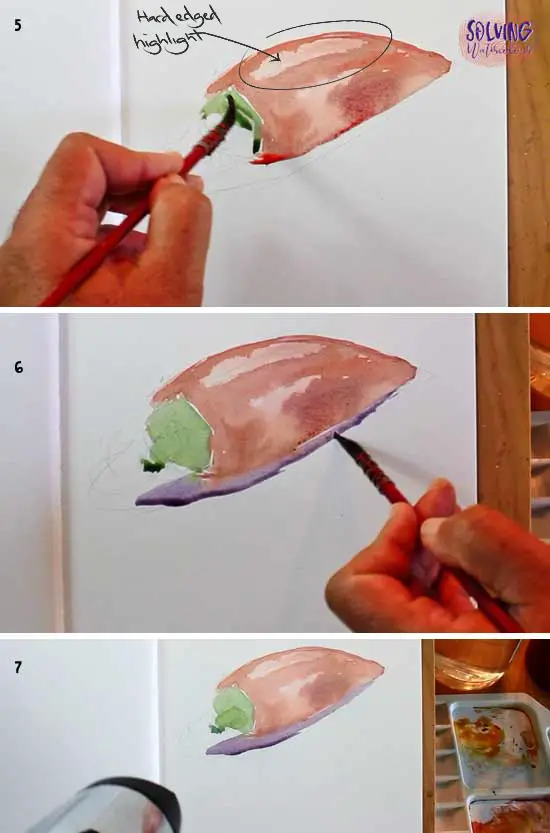
I began with a thin flat wash of Cadmium Red and filled the shape of the pepper with that. For more on how to paint a flat wash click here. The wash is a pale red but I want the highlights to be lighter again. I could have used masking fluid here to preserve my whites but I didn’t want the edges of the highlights to be too sharp. Instead, I used a cotton bud to lift out some soft of the Cadmium red which left clear but fairly soft edged highlights.
Step 4: Shadows & Color Harmony
While the paint is still wet there is an opportunity to drop in some darker colors wet in wet to create some soft blended shadows. Although the paper was drying so quickly under the studio lights that I ended up with a hard edged highlight shape which I hadn’t planned for (See pic 5). This is all part of the fun and unpredictability of watercolor.
Things just don’t always go according to plan. Sometimes this ruins your painting, sometimes it gifts you with a happy accident. Sometimes you won’t be able to decide exactly what it was until the painting is finished. So always carry on and wait until the end before you make that judgement call!
So let’s take a step back and look at an important point related to color harmony. Note that to produce a harmonious darker red shadow, I mixed Alizarin Crimson with a little Dioxazine Purple. What I didn’t do was take take Cadmium red and add black to it.
To darken a color go to the coolest adjacent color rather than add black. If you’d like a more detailed explanation of this, then take a look at this post on painting a bunch of roses which uses the exact same principle.
Steps 5 – 7
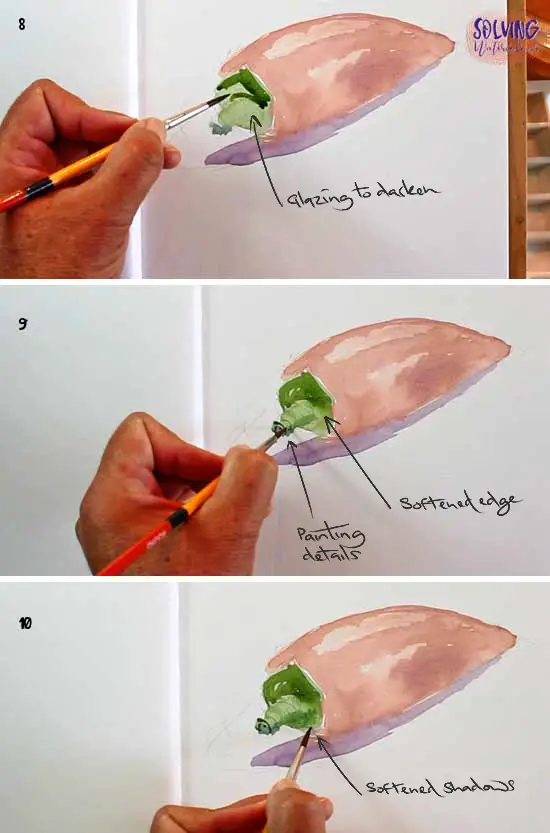
Step 5: Green Stem
Paint the green part of the pepper with a mix of Gamboge Hue and Ultramarine. I was careful to leave a thin white line of dry paper between the green and the red. This serves the dual purpose of creating the edge highlight and separating the green from the red so that they don’t bleed into each other. When green and red mix they will cancel each other out forming a neutral tone. Sometimes a neutral color is desirable but when it’s not, we call it “Mud”. It’s my intention to keep the colors as bright as possible so I’m keeping them apart.
Step 6: Cast Shadow
Cast shadows tend to be darker than shadows on the surface of an object. The light source is quite strong and close to the object which creates a hard edged shadow. Again, we don’t need black. Shadows tend to be blue plus some of the light reflected from the object. This pushes it towards purple here. Though in reality it’s not such a bright purple but as long as the tonal values are correct you can take some license with the color.
Step 7: Drying
Stage one is complete. Time to dry the painting and beef up those colors with some glazing. I used a hair dryer for speed but allowing your painting to dry naturally will help it retain more of it’s vibrancy.
Steps 8 – 14
Glazing
Remember: When your watercolor painting is completely dry it is inert. You can wet it again and paint over the top of it without making the colors run and bleed.
Glazing simply means to add a wash of thin transparent color over the top of another color. Because watercolor is transparent, we can use glazing to darken colors or to create new colors. In this case, my colors have faded back quite a bit so I’m going to punch them up a bit by glazing over the top of them. This will give me an opportunity to soften that big hard highlight, create some new ones and add some shadows where needed.
After glazing the stem and adding a few details. I glazed the pepper with Cadmium red once again. Glazing can have the effect of flattening out the tonal values so to reestablish the shadow tones again, I dropped in some Alizarin Crimson/Dioxazine Purple, wet in wet.

My highlight had almost disappeared too. So I lifted out a patch of color again just with a brush this time.
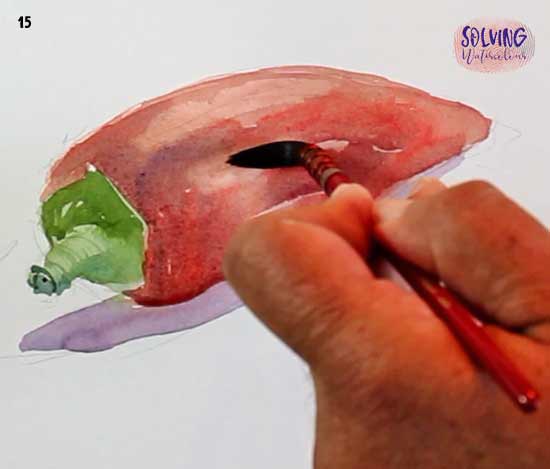
Optional: I added in a vignette of background color by painting a wash of clear water around the pepper and adding a pale wash of Ultramarine around it allowing it to blend out rather than form a hard edge.
Watch the YouTube video here.
If you enjoyed this post check out these too.
