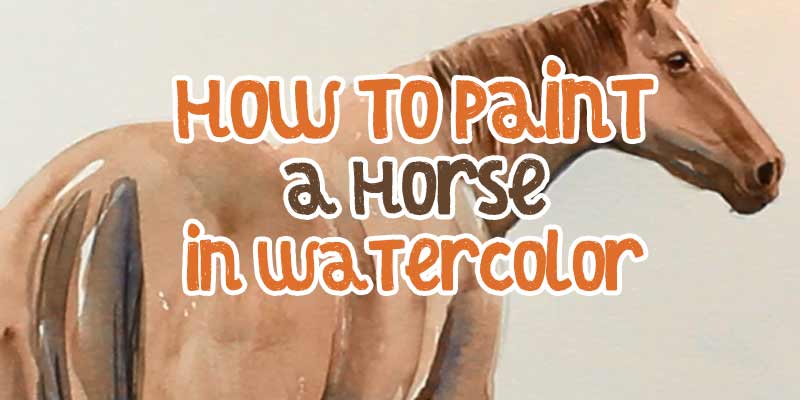
In this post I will cover:
- How to paint a watercolor horse
- How to simplify a horse’s anatomy
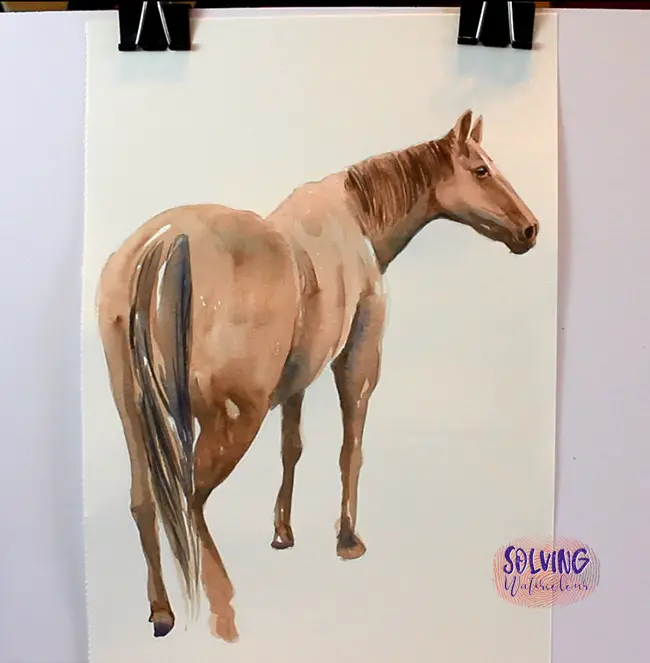
This painting of a horse could be described as “Simple” as there is no background, only two colours were used, and only two brushes, were required.
“Simple” it maybe but “Easy” it definitely isn’t. The really tricky part of a painting like this, is what happens before any paint is even mixed on the palette, i.e. the drawing.
How To Draw Horses
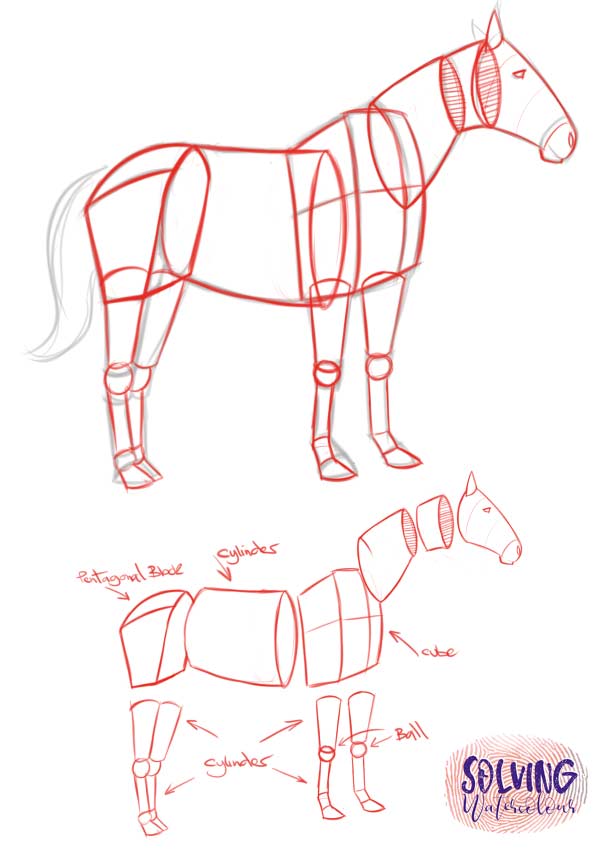
To draw a horse (Or anything actually) it helps to break the subject down in to smaller simplified shapes.
Start by drawing the largest shapes first. In the diagram below I’ve shown how the horse’ shoulders, can be depicted as a large box, or cube. The midsection is cylindrical while the rear end forms a rounded pentagonal block, or saddle shape.
The legs are are basically a collection of stacked cylinders and spheres. Finally the head and neck are formed from three tapering cylinders.

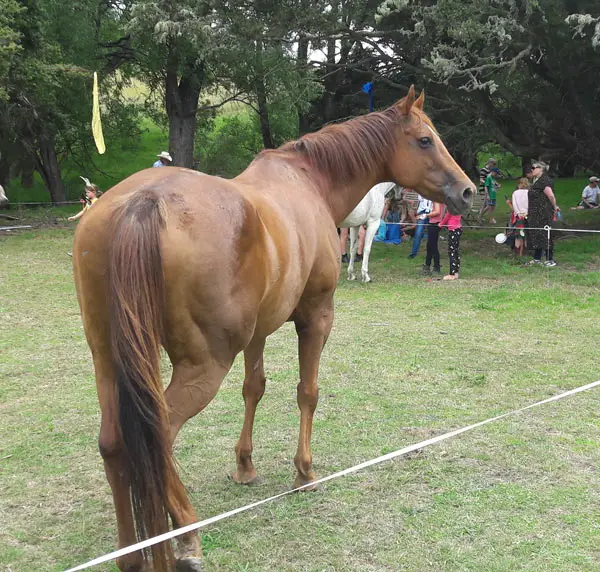
Here’s the reference photo that I used.
If you’ve had a go at drawing horses and you’re not happy with the results. Don’t let that stop you from attempting this painting. I’ve got you covered! I’ve prepared a PDF file of my original drawing that you can print on to a sheet of A4 watercolour paper. You can download it here.
Tip: Always use the rear tray of your printer, where possible for printing onto sheets of watercolour paper. Using the cassette at the front of the printer is likely to end up in a paper jam as the paper has to bend round the rollers.
Materials List
Paint
Burnt Umber : Winsor & Newton | Daniel Smith
Paynes Gray: Winsor & Newton | Daniel Smith
Brushes
No.4 Princeton round brush Buy From Amazon
No.4 Winsor & Newton Cotman round brush Buy From Amazon
How To Paint A Horse In Watercolor Step By Step
Steps 1 – 3
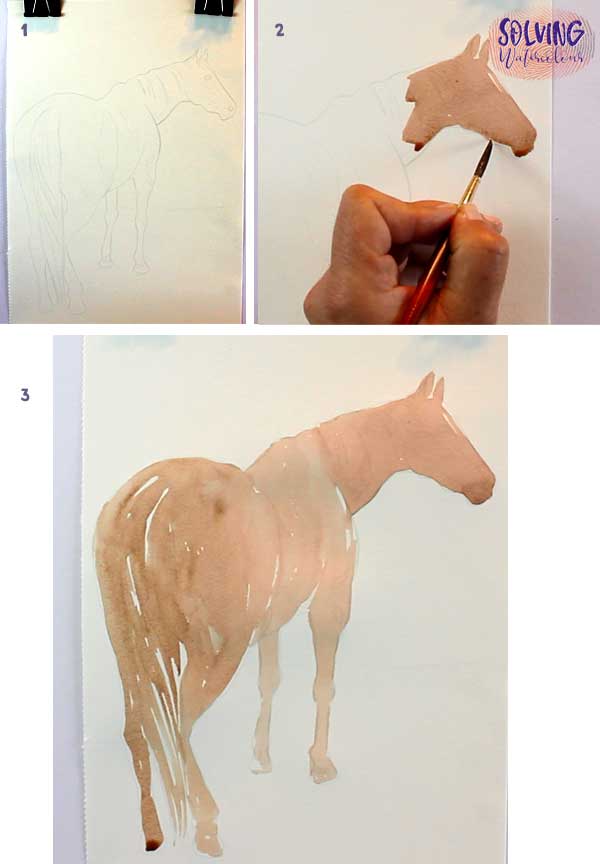
If this was a landscape painting, I would tend to keep my initial sketch very loose.
painting subjects such as animals and portraits it’s really important to get the proportions correct. It’s essential to draw a much tighter sketch to work with. The pencil lines can still be light though.
the first stage of the painting is to mix up a generous quantity of weak Burnt Umber for an initial flat wash . Remember to leave white highlights in the appropriate places.
I began with the head, though I could have started anywhere. The important thing is to keep the wash as even as possible in the lightest parts. In this case the front of the horse is facing towards the light and the rear half of the horse is more in shadow.
Steps 4 – 9
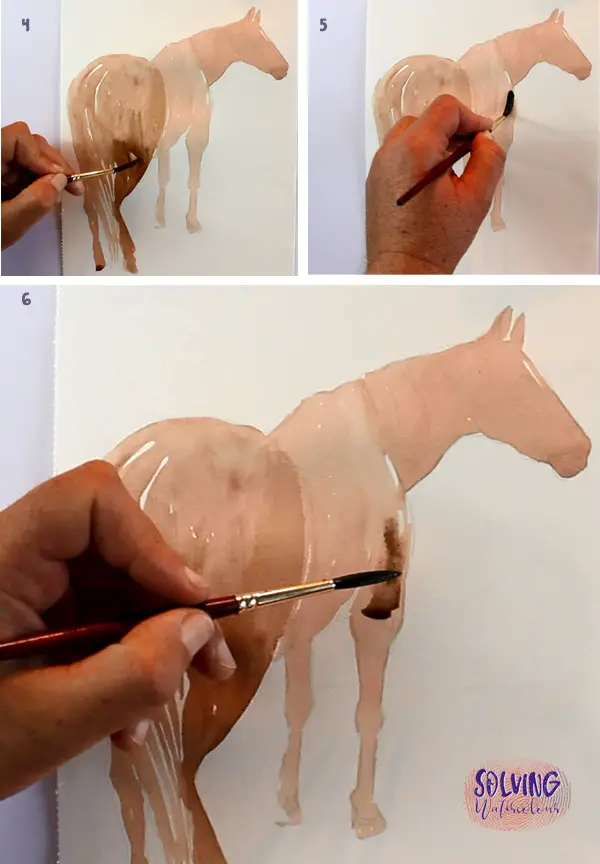
The next wash will be a stronger wash of Burnt Umber. This wash can be done wet in to wet as the aim is to maintain relatively soft edges at this stage. In practice, the first wash may have already partially dried, so it’s better to wait for the entire picture to dry completely and avoid any unwanted Cauliflowers occurring.

Adding The Mid Tones
Add darker tones to the areas that are in shadow. The light source is coming from above and to the front, so the legs and under side and rear of the horse have the most shadow.
Soften the hard edges by “painting” into them with a moist brush loaded with just clean water.
For more on how to control soft and hard edges in your paintings see this post.
The darkest shadows are on the horses tail so adding a little Paynes Gray cools and darken darkens the mixture.
The muscles on the horse’s back leg have some light patches so it’s important to preserve those areas.
Steps 10 – 13
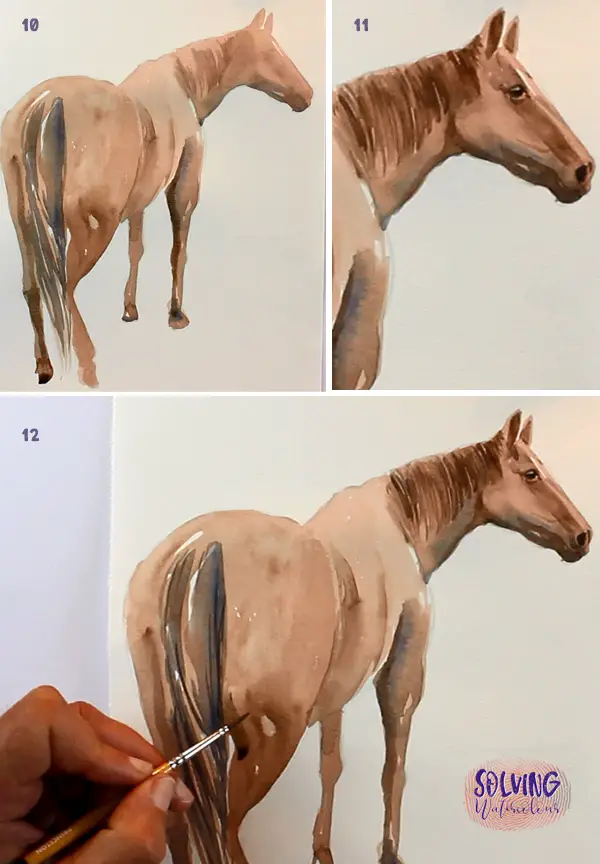
At this point the main areas have been blocked in.
It’s time to swap to the smaller brush now and add the darkest darks to the legs and tail
Painting The Head
All that remains is the head. This is the most difficult part. How you handle painting the horse’s head will make or break the painting. I’ve chosen to leave it till last, as it would have been tempting to overwork it if I’d painted it earlier on. With everything else complete, it’s easier to see how much detail is actually required.
I would suggest reversing the usual process start with the darkest darks painting the eye and eyelid. (Don’t forget to leave a highlight). Do the nostrils and insides of the ears next. Allow this to dry completely and then slowly add some very thin washes for any remaining shadows.
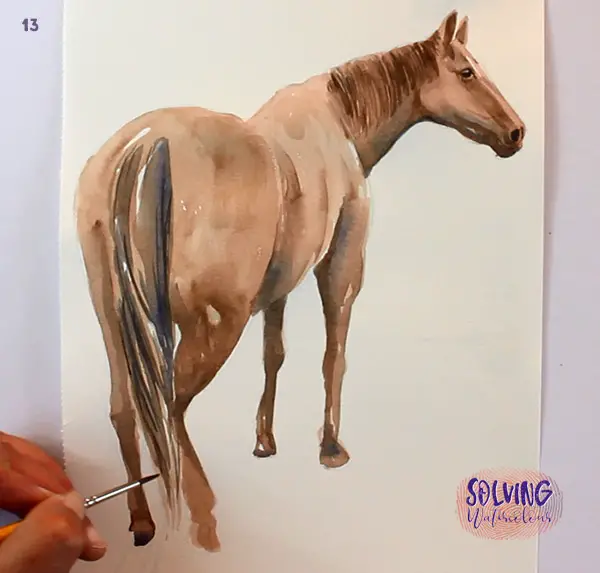
The final step is to add any small dark details that you may have missed. Thin hair in the tail and mane, or any shadows that need a little more definition.
Watch The Video
Here’s the time lapse video which compresses forty mins of actual painting time into one minute.

Like the tutorial on the horse. I’ve only been painting about a year and I am ,69 years old. I have thoroughly enjoyed watercolors. Thank you for sharing.
Thanks for the comment Linda, glad your enjoying the lessons
Thank you for the guidance. I am going to try painting the horse. I am 58 and very keen to learn. I am learning the art of water color through you tube and pinterest.