For this post, I wanted to do a tutorial that’s easy and fun. Starscapes and galaxies are something that literally anyone at any level of painting ability can do.
Painting a galaxy is also great way to get started with the most fun aspect of and it’s most unique and celebrated aspect. Wet into wet. You can instantly experience the stunning possibilities of the medium and what’s even better. There’s a good chance that you’ll end up with something that you’ll be more than happy to hang on your wall. The following paintings are done entirely wet into wet. The beauty of this technique is that the paint literally does all the work for you.
What You’ll Need
In addition to paint and brushes you will need.
Low Tack Painters masking Tape
Liquid Frisket a colour shaping tool
Good Quality 100% cotton watercolour paper such as Arches. At least 300gsm or higher.
A Misting spray bottle
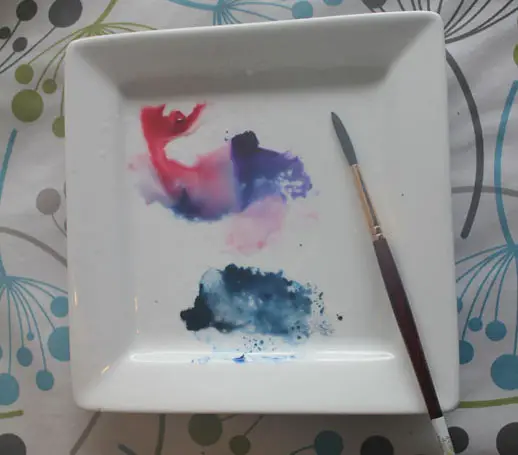
One of the great things about painting these abstract galaxy and starscapes is that almost any colours will work. The palette I used features plenty of strong blues and reds but feel free to go crazy and experiment.
Painting a Starscape Step by Step
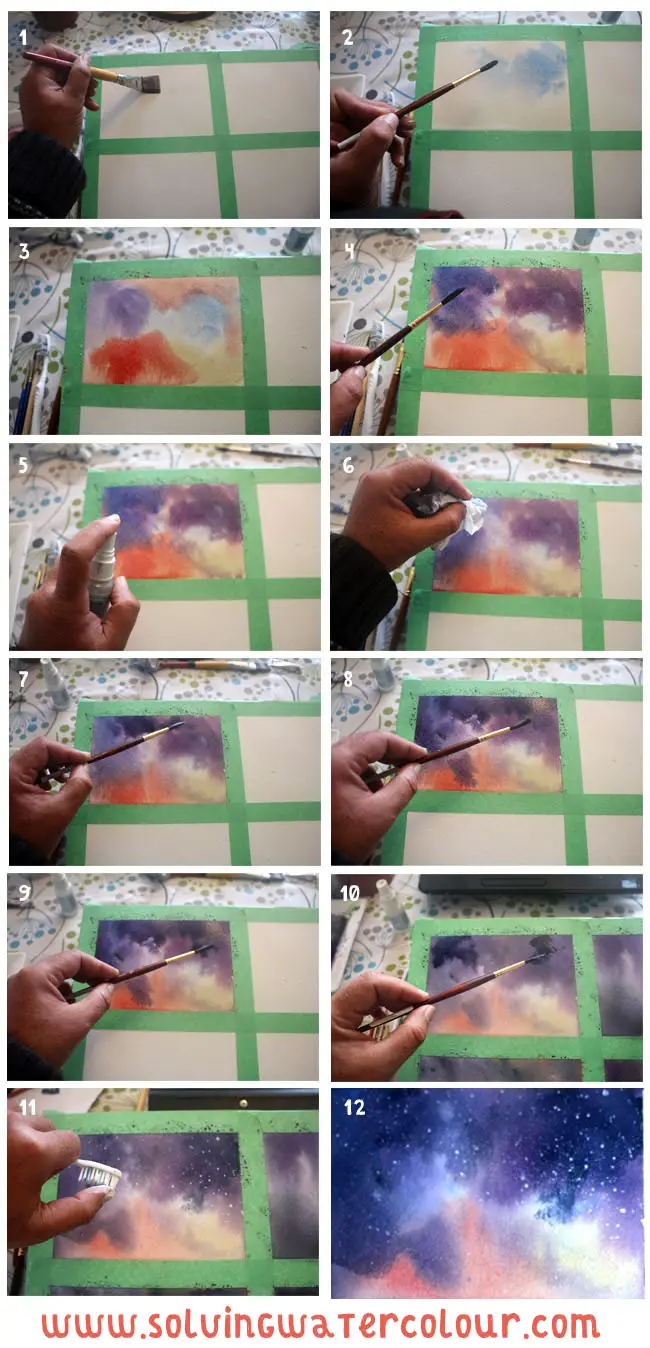
- I put masking tape onto a sheet of Arches 300gsm paper dividing it into four areas. I wanted to make four distinctly different paintings (Great for creating handmade greetings cards for instance) but skip this step if you don’t want to do this.
I’m painting wet into wet. Which means that I’m going to be using wet paint on wet paper. So the next step is to cover the area evenly with fresh clean water.
I prefer to apply the water with a large flat brush, though any large brush will do. - The colours I’m using for this. particular painting are Rose Madder, Alizarin Crimson, Dioxazine Violet, Cerulean Blue Ultramarine Blue and Prussian Blue.
- I’ve avoided using colour combinations that could mix and create muddy grays as I want to keep these colours as vibrant as possible.
- This means, avoiding putting complementaries such as violet and yellow or red and green right next to each other.
You can still use complementaries but try and put an analagous colour in between them. If you’re not sure what I mean by analagous and complementary colours and to learn more about mixing colours in general. Please check out this post all about mixing colours. - I paint several distinct areas of colour and allow them to mix. I realised that the paper was starting to dry out quite quickly and that the colour mixing was slowing down. So in order to reactivate the paint and encourage the colours to mix I lightly sprayed the whole thing with water from my misting spray bottle. I was also angling the paper in different directions and encourage the paint to flow in different ways.
- While the paper is still wet I take a damp piece of kitchen roll and lift out patches of colour.
- I want to create an area of irregular light patches to contrast with the darks that I’m going to be adding. I’m happy with how that’s looking now. So I allow the whole thing to dry thoroughly.
Once the paint is dry, the painting is now basically “Set in stone” and I can re wet it again in order to paint over the top. Selectively spraying with the misting spray creates a random mixture of hard and soft edges. - I put another wash of darker blues on top.Because I allowed it to dry thoroughly this doesn’t disturb the wash that’s already been layed down.
- I’m still careful to preserve most of my lightest areas though as I don’t want the whole piece to end up as dark blue.
- Watercolours will tend to dry significantly lighter than they appear to be when wet and this painting is no exception. So once the whole thing has dried I go in with the spray once again and add my darkest blues.
- The final stage of the painting is to spatter some titanium white “Stars”. For this I used an old toothbrush and flick the paint on. Although as you will see in the “Galaxy Girl” video below. There is another way to do it that gives better results and doesn’t require getting paint all over your thumb! Again the painting needs to be absolutely dry before doing this.
- I also strategically added a few stars here and there by dabbing them in with a number 4 round brush

Painting A Galaxy Girl Silhouette
This is supposed to be an easy tutorial so if your drawing skills aren’t that great, don’t panic. You can take any suitable photograph that would make a good silhouette and print it out on ordinary copy paper and transfer the outline onto your watercolour paper by scribbling a thick layer of graphite on the back with a very soft dark pencil and then placing it against your paper and tracing the over the photo.
The video below isn’t mine but shows the technique.
Painting a silhouette requires a little more work than the previous example and you will need to create a mask to corral your paint within the silhouetted shape but don’t let that stop you. Masking fluid, also known as “Liquid Frisket” is simply a latex solution that comes in a bottle. You paint it on to your paper and it resists the paint allowing you to retain areas of white paper where required.
How To Apply Masking Fluid
I would definitely recommend that you use a colour shaper for applying masking fluid. A colour shaper is like a brush but it has a rubber tip that enables you to move the masking fluid around.
The big problem with using masking fluid is that it will ruin your brushes as it’s very difficult to clean the dried fluid from the bristles of your brush. With a colour shaper though the dried solution can easily be peeled from the tip.
Galaxy Girl Step By Step
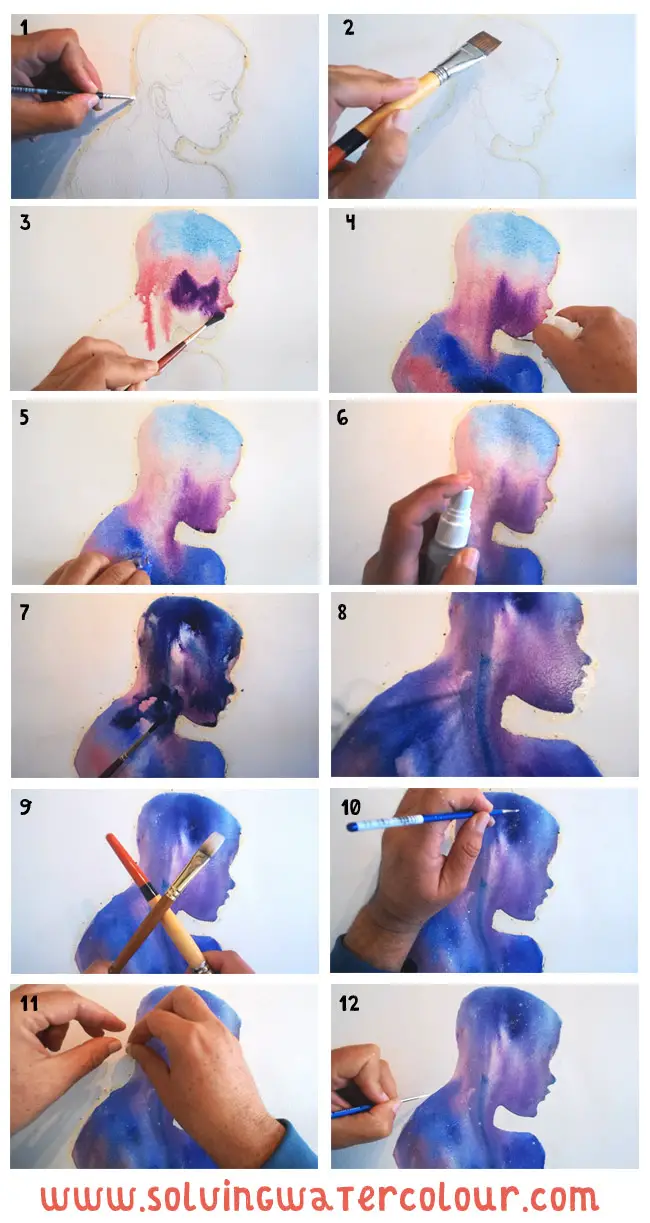
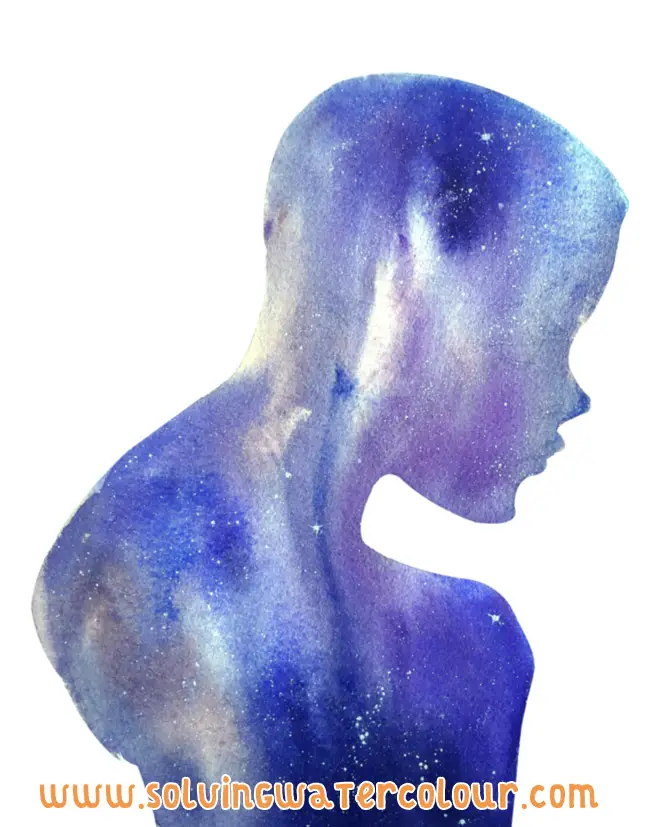
- Although I’ve drawn some facial features on my initial sketch, that was just me getting carried away! All you actually need for this is the outline. Once you’ve transferred the drawing you’ll need to mask around it.
I’ve used latex masking fluid. You don’t need to mask off all the white paper, Just enough to contain the area you’re going to be painting in. Beware of splashing the paint around too much though or you’ll have some cleaning up to do. - Just as before. I’m working on a tilted surface and wet the paper thoroughly.
- I paint bands of colour one after the other and allow them to freely run into each other.
- Paint is pooling around the chin area, threatening to spill out of the confines of the masking fluid so I’m carefully dipping some dry tissue into this area to lift it out.
- I dab out more colour from the centre with damp tissue in order to create some light areas of contrast.
- Once everything is dry I go back in with my spray bottle and re wet the painting in order to start on the next darker wash.
- I add a dark wash of Prussian Blue, Paynes Gray and Dioxazine Purple to the re wetted painting.
- Here I’m tilting and moving the painting, encouraging the paint to move in different directions.
- An alternative technique for spattering the painting with Titanium White in order to create the stars. See what I mean about keeping my thumb clean this time!
- I add some larger stars by hand with my small round brush.
- Carefully remove the masking film but only after the painting is COMPLETELY dry. If the painting is still damp you run the risk of smearing paint as some vigorous rubbing is required to lift the film. Remove the film slowly, as you don’t want to risk tearing the paper at this stage.
- After I removed the masking film. I noticed that there are still quite a few rough edges around the outline, so I go in and smooth out these with the same round brush using a thick application of Titanium White.
[sc name=”Blick001″]
I recorded the whole process (Speeded up of course) for my YouTube channel. Please check it out and don’t forget to subscribe!
Painting starscapes in watercolour can be really fun and addictive and when you combine this with masking there are literally hundreds of potential craft projects that you can apply this technique to.
If you need some help trying to select appropriate art supplies for your needs I’ve put together a list of my recommended art supplies.