
Why Add Figures To Your Paintings?
I understand why you may be reluctant to put people in your paintings. If you find it tricky to paint a convincing looking person, then adding a wonky looking figure could just ruin that beautiful landscape you just completed. The thing is, figures can add a sense of scale and perspective and bring some human interest to your work.
You don’t need to have the anatomy skills of Leonardo Da Vinci to add some basic figures to your paintings. They’re really not that hard to do. As we will see, if you keep them simple and follow a few straightforward rules, you’ll be painting believable figures in no time at all so let’s look at how to put simple figures in your watercolors.
How To Paint A Simplified Figure
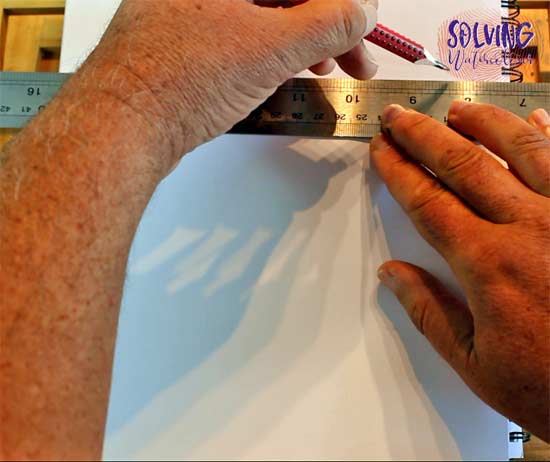
Let’s start with a straight ruled line and “Hang” our figures from it just like clothes on a washing line. We are going to simplify the shapes as much as possible.
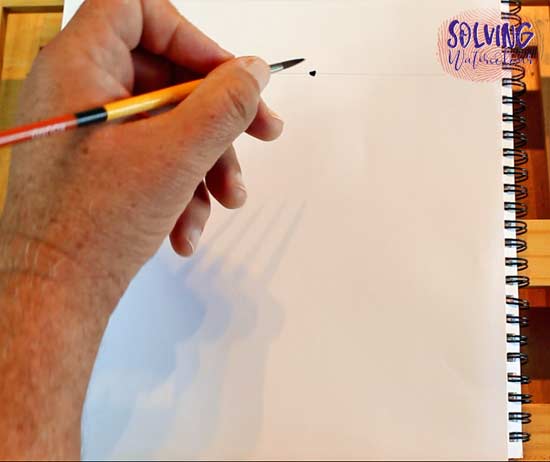
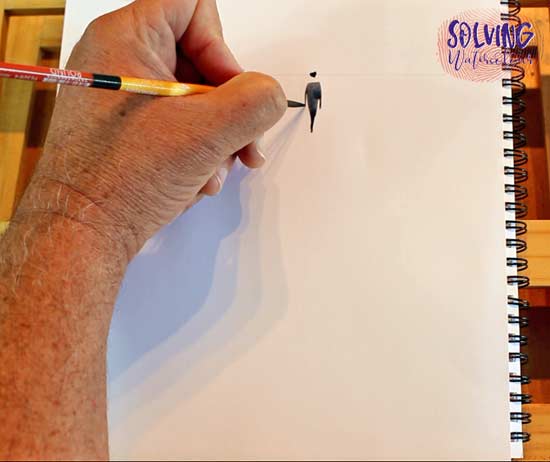
Take a small round detail brush and begin by placing a small dot on the line. This dot is the head.
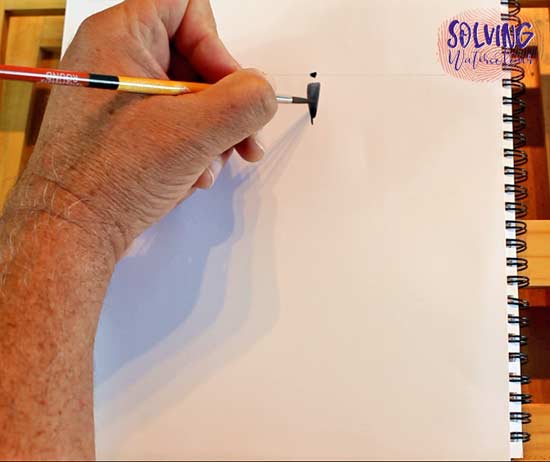
Just below the dot, paint a downward pointing “Carrot”. This carrot shape is a simple silhouette representing the torso. Some artists like to place the dot right on top of the carrot. I like to leave a small gap between the two shapes. Whichever you prefer to do, make sure the dot is relatively small in relation to the carrot shape and most importantly, make sure you paint it a bit smaller than you think it needs to be and you should be about right.
Bring a leg down from the bottom of the shape. One leg is often enough to create the impression of a walking figure. In silhouette one leg will seem to disappear when it’s extended in front of the other. Don’t be tempted to try and add details like feet! Just bring down the arms with the thin point of your brush. That’s It. Figure complete!
What I love about painting small abstract figures like this, is that the viewer’s mind fills in the blanks and starts to do some of the work for you. Experiment with small variations on a theme. Make the dot a small crescent shape and it becomes a hairstyle framing a person’s face. Leave a little white shape unpainted on the body and it becomes a collar or a shirt sleeve or an arm. Slope the top of the carrot shape slightly and tilt the whole shape slightly off-center, you have a person running.
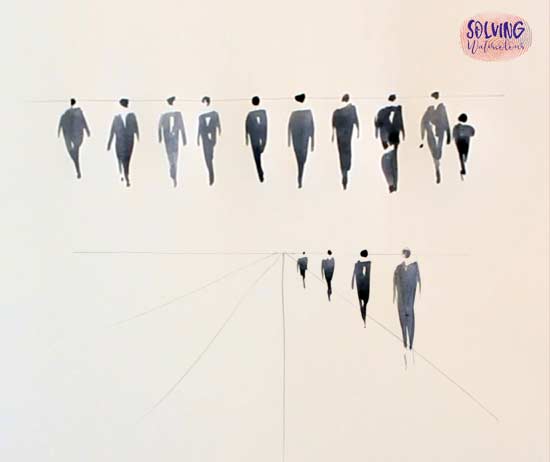
Look at the row of figures below. Some are walking towards you some away, there’s woman in a dress, men in suits and overcoats, there’s a mother with her child.
Tip
Remember when painting children. A child’s body is much smaller than an adults but the head is almost the same size.
In the bottom row of figures, painted in perspective, see how the heads all line up with each other even though they are at different distances. This is an important rule as we will see in the next painting demo.
Practice painting small figures like this, just with one color on pieces of scrap paper, you’ll soon start to build up confidence.
Materials List
Ultramarine Blue: Winsor & Newton | Daniel Smith
Pthalo Blue: Winsor & Newton | Daniel Smith
Cerulean Blue: Winsor & Newton | Daniel Smith
New Gamboge: Winsor & Newton | Daniel Smith
Burnt Umber : Winsor & Newton | Daniel Smith
Alizarin Crimson: Winsor & Newton | Daniel Smith
Paynes Gray: Winsor & Newton | Daniel Smith
Brushes
Winsor & Newton Series 150 Bamboo Round #6 Buy From Amazon
Rigger Brush (For thin tree branches etc) Buy from Amazon
Synthetic Squirrel Flat Brush Buy From Amazon
1″ Hake Brush Buy from Amazon
Paper
Arches Watercolor Paper Block, Cold Press, 9″ x 12″, 140 pound Buy from Amazon
Miscellaneous
Easy release painters masking tape Buy from Amazon
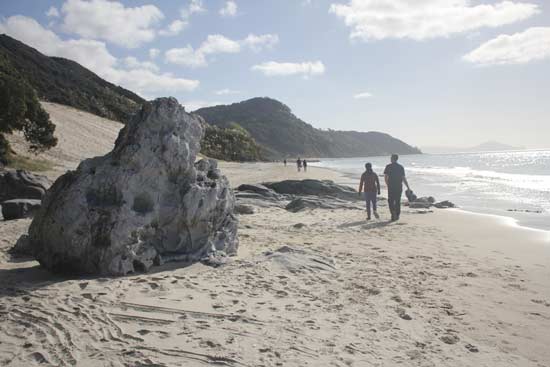
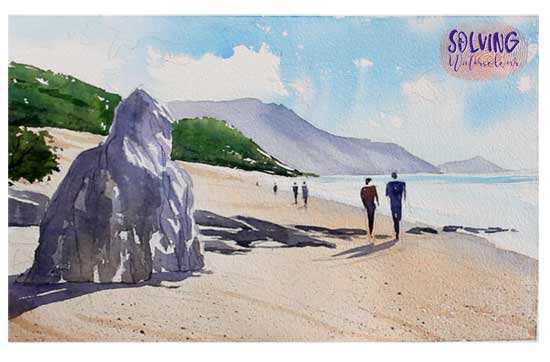
Figures On A Beach: Painting Demo
In the reference photo I took below, there are a number of people walking along a beach.
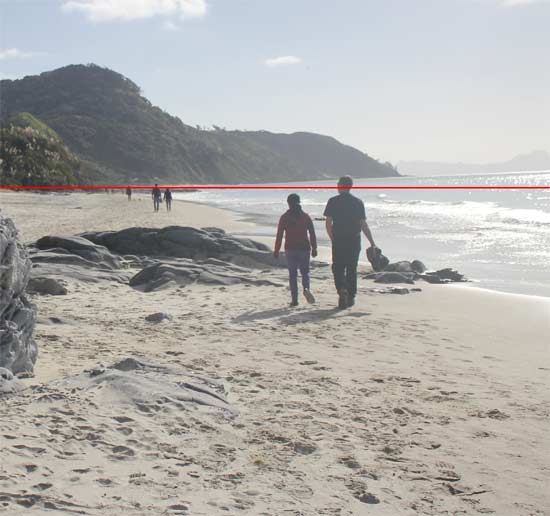
In real life, people vary dramatically in height of course but let’s take the eye line of the man in the foreground on the right and project it across. You can see how his eye line is level with the head of everyone of similar height. It makes no difference how far away the person is from him. The only time that this wouldn’t be the case, is if the ground was uneven, or sloping.
Steps 1 – 2
My paper is resting on a desktop easel, angled at 45 degrees. Beginning with the lightest colors of the sky we’ll work our way down the paper from top to bottom.
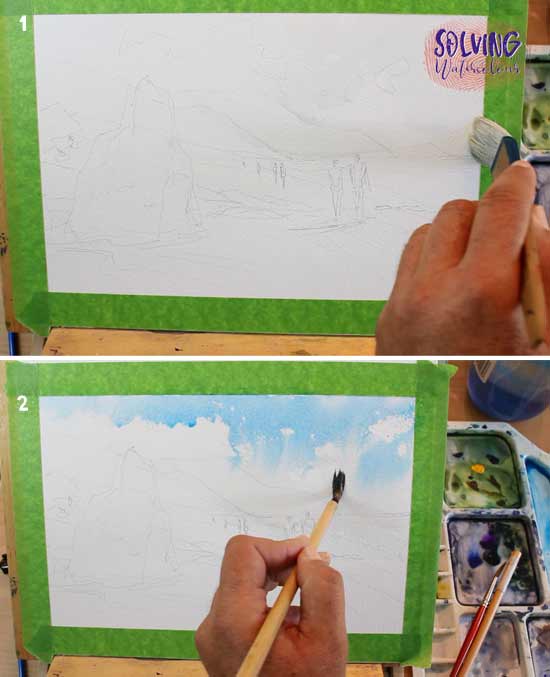
- With a Hake or flat brush, Start by wetting the sky, the sea and all the headland in between but leave some irregular cloud shaped dry patches in the sky. You are going to leave these white. Leave the sand areas dry too. The foreground rocks have a distinctly blue cast to them, so if blue from the sky bleeds into those areas it’s not going to be a problem.
- For the sky wash, I’ve used Pthalo Blue. Pthalo Blue is bold, strong and highly staining. A little goes a long way with this color, so keep your wash to a very weak tea consistency. I’ve used a Bamboo brush and allowed the color to run where ever it wants to. (Remember the paint will only flow where the paper is wet). Blue Skies tend to go from dark blue above, to light blue at the horizon line.
Steps 3 – 6
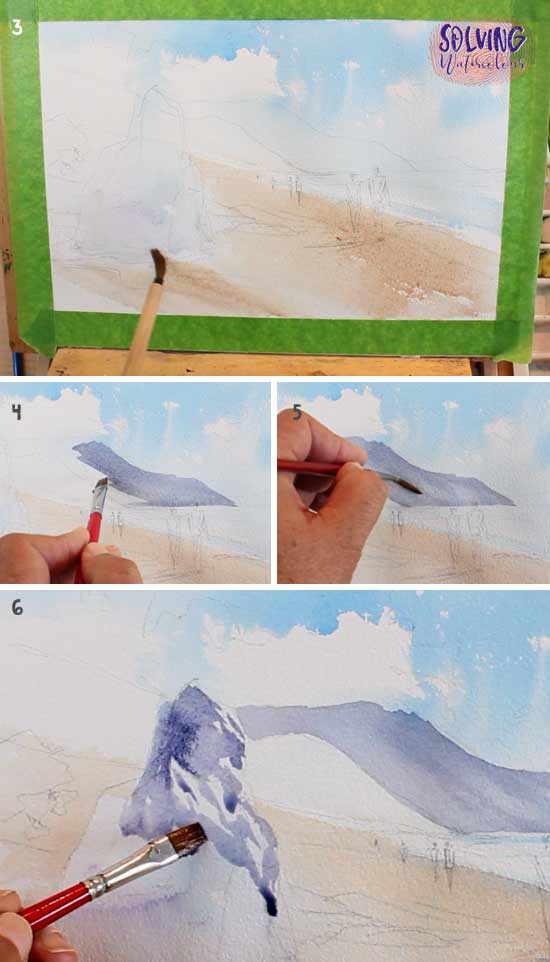
- For painting sand, I find that a pale wash of Burnt Umber works perfectly. I’ve tried to keep the Burnt Umber separated from the Blues but if they do touch and mix slightly it’s not going to be a huge issue. Blur the edge where the sand meets the water, by softening that edge with a damp brush. Don’t try and paint around your figures, as they are going to be the darkest elements of the painting and any light underpainting present now, won’t be noticeable after we come to paint them at the end.
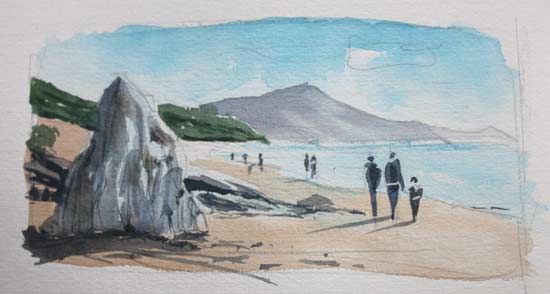
- Due to the effect of atmospheric perspective. Elements such as distant hills tend to became paler and bluer, the further away they are. I began with a mix of Ultramarine Blue and toned it down with some Paynes Grey but in my preparatory rough painting ( See pic below), the overall effect was slightly too cold looking. So I’ve pushed those blues towards the warm side by adding a just a tiny amount of Dioxazine Purple. Alizarin Crimson would have worked too, so don’t get hung up on using precisely the same colors as me, work with what you have and develop your own color preferences.
- Here, I’m lifting out some color with a damp round brush to get the appearance of rocky ridges in the cliffs.
- Allow your paper to thoroughly dry. The next step will be to paint the largest foreground rock with the same warm blue as the distant hills. Leave some hard-edged white shapes to show the highlights on the rock.
Steps 7 – 9

- While the foreground is still wet drop in some Paynes Grey and Burnt Umber to darken here and there to add interesting color variations. This is called “Charging”.
- Charging with more Burnt Umber around the base of the rock.
- When the rock has dried it’s safe to go and paint around it adding the grassy mid ground cliffs. Leave a few spots of white showing through and vary the strength of your greens dropping in darker greens here and there to avoid making it a solid block of uniform color.
Steps 10 – 11
Add cast shadows and the rest of the rocks with the edge of a flat brush.
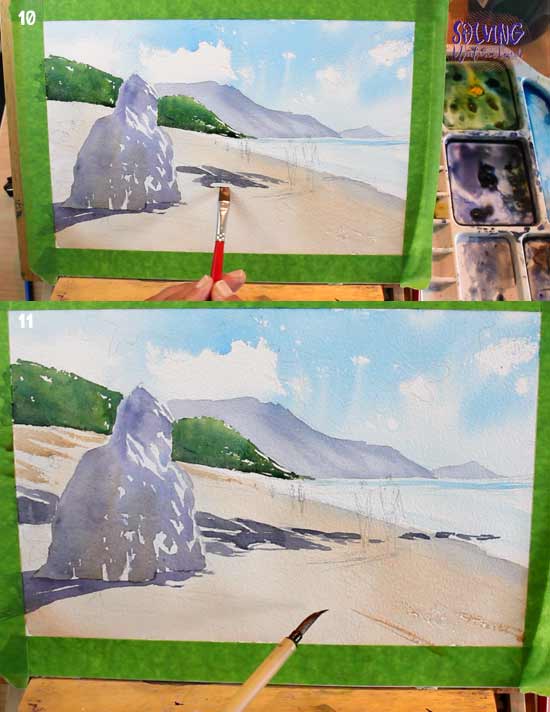
Steps 12 – 14
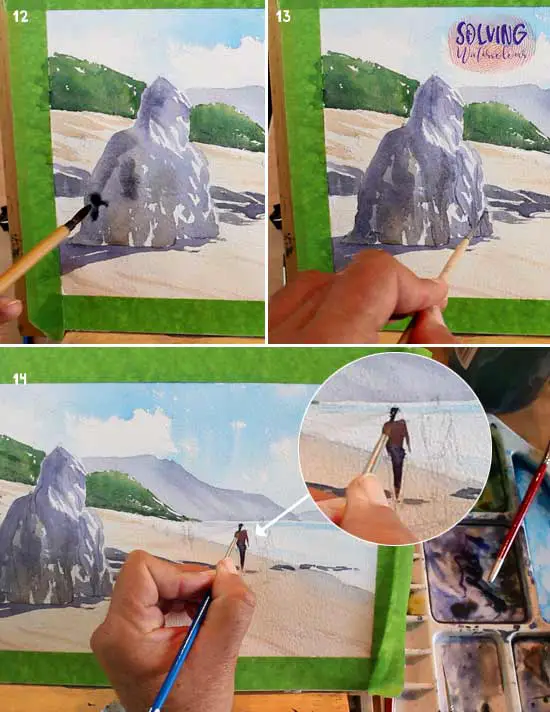
- Wet the foreground rock again and drop in more darks on the shadow side if required.
- When dry add the darkest lines and thin cracks and crevices with a Rigger Brush.
- The figures are the darkest elements of the painting so we’ll add those last. The method is the same as i outlined at the beginning of this post but I’m using some color this time. On the female figure I’ve used Paynes Grey for the hair. Do you notice how the shape of the hair implies the shape of the head and face without my actually needing to paint it. I’ve used a dark red for the t shirt and dark blue for the jeans. For the more distant figures I’ve kept the colors to paler neutrals and greys as I want those to recede and become less distinct.
Steps 15 – 18
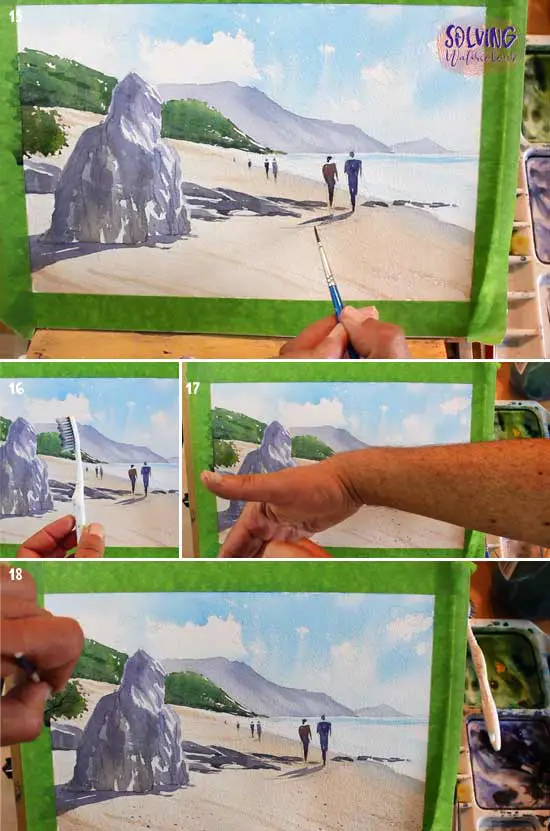
- Add a cast shadow extending from your figure’s feet. This anchors your figures and makes them look more convincing. In an outdoors scene like this all the shadows will be defined by the position of the sun so make sure that the shadows cast by your figures and by any other objects are consistent and pointing in the right direction.
- An old toothbrush is great for flicking on paint to create a sandy texture
- Here I’m using my arm to act as a shield and stop flecks of paint from going where I don’t want them to i.e. in the sea and sky.
- Adding a few thin branches with a Rigger Brush.
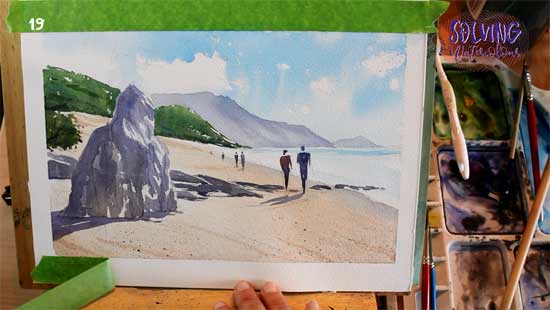
- Removing the masking tape.

If you found this post useful, check out these posts too.
How to draw and paint watercolor portraits
How to paint seascapes and beaches in watercolor

Thanks Andy. Your tutorials are interesting, understandable and helpful. I always look forward to the next one.
Thanks Bill!
This was a revelation. Thanks
This is a great site to learn water color painting. Basics are most essential for any learning. Which rigger brush do you recommend me to buy?
Thanks for the question Ashok. If you scroll to the materials list on this page, I’ve linked to one that you can get from Amazon.