In this post we’ll take a look at how to paint convincing watercolor rocks and rock textures in watercolor. Only two brushes and three colors are required to paint both of the examples I’m going to show you.
Materials List
Burnt Sienna: Winsor & Newton | Daniel Smith
Ultramarine Blue: Winsor & Newton | Daniel Smith
Burnt Umber : Winsor & Newton | Daniel Smith
Paynes Gray: Winsor & Newton | Daniel Smith
Brushes
Synthetic Squirrel Flat Brush Buy From Amazon
Rigger Brush Buy from Amazon
Paper
Arches watercolor paper block, cold press, 9″ x 12″, 140 pound Buy from Amazon
Miscellaneous
Easy release painters masking tape Buy from Amazon
Adjustable desktop easel Buy From Amazon

Rocks can appear to be quite complex shapes at first so let’s start by painting simplified versions of them by using the following method.
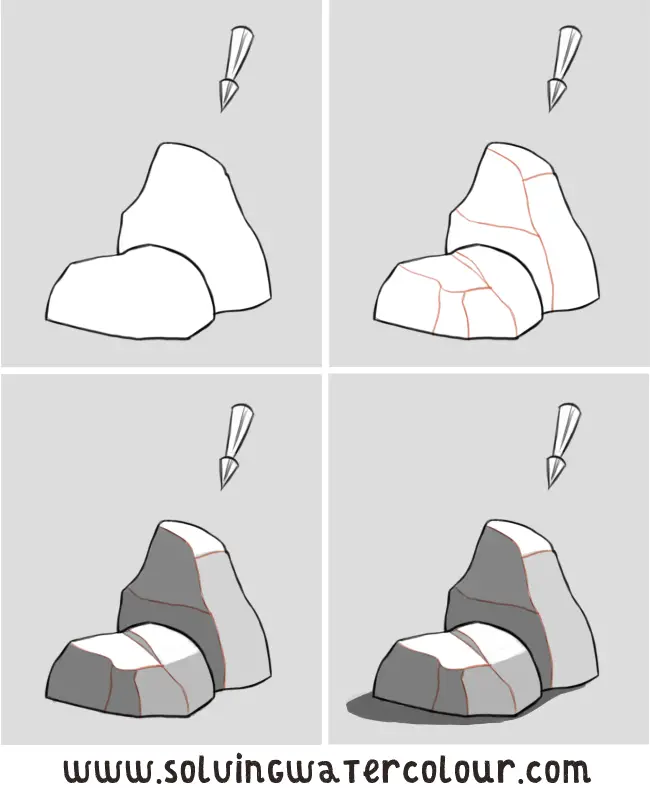
First establish the basic outline of the rocks lightly in pencil and decide on the general direction of the light. Use three basic shadow tones, light, medium and dark The rock faces which face directly towards the light will be lightest and the ones which face directly away will be darkest with the mid tones on the faces which are in between. There are also shadows cast by the rocks which will tend to be quite dark. Practice painting monotonal studies of rocks with a single color such as Paynes gray.

Painting a group of wet rocks in the sea
Step 1: Understanding Shadows & Light

In the reference photo above, notice how the light is shining on the different faces of the rocks. The direction of the sunlight determines which rock faces are lit and which are in shade. In this case the sun is coming from the right and because the rocks are wet, there are some particularly bright shiny highlights reflecting off them that will need to be preserved right from the start.
Step 2: Rough Sketch
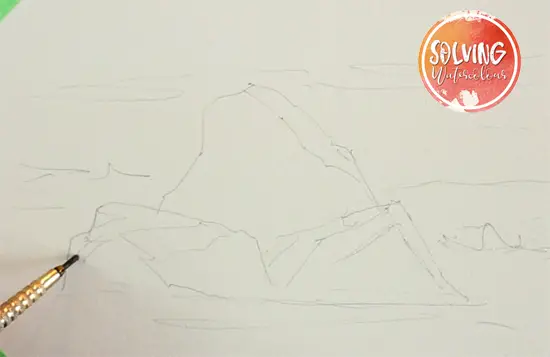
In the sketch above, I’ve drawn in the basic outline of the rocks along with some internal lines to indicate where the main faces are. Notice that while some of the lines go from outside edge to outside edge, some stop where they meet other internal lines.
Step 3: Wet Into Wet Painting
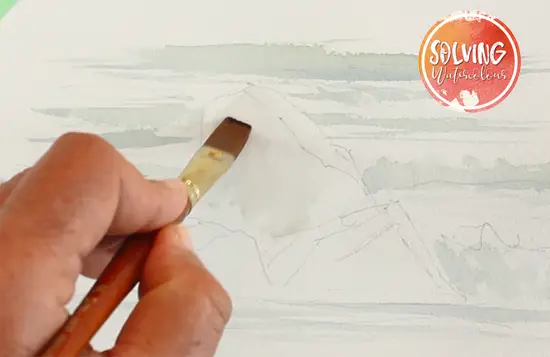
I’ve lightly painted in some pale streaks of green/blue to indicate the waves breaking behind the rocks and allowed that to dry completely. Using a 1/4″ flat brush, I wet the rocks with some clean water in preparation for the wet in wet wash that I will paint next. I’m being careful to leave some small areas of dry white paper where the paint will not flow. These will be the highlights.
Step 4: Adding The First Wash
I’ve mixed a combination of Burnt Umber and Ultramarine and applied them with the flat brush. If you allow the colors to mix freely on the paper , it creates a variegated wash of the two colors where they blend and separate creating a random natural looking effect that is delightfully unpredictable and naturalistic in effect.
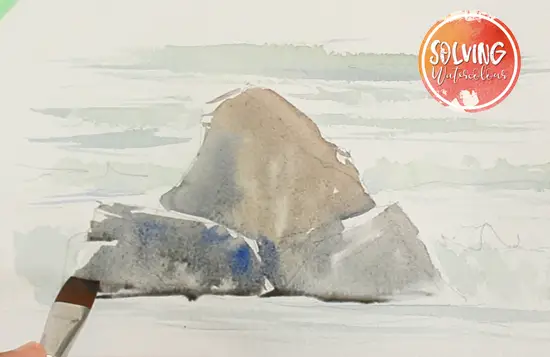
Step 5: Lifting Out Highlights
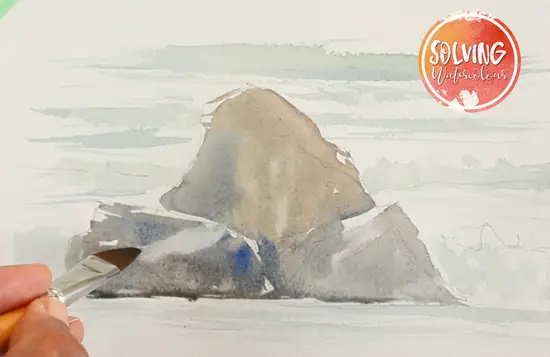
While the paint is still wet, I can lift out some additional highlights where necessary, by drying off my brush on a paper towel and firmly dragging it, soaking up some of the paint. Allow this to dry completely.
Step 6: Adding Final Shadows
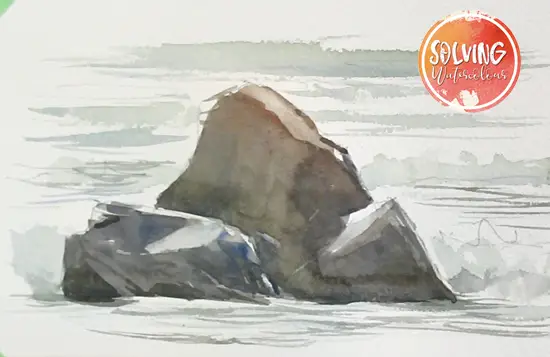
Darken the shadows where needed by adding a thin glaze of Ultramarine and Paynes Gray. This will really make those highlights stand out in contrast.
Additional Techniques For Adding Texture To Watercolor Rocks

In the painting above I’ve used similar techniques to the ones that I described previously but I’ve also included some additional ones too as it never hurts to have a variety of techniques in your watercolor arsenal.
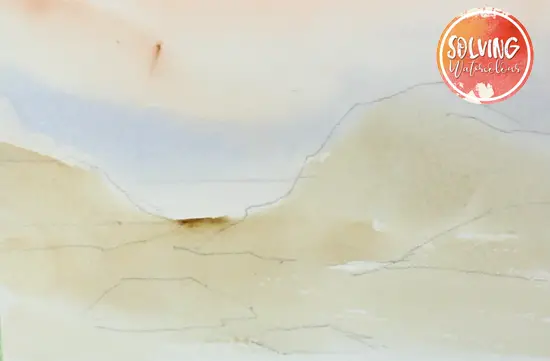
Starting with the lightest tones I’ve added a loose wash of Burnt Sienna and Ultramarine for the sky, followed by a wash of Burnt Umber for the sand and rocks.
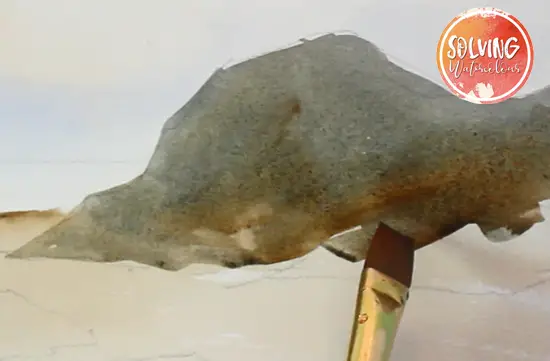
Just like in the previous example, I painted a variegated wash of Ultramarine and Burnt Umber.

I start adding texture by pressing a crumpled wad of tissue paper against the painted surface, as you can see this partially lifts the paint leaving a series of random marks
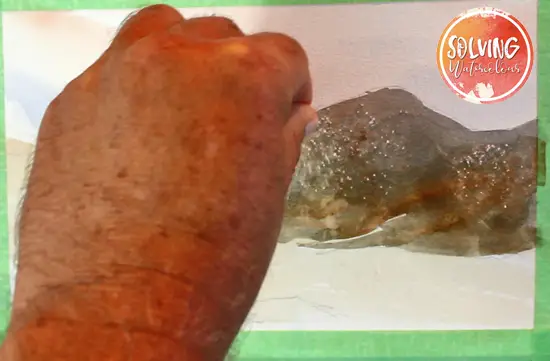
While the paint was still wet I took a pinch of salt and sprinkled it on. As the salt grains start to absorb the moisture from the paper it creates interesting patterns and textures . You can speed up this process a lot with a hairdryer
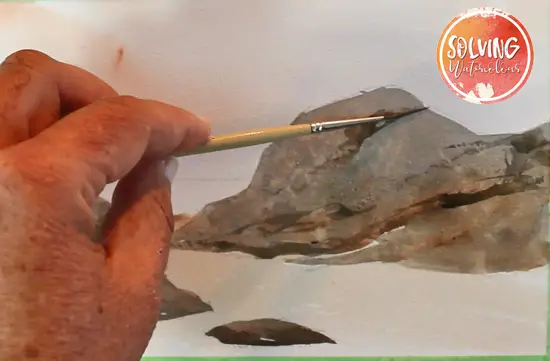
To complete the rocky textured effect, I dragged some thicker, darker paint with my Rigger brush, creating random lines that look like cracks and crevices in the rock.
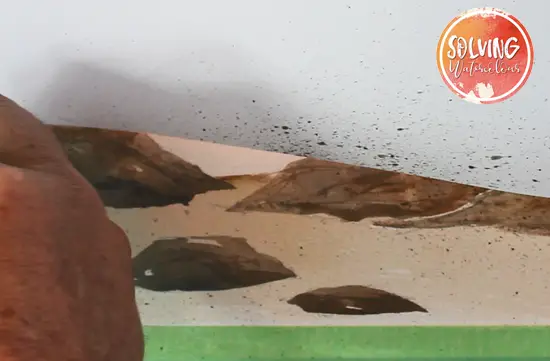
As a finishing touch, I spattered some flecks of paint on to the rocks and sand by dipping an old toothbrush in paint and flicking it to create a rough looking texture effect. I’ve used a sheet of paper to control the spatter and make sure that none of the spatter ends up in the sky.

Thank you for the step by step instructions, and the development of the picture in stages. This is wonderfully helpful.
Bob Edwards
Thanks Bob!
Thank you Andy. This is an amazingly helpful tutorial.