In this post, I’ll show you how to paint realistic eyes in watercolor step by step. Eyes are the windows to the soul, so they say and whether you like to paint pets or people, the eyes are the make or break element of any portrait. This is because eyes are a very powerful focal point in a painting you can’t help look at them and they hold the viewer’s attention. We are so familiar with the way eyes look that when we get them wrong the viewer will instantly know, it even if they can’t quite understand why.
5 Pro Tips For Painting Realistic Eyes in Watercolor
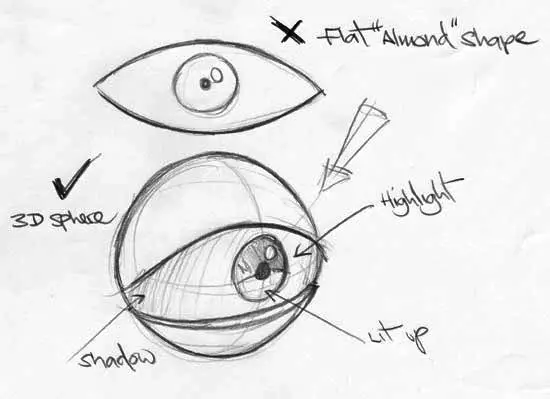
- In order to paint realistic eyes in watercolor, first learn how to draw them in pencil. Eyes are often described as “Almond shaped” but it’s more accurate to think of them as spheres with wrap around covers. Focusing on the the almond shape without taking into account the spherical part will tend to result in flat cartoony looking eyes.
2. The “Whites” of the eyes, are not white. The whites of the eye, or Sclera, to use the medical term, rarely appear to be totally white as they will reflect colored light from the surrounding environment including the subjects skin. Also the curvature of the eye will usually cause shadows to appear where it turns away from the light source.

3. Add a highlight to the Iris. That little highlight reflected in the iris is the one detail that really brings an eye to life making it much more realistic. The position of the highlight will depend on the direction of the light source. This usually comes from a light source above the head i.e. Lightbulbs, windows, the sun, etc and will appear in the top half of the iris . The highlight will always be in the darkest part of the iris.
4. Treat the eyebrows and eyelashes as solid shapes rather than lots of individual hairs. You can add individual hair details after if necessary.
5. The shape of the iris will go from a circle to an oval as the eye turns away from the viewer. Don’t forget that the pupil will also do this.

Materials List
Ultramarine Blue: Winsor & Newton | Daniel Smith
Cobalt Turquoise: Winsor & Newton | Daniel Smith
Burnt Umber : Winsor & Newton | Daniel Smith
Paynes Gray: Winsor & Newton | Daniel Smith
Alizarin Crimson: Winsor & Newton | Daniel Smith
Brushes
Synthetic Squirrel Flat Brush Buy From Amazon
Rigger Brush Buy from Amazon
1″ Hake Brush Buy from Amazon
Princeton No.2 Round Brush Buy From Amazon
Paper
Arches watercolor paper block, cold press, 9″ x 12″, 140 pound Buy from Amazon
Miscellaneous
Easy release painters masking tape Buy from Amazon
Adjustable desktop easel Buy From Amazon
How To Paint A Painting Realistic Eyes In Watercolor Step By Step
Total Time: 30 minutes
Step 1: Sketching The Eye
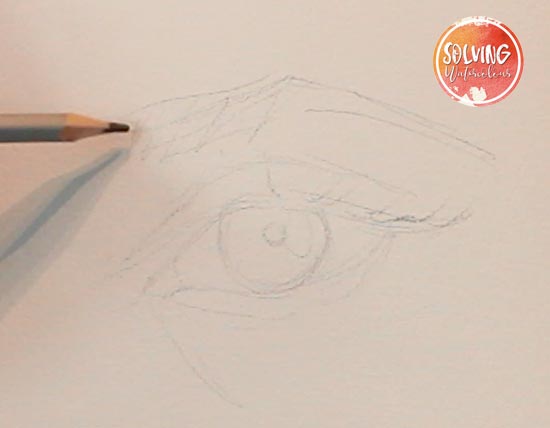
This method of painting an eye reverses the conventional wisdom of painting watercolor paint from light to dark. When it comes to eyes, I prefer to establish the darks first but try it both ways and see which works best for you. With your paper angled at roughly 45 degrees start by lightly sketching the eye with a soft pencil such as a 2B. There is no need to get too detailed with the drawing, just indicate the most important shapes such as the position of the eyelash, iris, pupil and highlight.
Step 2: Painting The Iris
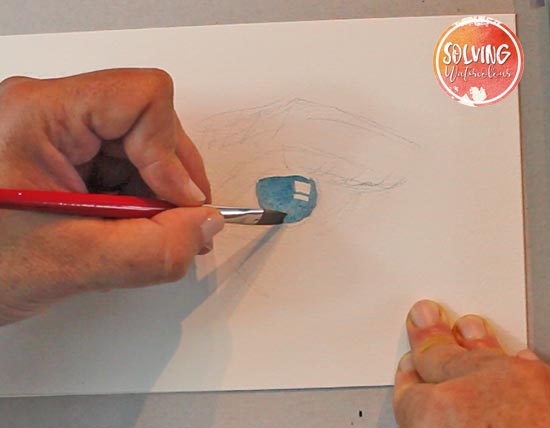
I began by painting the Iris with Turquoise. I used a flat brush to carefully paint around the highlight. Although a round brush would just work as well, for this. In the image above, I’ve made the brush “Thirsty” by wiping the excess paint from it with a tissue, then I’ve gone back and lightened the bottom half of the iris by lifting out some of the wet paint.
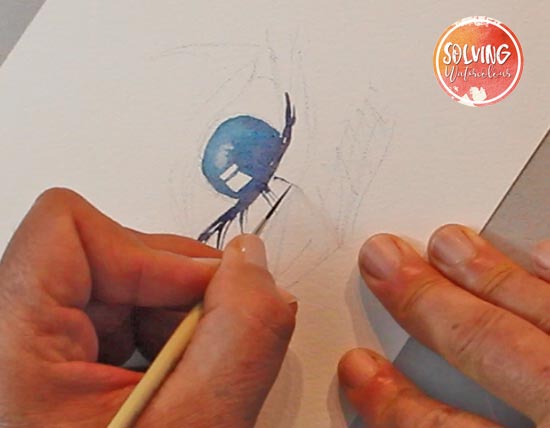
Step 3: Blending Eyelashes & Iris Together

Mix a combination of Alizarin Crimson, Ultramarine and Paynes Gray to to make a dark Violet Gray and paint the shape of the top eyelash. By connecting these two shapes together the darker color from the eyelash can bleed into the shape of the iris below, enhancing the dark to light color gradient. My preference is a a 1/4″ flat brush for this but as before, a round brush will also work perfectly well.
Step 4: Adding Eyelash Details
A Rigger brush is perfect for adding individual eyelashes to the basic shape. Making thick to thin strokes with the brush is much easier if you pull the brush down towards you rather than trying to push it away from you. Note how eyelashes fan outwards as opposed to all going in one direction. Turning the paper as you make each stroke will make it easier to keep your brush strokes consistent.
Step 5: Lower Eyelashes & Eyebrow

Add the the lower eyelashes using the same method as before. Now add the basic shape of the eyebrow by using the 1/4″ flat brush and a thin mix of Gray Violet. Once you’ve established the darkest tones it’s important to make sure that the paint is completely dry before adding further washes over the top, or your color will run and bleed.
Step 6: Adding Shadows & Flesh Tones
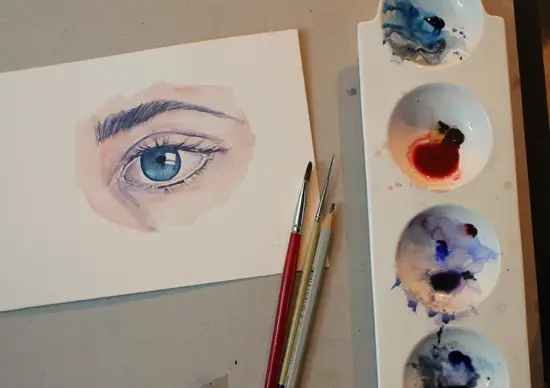
The next step is to apply thin washes of flesh tone and shadow. Caucasian skin is a subtle blend of blues in the shadow areas and places where the skin is thinner, and pinks in the fleshier areas. My pink was mixed from a very thin wash of Alizarin Crimson with just a hint of Burnt Umber. The bluer skin tones are just a thinner wash of the same Gray/Violet that I used for the eyelashes. Remember that the whites of the eyes will have shadows too and can be almost as dark as the iris in places. Notice too, that I’ve preserved some small areas of pure white paper as highlights.
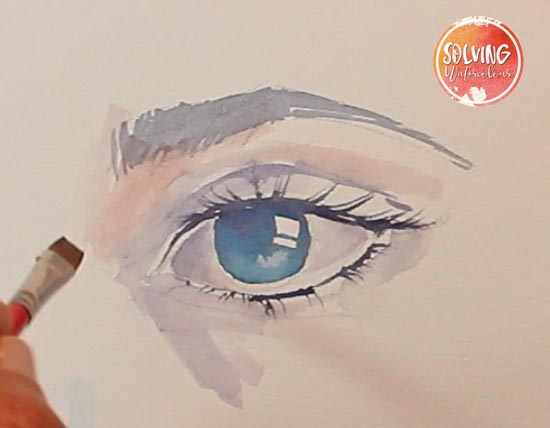
Step 7: Glazing & Detailing

I realized that my skin tones were a little too blue, so I waited for them to dry then wet the area with clean water and glazed another thin wash of pink over the top to warm them up. Now you can add the last darkest details such as the pupil to the Iris and eyelashes. Try and avoid using actual black wherever possible. I used a mixture of Ultramarine and Paynes Gray.
Step 8: Final Details & Shadows
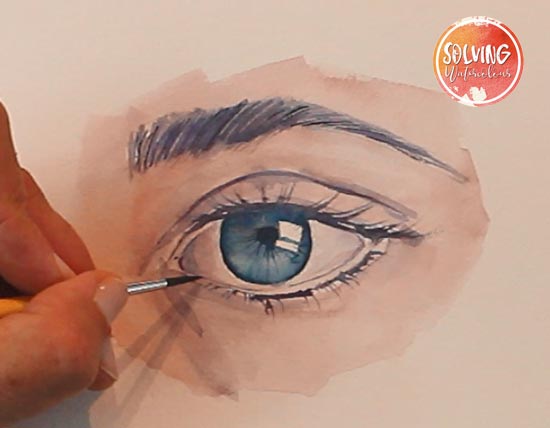
Add the final darkest details. I’ve added some individual hairs on the eyebrow and in the above pic I’m using a small round detail brush to put in those tiny shadows around the rim of the eyelids.
