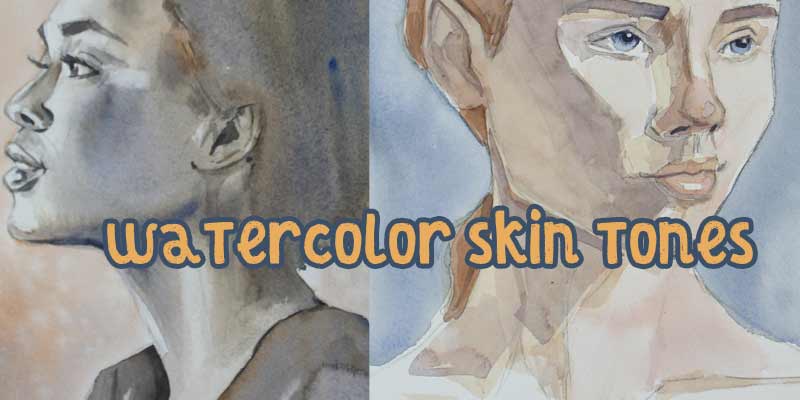
How To Paint Skin Tones With Watercolor
Do you struggle to mix the right skin tones in watercolor? Portraits and figures are not easy subjects to paint as everything depends on getting the drawing right. However, realistic skin tones are actually quite easy to achieve in watercolor.
Skin is translucent and the secret to painting realistic skin tones in watercolor is to focus on using thin glazes of translucent reds and blues to build your colors up in layers.
In this post I’ll focus on three examples. First, a pale Caucasian skin type then a dark Afro/Caribbean skin type. Finally I’ll demonstrate how you can use underpainting technique commonly used in oil painting that works perfectly well in watercolor. I’ll use a limited range of colors and it may surprise you how similar the colors are in all these examples.
Materials List
Burnt Sienna: Winsor & Newton | Daniel Smith
Ultramarine Blue: Winsor & Newton | Daniel Smith
Burnt Umber : Winsor & Newton | Daniel Smith
Cadmium Red: Winsor & Newton | Daniel Smith
Brushes
Winsor & Newton Series 150 Bamboo Round #6 Buy From Amazon
Princeton round detail brush 9650R-2 Buy from Amazon
Princeton Synthetic Kolinsky Mop Brush Buy from Amazon
Synthetic Squirrel Flat Brush Buy From Amazon
Paper
Arches watercolor paper block, cold press, 9″ x 12″, 140 pound Buy from Amazon
Miscellaneous
Easy release painters masking tape Buy from Amazon
Adjustable desktop easel Buy From Amazon
How To Paint Light Skin With Watercolor
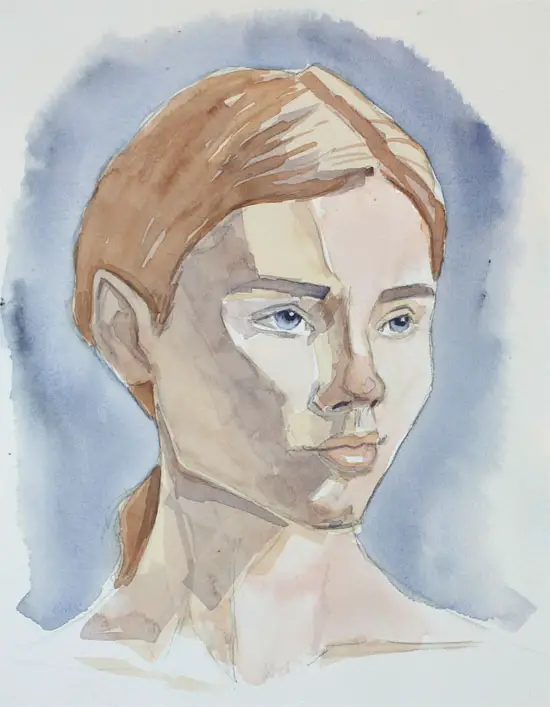
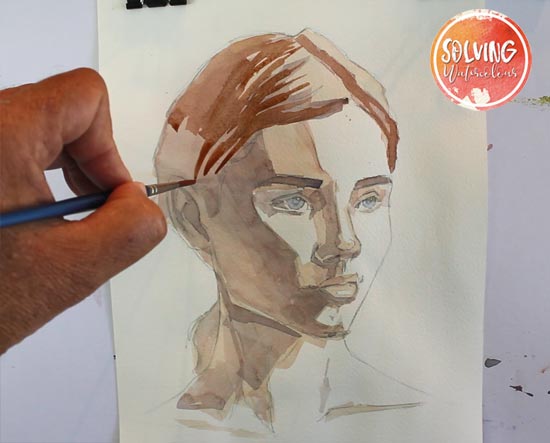
For this portrait of a pale skinned girl with red hair, I used mostly transparent hard edged washes of pale reds and red biased neutrals. These were mostly painted wet on dry which creates hard edged shapes painted with a flat brush. This was a stylistic choice which emphasized the angularity of her features.

Step 1: Identifying Shadow Shapes On The Face
When choosing reference photos for portrait paintings, I always go for photos that have a strong directional light source. This creates well defined shadows that make for more interesting paintings and helps to define the planes of the head which reinforces the illusion of Three dimensions.
For this painting, there is a bright light source coming from the front left of the subject’s face. The left side of her face is mostly in shadow. For the initial wash, I blocked in this facial shadow and her hair with a thin watery flat wash of Burnt Sienna. I allowed this to dry completely before moving on to the second wash.
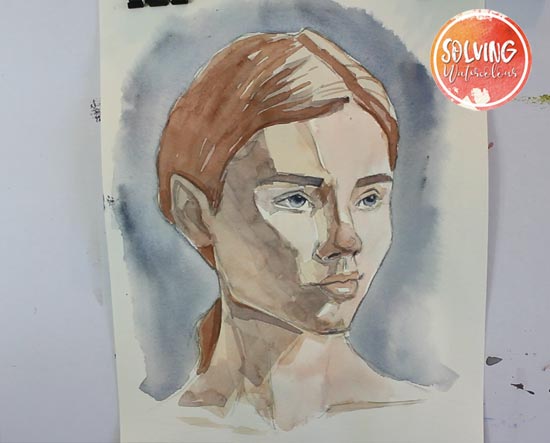
Step 2: Painting The Second Wash
As the shadows get darker, on the right side of her face I’m adding a little more Ultramarine to the Burnt Sienna. This creates a colored neutral which is warm (i.e. it leans towards red) but cooler than Burnt Sienna.
Step 3: Painting The Hair
For the hair, I switched to a round brush and a stronger mix of Burnt Sienna.
Step 4: Final Touches
In retrospect, to be technically correct I should have probably done this part first! But in To make the skin more lifelike, I added a very thin wash of Cadmium Red, all over but paying particular attention to the fleshiest areas of the face such as the lips and nose. The increased presence of blood in these areas tend to make them redder in hue.
How To Paint Dark Skin With Watercolor
For this portrait of a woman with dark skin. I used a combination of Burnt Sienna, Burnt Umber and Ultramarine. The main differences between this portrait and the previous one was that the colors were mixed in stronger, darker washes. To paint convincing dark skin, it’s necessary to cut back on the reds and use darker neutrals alongside stronger blues and purples to indicate shadows.
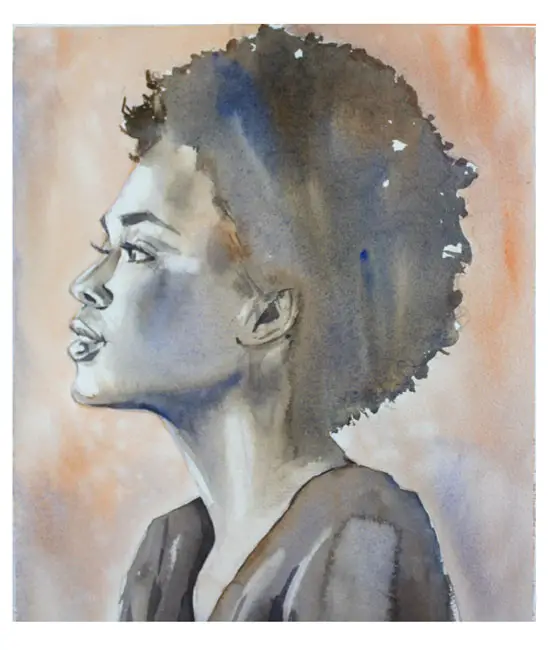
Previously, I took a purely additive approach. I built up the skin tones and shadows with a series of transparent washes, using the white of the paper as a starting point. In this painting I used a slightly different approach. Combining an additive and subtractive technique. This meant beginning with a basic mid tone and use a combination of lifting out with a clean damp brush to create highlights and then adding subtle washes of blues and blue leaning neutrals over the top to build up shadow tones.
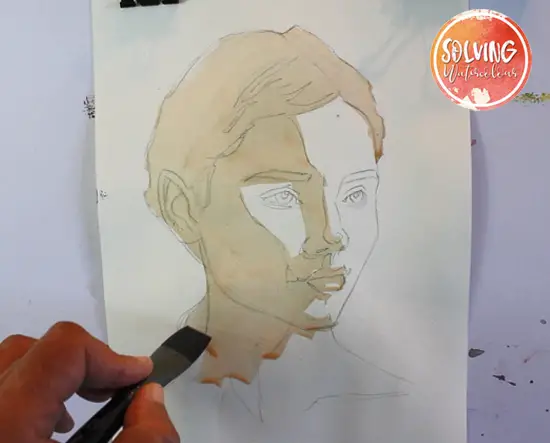
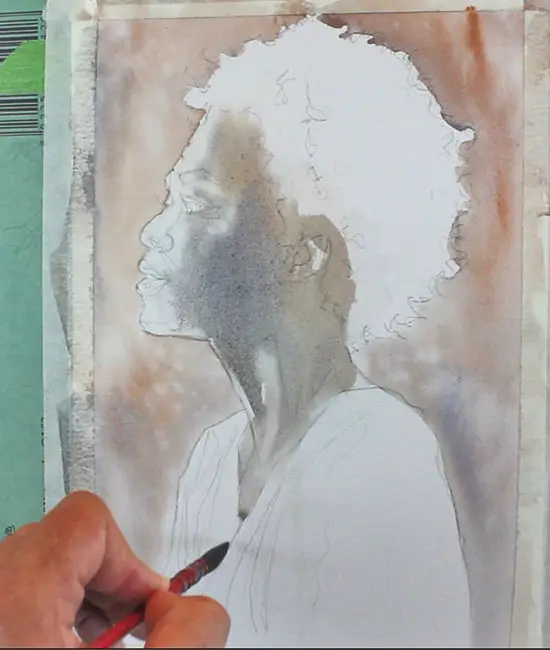
Step 1: Painting The Background
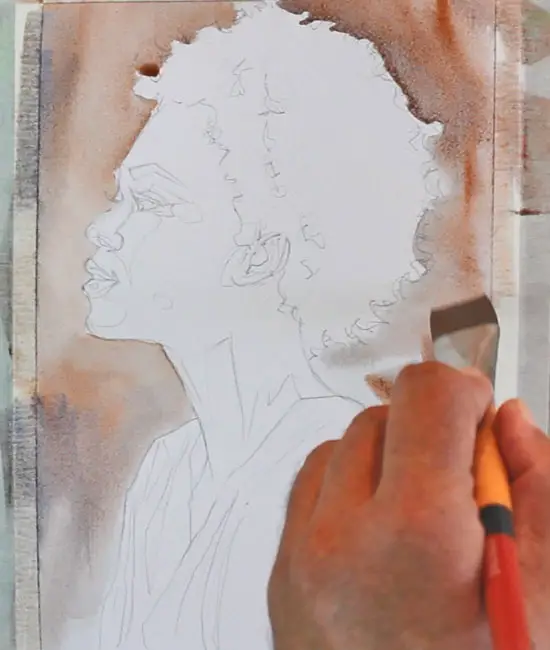
I wanted to create a semi-abstract background that’s interesting to look at without distracting from the main subject. I carefully brushed clean water around the figure with 1″ flat brush and painted a variegated wash of Burnt Sienna and Ultramarine allowing the colors to move and blend naturally with the least amount of brushing possible. The paper was then left to dry naturally in order to keep the colors bright and fresh looking.
Step 2: Choosing a Starting Point For the Portrait

The drawing naturally falls into three main areas. The skin of the face and neck. The jersey, and the hair. Human skin is somewhat reflective and in this case, the subject’s skin is brighter than the other areas, as it is illuminated from the front. In watercolor painting, it’s generally a good idea to start with the lightest areas first, so I began by wetting the face and neck portions with clean water. I was careful to leave a few areas of dry paper in the whitest areas i.e. the teeth, eyes and highlights on the lips. This meant that there was no chance of paint bleeding into those areas accidentally.
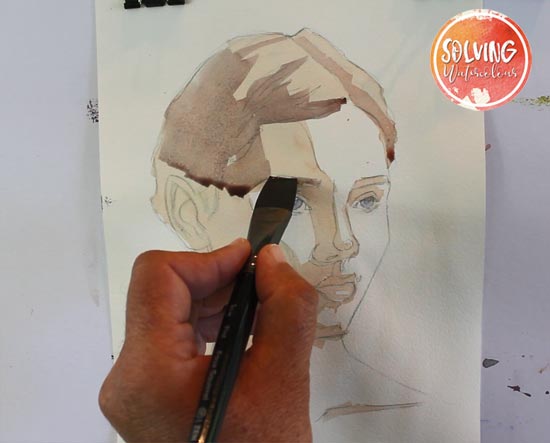
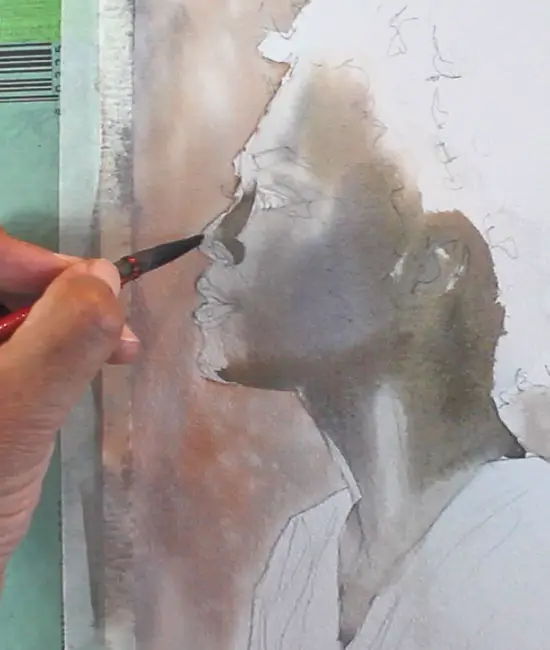
Step 3: Painting Dark Skin Color Wet In To Wet
I placed three large blobs of color on my palette. As previously mentioned These were Burnt Umber, Burnt Sienna and Ultramarine. In fact these are the only colors I used for the entire painting. I mixed the the three colors together but left some unmixed color on the palette so that I could change the color balance by adding add more of a color if required.
In the image below you can see how a wash of mostly Burnt Umber blends with a mix of Burnt Umber and Ultramarine. At this point in the painting the goal is to establish a range of soft edged shadows.
Tip: Lifting Out
I like to keep a cloth and a second clean damp flat brush handy in order to help control where the paint flows, by using the brush to lift excess paint from areas where I don’t want it such as the neck highlight (Above). I then wipe the excess paint off on the cloth.
Step 4: Building Up Shadow Tones On The Face
In the image above, another soft wet in to wet shadow has been added under the chin and throat with a slightly darker mix of Burnt Umber and Ultramarine. The shadow on the nose required a hard edged shape, so it was necessary to completely dry the paper before this was added, so that the paint would retain it’s edges and not bleed. I subtly blended out the shadow by softening the shape just above the nostril with a little water from the point of my No.3 Mop Brush. I also did the same thing where the shadow fades away at the top as it meets the eyebrow.
Step 5: The Hair
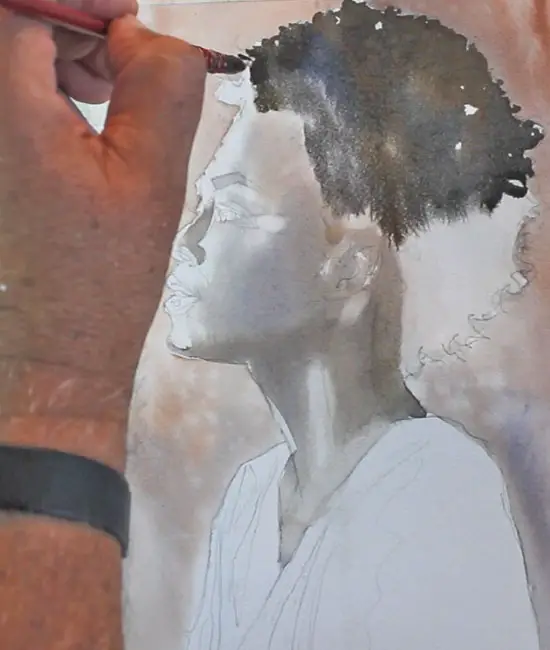
At this stage it was important to consolidate the skin tones that I had established so far by drying the paper thoroughly with my hairdryer. For the hair I wasn’t too concerned with realism but it was important to establish the hair as being darker than the skin. Some decisions also had to be made regarding the hairline. If the hairline has too hard of an edge it could look a bit unnatural rather like a wig or a cut out. The key here is to observe where the “Lost edges” are on the hair.
Tip: Lost & Found Edges
Lost and found edges refer to the way that edges can appear and disappear depending on the tonal value you are painting the edge next to. In this case, there are spots where the hair thins out and starts to blend with the shadows on the face. Soften hard edges where necessary by painting into them gently with a clean wet Bamboo brush. As before keep a clean cloth handy for removing excess moisture from your brush
I wet the hair area and mixed up a milky almost creamy consistency of my three colors Burnt Sienna, Ultramarine and Burnt Umber. Ultramarine has the darkest tonal value of those three colors so I chose that as the dominant color in the mix. I also wanted to create a natural variation in the colors with an interesting variegated wash rather than create one uniform dark neutral.
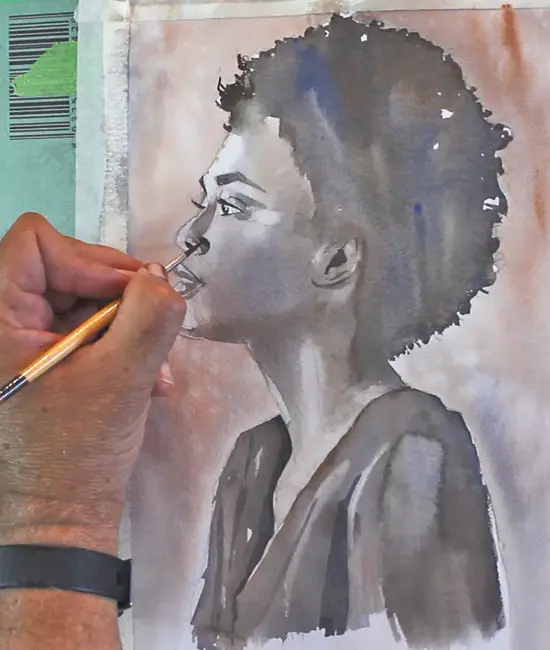
Step 6: Final Touches
I used my three colors mixed to a buttery consistency for the final details. There are lots of small dark hard edged shapes on a face such as eyelashes, the eyes, shadows on the ears and nostrils, etc. Wherever there is a strong highlight there is usually an equal but opposite dark shadow right next to it. Take your time and carefully add these little details with a small round brush. I also ended up drying the whole painting before re-wetting it and adding some subtle blue wet in to wet shadows where necessary such as on the cheeks, temples and throat.
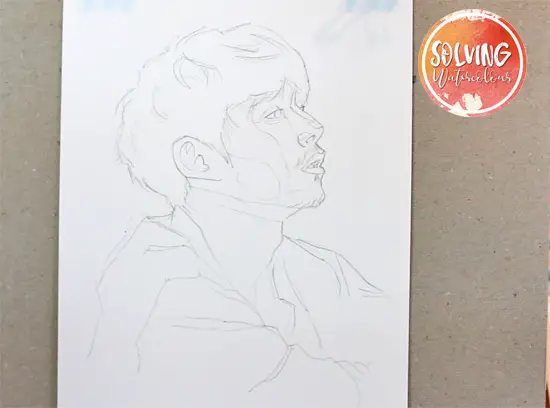
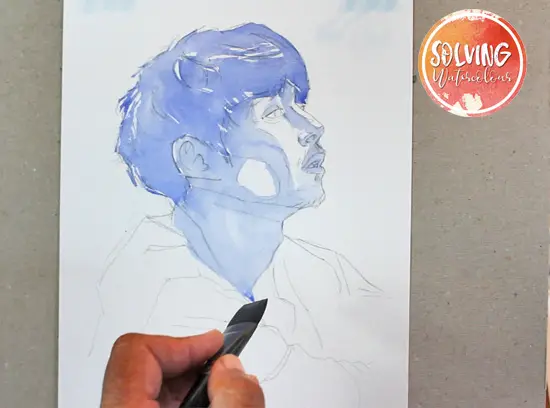
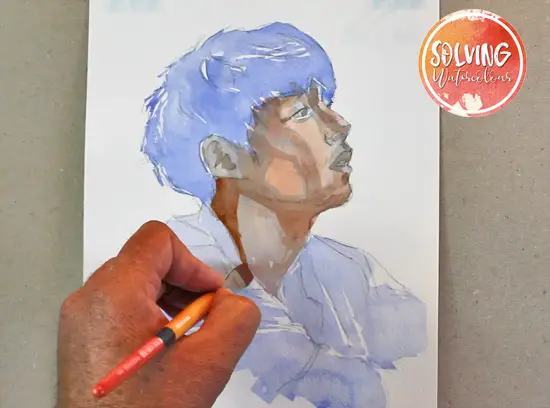
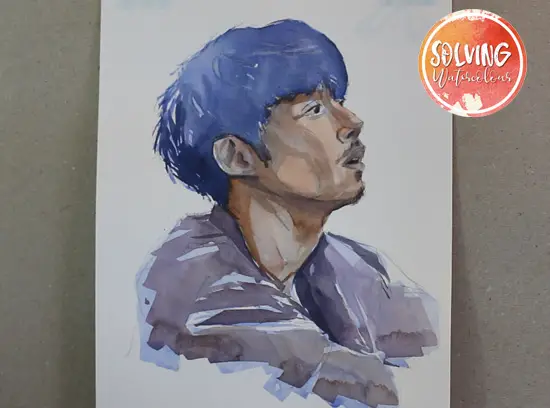
Mixing Skin Tones With Blue Underpainting & Warm Glazes
Underpainting is a technique that is often used in oil painting and it also works particularly well with watercolor glazes. Glazing is the technique of putting down successive layers of transparent color. Shadows often have a blue cast to them , so by underpainting all the shadows first in blue and glazing over them in transparent flesh tones, we can create realistic skin tones.