What Is Masking Fluid For?
Masking Fluid, also known as Liquid Frisket, is a latex solution that can be applied to dry watercolour paper before you paint on it. The purpose of it is to preserve specific areas of white paper, as white paint is not traditionally used in watercolour painting . The masking fluid will form a thin film of latex that adheres to the paper. Once the painting is dry, the latex film can be carefully peeled off, leaving the white surface of the paper untouched.
In the example painting below entitled “Sun shower tree” I wanted to illustrate the dramatic reversal of light that often occurs just before a sun shower.
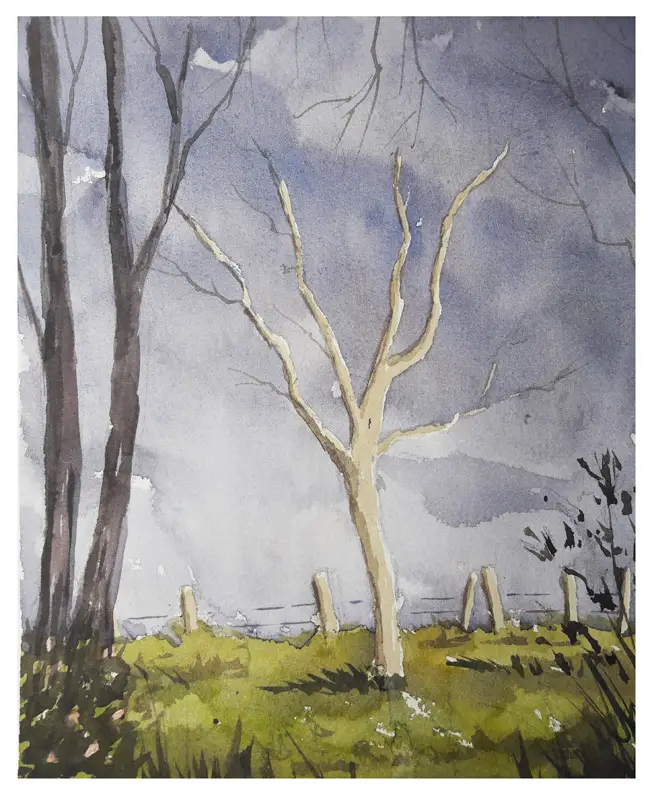
The sky has dark clouds but the sun is still shining, lighting up the subject. So, in this painting, the tree was lighter than the background sky. You cannot paint light over dark with transparent watercolours, so the only options are to paint around the tree, or mask it out altogether.
Painting around large simple shapes is easy enough to do but painting around shapes with complex detailed edges (e.g. trees) can be a problem. Especially when you are trying to be free and loose with your brush painting nice broad washes for a sky for instance. (Always try to be loose and free with your brush strokes!).
Having to paint slowly and carefully around a subject can result in all kinds of problems. e.g. Paint drying before you complete the wash, uneven areas of colour and tone giving a patchwork appearance to your painting.

How Do You Apply Masking Fluid?
Masking fluid can be applied just like you would apply paint, with a brush. I wouldn’t recommend using your finest Kolinsky Sable brushes to do this though! To be honest I wouldn’t recommend using a brush at all, as the masking fluid can be quite difficult to remove and will eventually ruin your brushes.
I use a Royal Sovereign Colour Shaper This is a brush like tool that has regular brush handle, with a chisel shaped rubber tip at the end instead of hair. The beauty of a colour shaper, is that you can apply the masking fluid very precisely, then simply peel the dried masking fluid off. Easy. Well,usually.

The video below shows some interesting techniques for using Winsor & Newton masking fluid, including spatter and texture techniques that you may find useful to experiment with.
How Long Does Masking Fluid Take To Dry?
On average, masking fluid takes around four, or five minutes to dry. As soon as it is dry, it’s safe to start painting over it. If you try to paint over it to soon you will simply end up diluting it and washing it away.
How Long Can Masking Fluid Be Left On Paper?
This is a difficult question to answer as the brand of masking fluid and the brand of paper can affect this. The longer that masking fluid is left on the paper, the more difficult it becomes to remove. It actually starts to bond with the paper over time.
I’ve heard of masking fluid being left on for as long as six months but that is extreme and I don’t recommend it. Leaving it on for up to twenty four hours is generally no problem at all.
How Do You Clean/Remove Masking Fluid From Paint Brushes?
Masking fluid can be removed from brushes with soap and warm water. Never clean brushes in hot water though, as that can cause the ferrule to expand and hairs to fall out over time.
Can You Put Masking Fluid Over Painted Areas?
The simple answer to this is, yes you can. The most important thing to remember is that the surface you are applying it to, whether painted or unpainted, must be absolutely dry.
Can You Dilute Masking Fluid?
You can and you should. Masking fluid does tend to evaporate and thicken over time, making it much more difficult to apply. You can thin it out again by adding water. It’s very easy to add too much though! Try adding one drop of water with an eyedropper pipette like this and slowly stirring (Not shaking) it in before testing it out and then add another drop. If it’s still too thick. Another way to add water is to give a quick spray of water from a mister spray bottle like this one which are so incredibly useful in several ways for watercolour painting.
How Do You Remove Masking Fluid From Watercolour Paper?
Tip. Wash your hands and throughly dry them before doing this. To remove the masking fluid from your paper you can simply use your finger and start rubbing gently at one of the edges until it starts to lift. Once it starts to come away, gently pull it off slowly and carefully. It will stretch and snap. Just keep working away at it until it’s all removed.
Alternatively, you could use a product like this Masking fluid remover block .
The advantage of using a masking fluid remover is that there is no chance of transferring sweat or oils from your fingers to the paper and potentially ruining your painting.
Does Masking Fluid Tear The Paper?
Masking fluid can and will tear the paper on removal, if you leave it on too long, or pull it off too quickly. Certain brands of paper seem to be more prone to tearing than others. I’ve never had any problems with Arches but I have had problems with other brands.
Tips For Using Masking Fluid
- Never shake or agitate the bottle of masking fluid. This will make bubbles from and cause it to congeal, creating little floating clumps of latex.
- Keep within the lines. It’s easy to over estimate how much masking fluid to apply. This can leave you with thicker areas and blobby looking spots than you anticipated. So stay well within your drawn lines and you’ll probably be ok.
- Soften edges. Masking fluid will inevitably leave you with a hard edged shape. These edges can be softened through the application of a damp detail brush.
- Test your masking fluid on a small scrap of paper before you use it on an actual painting. If it tears the paper, or is unusually difficult to remove you may want to consider using a different brand of paper.
- Don’t use a hot hair dryer on your painting if it has masking fluid on it. You’ll probably end up baking it on to your paper!
Recommended Masking Fluid Brands
Daniel Smith Watercolor Masking Fluid
Comes with a handy set of applicator nozzles for masking off areas which require fine detail.
Buy from Amazon
Pebeo Drawing Gum, Masking Fluid
This masking fluid has a blue tint making it easy to see on the paper. Many users recommend it for it’s ease of application and removal.
Buy from Amazon
Winsor and Newton Watercolor Art Masking Fluid
Winsor and Newton always make quality art products and this masking fluid is no exception. easy to apply and remove. Has a yellow tint for easy visibility.
Buy from Amazon
Grumbacher Miskit Liquid Frisket
This masking fluid has a bright orange tint for easy visibility. Recommended for its ease of use and removal.
Buy from Amazon
Painting “Sun Shower Tree”
Materials List
I’ve linked to where you can purchase the paints and the other art materials I used from Amazon.
Colour Palette
Sap Green: Winsor & Newton | Daniel Smith
Ultramarine Blue: Winsor & Newton | Daniel Smith
Cadmium Yellow: Winsor & Newton | Daniel Smith
Burnt Umber : Winsor & Newton | Daniel Smith
Alizarin Crimson: Winsor & Newton | Daniel Smith
Paynes Gray: Winsor & Newton | Daniel Smith
Masking Fluid and Accessories
Winsor and Newton Watercolor Art Masking Fluid
Royal Sovereign Colour Shaper
Brushes
Da Vinci No.4 Petit Gris Round Mop brush
Winsor & Newton Cotman 111 Round No.3
Mimik synthetic squirrel hair 3/4″ flat brush
Paper
Arches Watercolor Paper Block, Cold Press, 9″ x 12″, 140 pound Buy from Amazon
Misc
Easy release painters masking tape Buy from Amazon
Watercolour Palette Buy from Amazon
Fantasea Misting Spray Bottle Buy from Amazon
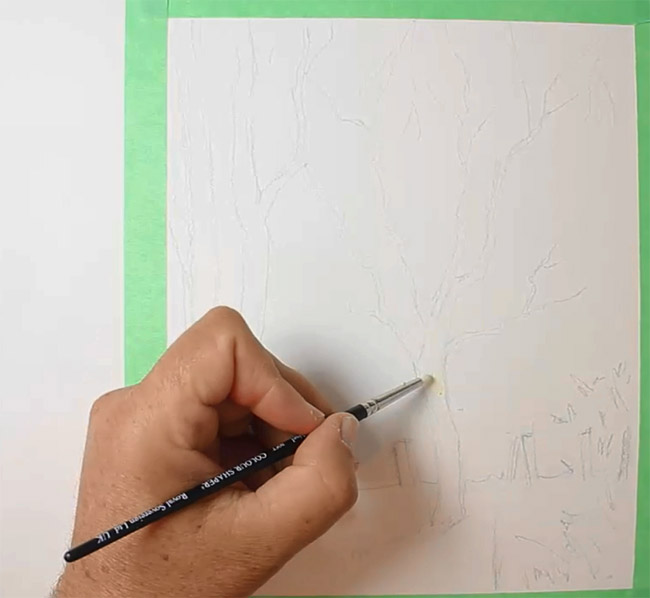
I began by lightly sketching my composition on to a sheet of paper and carefully applying the masking fluid to the tree.
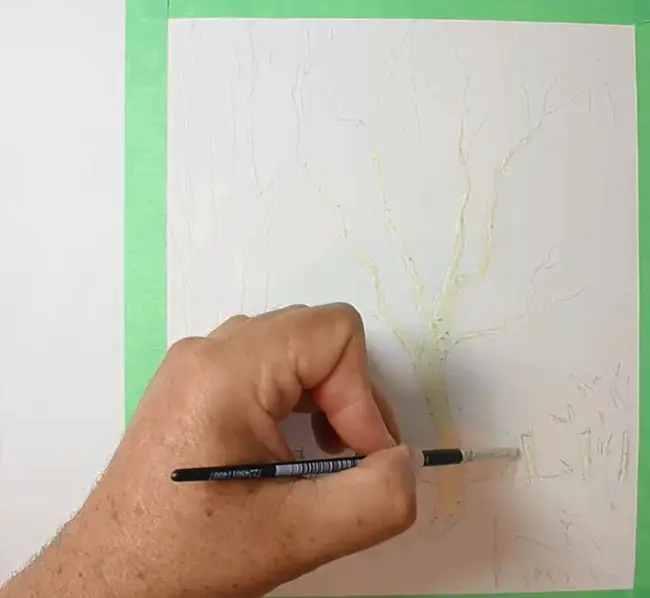
I also wanted to mask off the fence posts as they will be the same light tone as the tree. As you can see, the colour shaper is ideal for applying masking fluid. It works equally well on the irregular tree branches and the regular angular shapes of the posts.
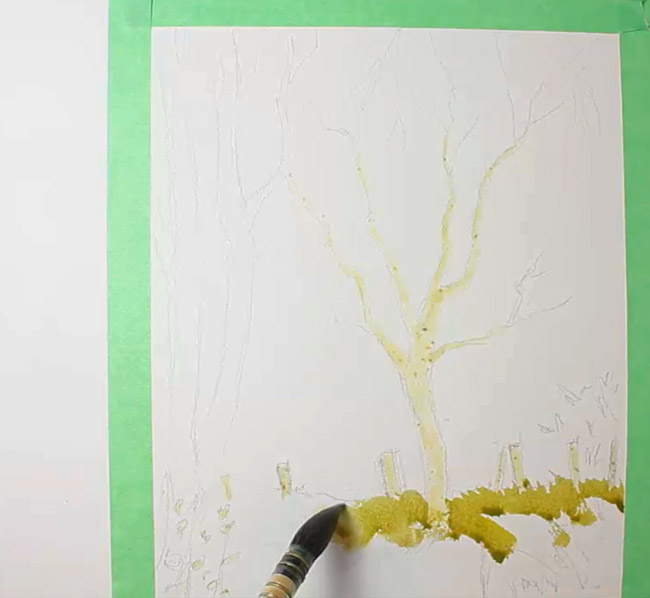
Once the masking fluid was dry, I began by painting the lightest tones of the grassy foreground. For the grass I wanted to have a variegated wash of different strength greens. To create this, I squeezed out some Sap Green. I don’t like using pure tube greens but Sap Green works well when modified with some Burnt Umber, Ultramarine and Cadmium Yellow in varying degrees.
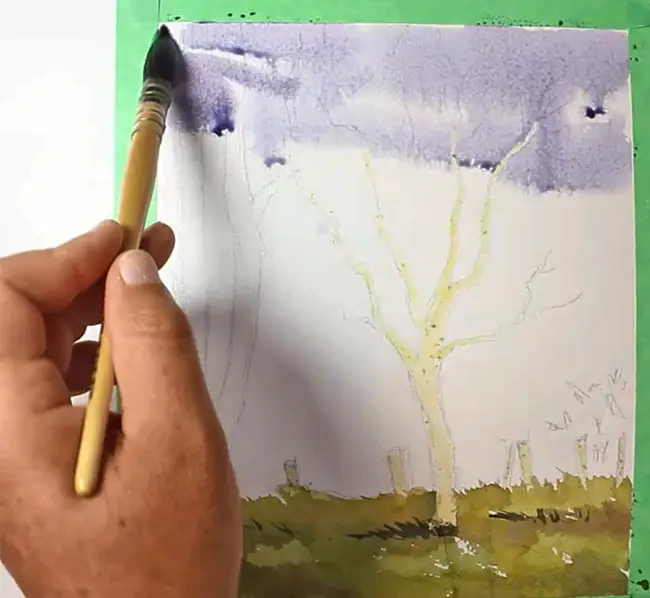
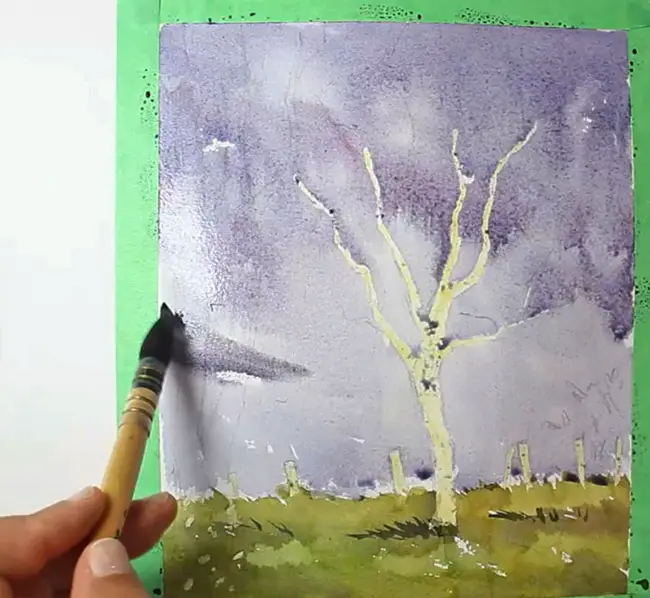
To create the impression of a grey sky darkened by storm clouds I used a wash of Paynes Grey mixed with Ultramarine. These are both cool colours (Cool as in colour temperature that is) It’s supposed to be a sunny day. So I warmed this up with some Alizarin Crimson.
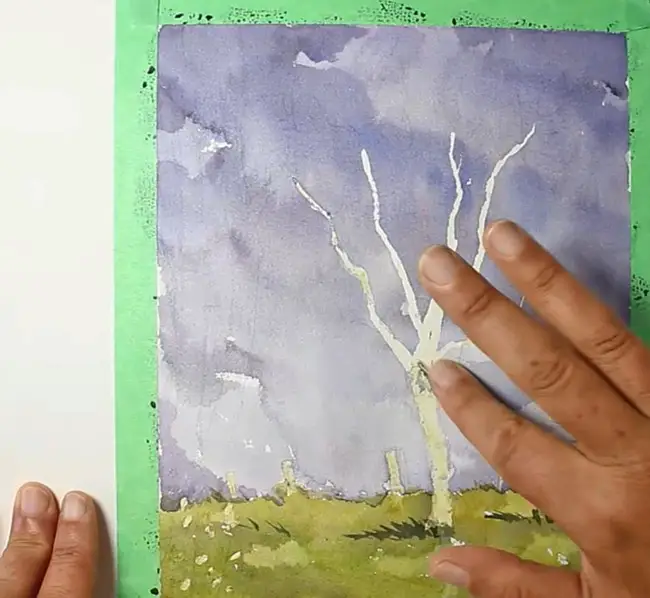
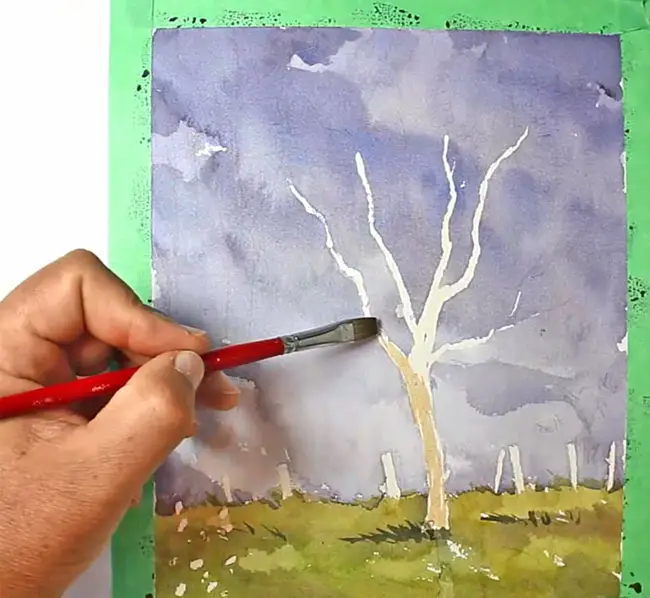
I waited for the painting to dry completely before carefully removing the masking fluid by gently rubbing at it with my finger.

All the masking fluid has been removed at this stage. Revealing the white of the paper underneath. There are a couple of unintentional specks of colour on the tree, where I hadn’t quite closed the gap between applications of masking fluid.
I wasn’t going to worry about that though. Let’s just call it tree bark texture!
I applied a thin wash of Burnt Umber for the tree with a small flat brush. Flat brushes are perfect for carving out hard, knife like edges
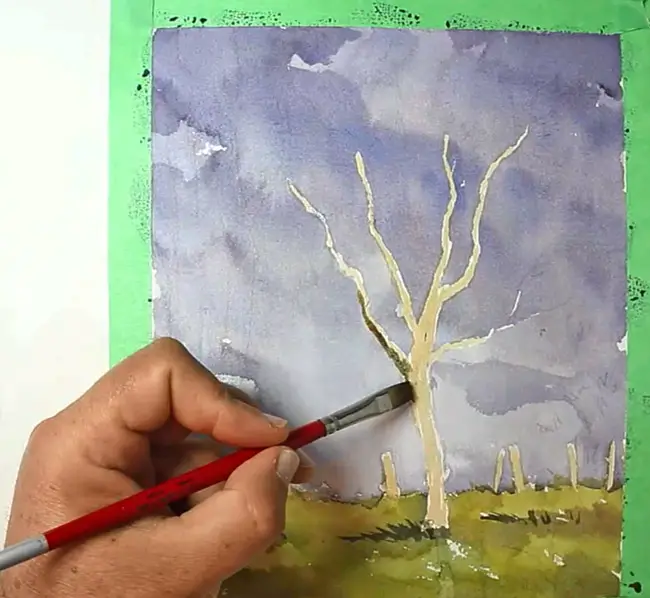
Burnt Umber Mixed with a little Ultramarine to cool it down was used for the shadow side of the tree. Again, a small flat brush works perfectly for doing this kind of thing.
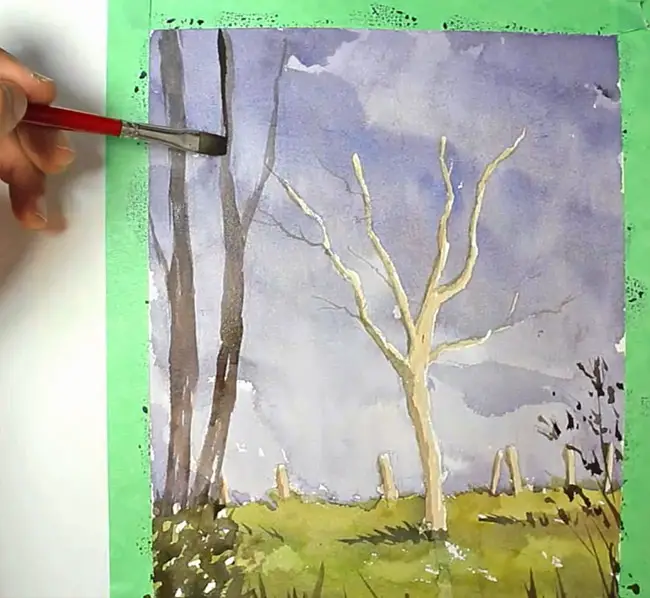
Finally. I painted the dark trees in the foreground with a stronger mix of Burnt Umber and Ultramarine. I later decided that I needed to add some very thin lines for the fence wire with a small round brush and the end results were shown in the pic at the start of this post.
That’s all for this tutorial. Although I don’t use masking fluid in my work a lot, I think you’ll find it’s definitely worth experimenting with if you’re prepared to exercise a bit of patience and just give it a try.
