
- Unlocking the Artistry: The Versatility of Traditional Chinese Calligraphy Brushes for Watercolor Painters
- Properties Of Chinese Calligraphy Brushes For Watercolour Art
- Painting A Coastal Scene With Chinese Calligraphy Brushes
- Materials List
- Paints
- Brushes
- Paper
- Miscellaneous
- Step 1: Rough Drawing
- Step 2: Wet The Paper
- Step 2: Add Some Light Clouds
- Step 3: Paint The Sky
- Step 4: Painting The Foreground (Initial Wash)
- Step 5: Adding Darker Clouds
- Step 6: Creating Texture and Controlling Water
- Step 6: Painting the Midground
- Step 7: Painting The Distant Headland
- Step 8: Adding Details To The Foreground
- Final Touches: Seagulls In The Sky
- Useful Links
Unlocking the Artistry: The Versatility of Traditional Chinese Calligraphy Brushes for Watercolor Painters
In the realm of artistic expression, tools play an instrumental role in shaping the outcome. Crafted with meticulous skill and precision, calligraphy brushes are an embodiment of Chinese heritage, cherished and passed down through generations. The materials used in their creation are selected with utmost care, reflecting a time-honored tradition. While this might seem exclusive to Chinese ink painters, there’s a surprising connection waiting to be explored by watercolorists.
What are the qualities that watercolorists seek in a brush? Firstly, it must be capable of applying free-flowing water-based paint. Whether it is made of natural or synthetic hair, it must be capable of holding and releasing water. It should maintain a fine point, possess the resilience to spring back to its original shape, and distribute watercolors evenly onto paper. Other factors, such as hair type, brush shape (round or flat), size, and cost, all factor into an artist’s choice.
The traditional Chinese brush aligns perfectly with these requirements. These brushes are designed to expertly apply water-based ink to paper crafted from various plant-based fibers, including sandalwood, bamboo, hemp, linen, mulberry bark, and rice straw (Chan). Crafted from animal hair, the specific type chosen depends on the intended use and the desired stiffness and springiness. Modern brushes typically feature white goat hair, black rabbit hair, yellow weasel hair, or a combination thereof. The brush head can form a fine point for intricate work or be spread out for broader washes. These properties hold great value for watercolorists as well
Properties Of Chinese Calligraphy Brushes For Watercolour Art
- Water Holding and Release: The hallmark of a great watercolor brush is its ability to control the flow of paint. Chinese brushes, honed for precision, excel in this aspect. They are adept at holding water and releasing it gradually, allowing for nuanced and controlled painting.
- Fine Point and Resilience: Whether you’re working on intricate details or sweeping strokes, a Chinese brush can adapt. It maintains a fine point for delicate work and easily regains its shape after each use, ensuring consistent results.
- Even Color Distribution: Just as in Chinese ink painting, watercolorists require even distribution of paint. Chinese brushes, with their finely tuned design, ensure that colours spread smoothly and uniformly across the watercolor paper.
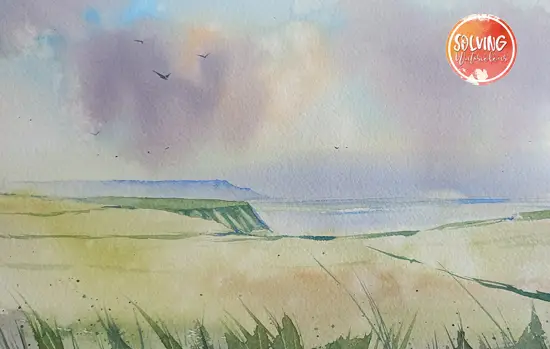
Painting A Coastal Scene With Chinese Calligraphy Brushes
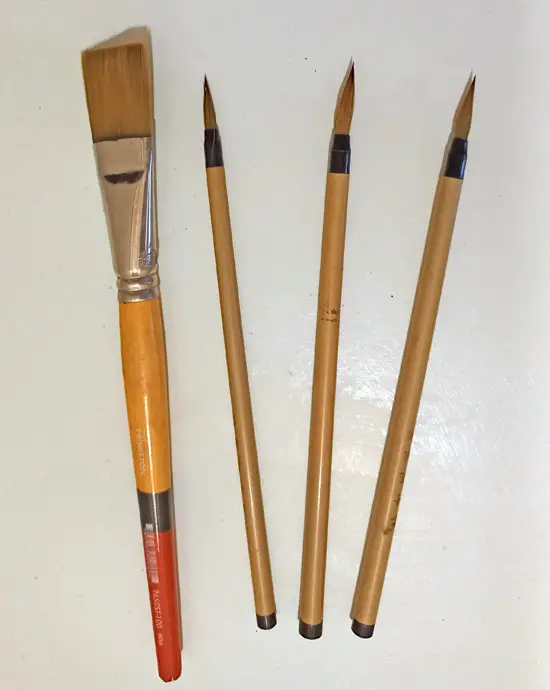
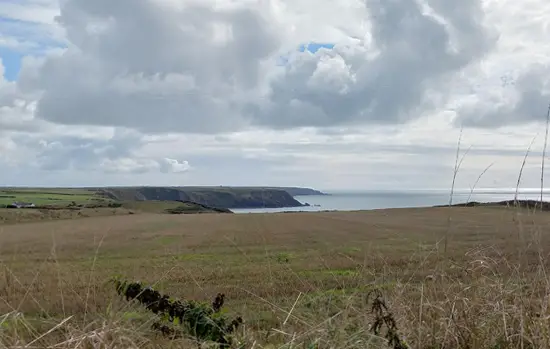
This photo below of Marloes Beach in Pembrokeshire, West Wales was the inspiration for a painting that was painted with a flat brush and a set of three Chinese calligraphy brushes (Small, Medium and Large) these are natural haired brushes, that facilitate a loose approach, form a nice point, hold a good amount of water and best of all, they are cheap to buy.
Materials List
Paints
Ultramarine Blue: Winsor & Newton | Daniel Smith
Cerulean Blue: Winsor & Newton | Daniel Smith
Prussian Blue: Winsor & Newton | Daniel Smith
Alizarin Crimson: Winsor & Newton | Daniel Smith
Paynes Gray: Winsor & Newton | Daniel Smith | Daniel Smith
Dioxazine Purple: Winsor & Newton | Daniel Smith
Burnt Sienna: Winsor & Newton | Daniel Smith
Brushes
Synthetic Squirrel Flat Brush Buy From Amazon
Chinese Calligraphy Brush Set: Buy From Amazon
Paper
Arches Watercolor Paper Block, Cold Press, 9″ x 12″, 140 pound Buy from Amazon
Miscellaneous
Adjustable desktop easel Buy From Amazon
Misting spray bottle Buy from Amazon
Easy release painters masking tape Buy from Amazon

Watercolor Coastal With Chinese Calligraphy Brushes Step by Step
Total Time: 45 minutes
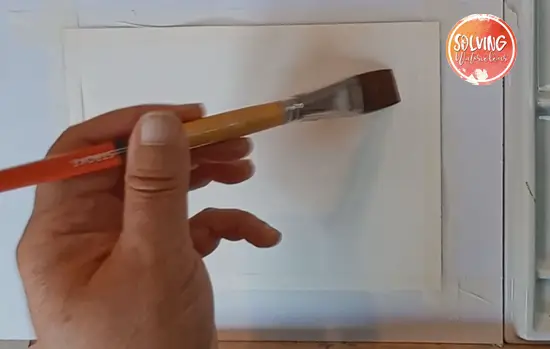
Step 1: Rough Drawing
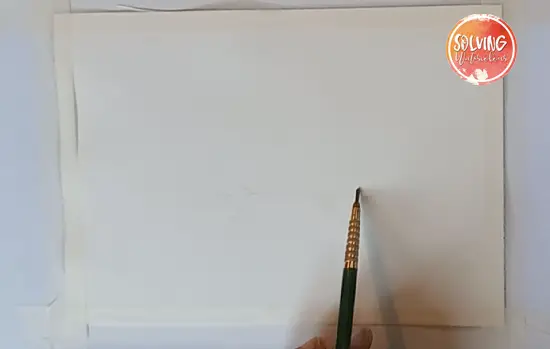
Lightly sketch the scene in pencil, minimal details, just enough to indicate the cliffs in the foreground the distant headland and the horizon.
Step 2: Wet The Paper
To paint the Wet in wet sky. Wet the top half of the paper with clean water using a 1″ flat brush
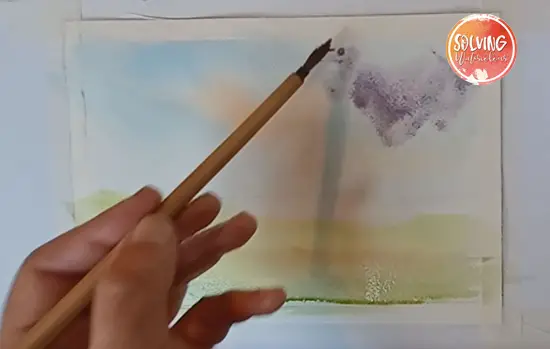
Step 2: Add Some Light Clouds
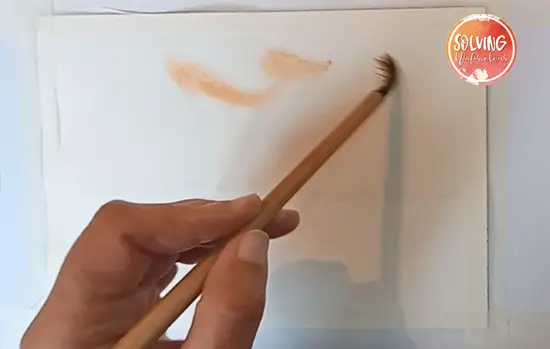
Indicate some clouds by making some small strokes of Burnt Sienna with the small calligraphy brush,
Step 3: Paint The Sky
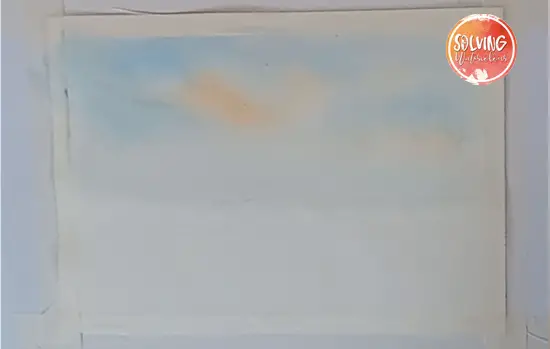
Using the flat brush again loosely paint around the strokes with some Cerulean blue bring the sky down to the horizon line
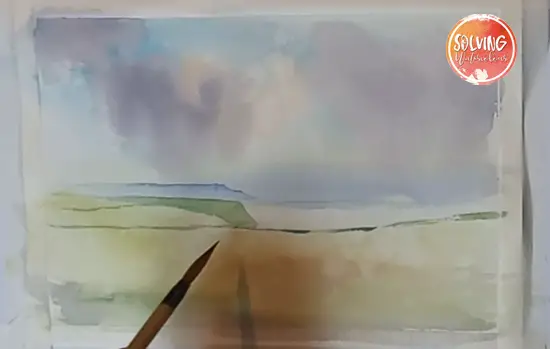
Step 4: Painting The Foreground (Initial Wash)
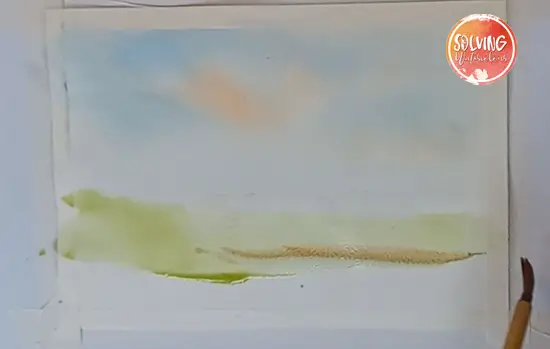
mix up a warm green from Pthalo blue and new gamboge and loosely paint the grassy cliff tops in the lower section with a loose thin wash. Add some Burnt Sienna into the wash as it comes into the foreground. This varies your green and helps to suggest the dry patches of grass. As long as the wash is wet you can add in darker greens to indicate the darker foreground grass and areas of shadow that form due the natural undulation the ground
Step 5: Adding Darker Clouds
I want to add some darker clouds but it’s important to make sure that the paper is still wet enough for the paint to diffuse but not so wet that it will run uncontrollably. Test this by holding your paper up to the light. The paper needs to be shiny but not too shiny. If the paper looks dull, it needs to be completely dried first before re wetting.
I mixed a bit of Paynes Grey with a bit of Dioxazine Purple for the clouds, and add it to the sky with a calligraphy brush.
Step 6: Creating Texture and Controlling Water
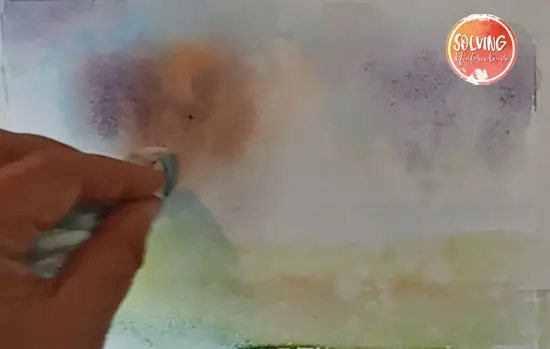
I’ve flicked some water droplets on to the paper to create texture. I also dab a piece of damp tissue around the clouds to help shape them and control the paint flow. Now I’ve got the inital washes complete I’m going to fix what I have in place by drying the whole painting completely with my hairdryer
Step 6: Painting the Midground
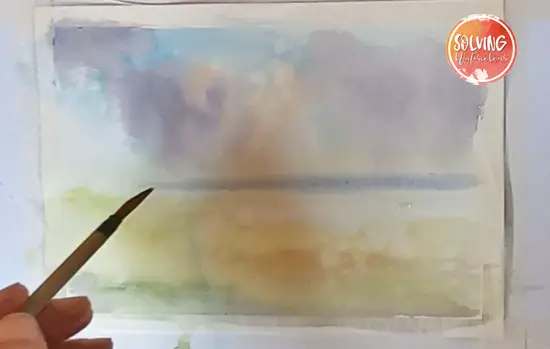
I want to create the effect of hazy distant land on the horizon, so I’m going to wet a strip along the horizon line with plain water and my flat brush. As long as you do this gently the water won’t disturb the paint underneath and now you can glaze over the top with another wet in wet layer.
Atmospheric perspective causes objects to become bluer and paler as they recede into the distance so I’m going to mix a warm blue by adding a touch of Dioxazine Purple to some French Ultramarine and pull the color across in a straight line with a calligraphy brush, The paint diffuses out but it can only diffuse where the paper is actually wet.
Step 7: Painting The Distant Headland
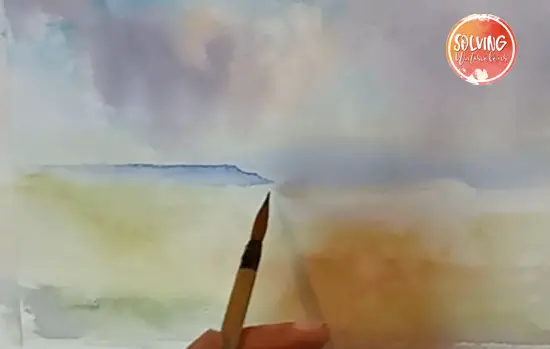
All the painting so far has been done wet into wet. Creating a series of soft diffuse shapes. The final stages will be painted mostly wet on dry which will bring everything into focus by creating a layer of shapes with clearer defined edges.
To create the illusion of distant land on the horizon, wet a strip along the horizon line with plain water and your flat brush. Apply another wet-in-wet layer with a warm blue mix, adding a touch of Dioxazine Purple to French Ultramarine.
Pro Tip: Remember, objects appear bluer and paler as they recede into the distance due to atmospheric perspective.
Start with the furthest bit of headland using French Ultramarine. Gradually blend towards the base with water, creating a faded sea-mist effect.
Step 8: Adding Details To The Foreground
Mix darker greens for the foreground cliffs and hedged borders. Use dryer brush strokes to create a natural, uneven appearance.
Final Touches: Seagulls In The Sky
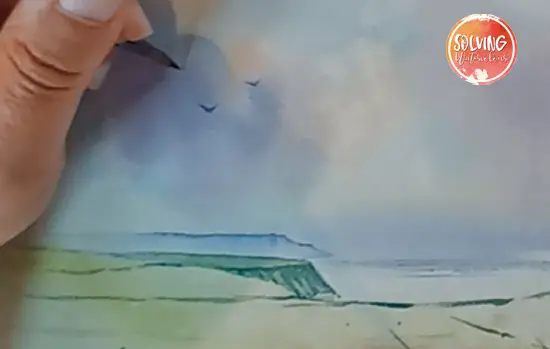
No coastal scene is complete without seagulls. Use a small calligraphy brush to add these charming birds to your artwork.
