Let’s learn how to paint this easy watercolor river scene. I didn’t use a reference photo for this one but I did do a very loose sketch just to get the elements in the right place. Here are the materials I used for the painting, feel free to change anything depending upon your personal preferences.
Materials List
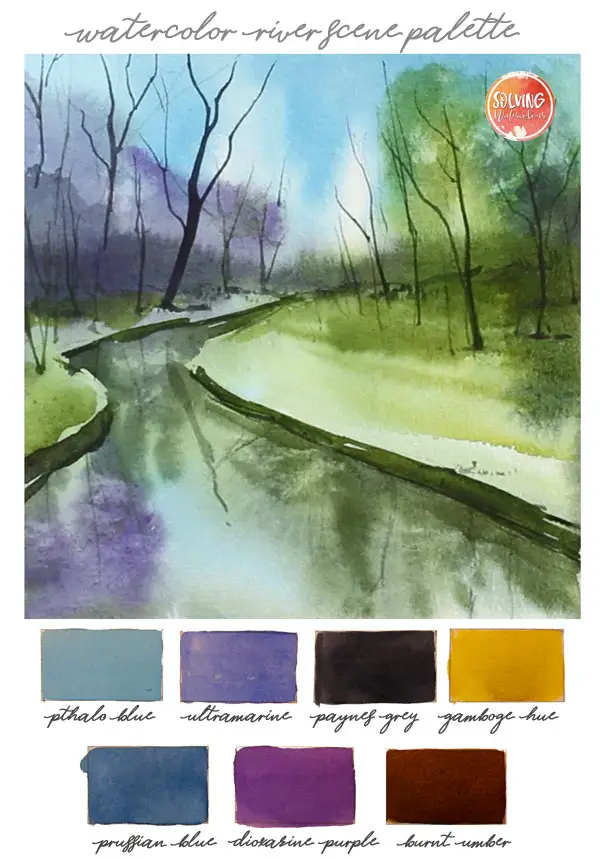
Ultramarine Blue: Winsor & Newton | Daniel Smith
Prussian Blue: Winsor & Newton | Daniel Smith
Pthalo Blue: Winsor & Newton | Daniel Smith
Dioxazine Purple: Winsor & Newton | Daniel Smith
New Gamboge: Winsor & Newton | Daniel Smith
Burnt Umber : Winsor & Newton | Daniel Smith
Paynes Gray: Winsor & Newton | Daniel Smith
Brushes
Winsor & Newton Series 150 Bamboo Round #6 Buy From Amazon
Rigger Brush (For thin tree branches etc) Buy from Amazon
1″ Hake Brush Buy from Amazon
Princeton Synthetic Kolinsky Mop Brush Buy from Amazon
Paper
Arches watercolor paper block, cold press, 9″ x 12″, 140 pound Buy from Amazon
Miscellaneous
Easy release painters masking tape Buy from Amazon
Adjustable desktop easel Buy From Amazon

Easy Watercolor River: Composition & Lead In
Putting a river into a landscape scene is a great way of giving your paintings a sense of depth. A river can be used as a perfect “Lead-in” for your painting. What’s a “Lead-in”? A lead-in is a visual device that draws and directs the viewers eye into the picture. In the examples below, I’ve shown some of the ways I’ve seen paintings of rivers composed. In the first example, the river runs parallel with the horizon line. The problem here is that the composition is split into a boring series of parallel lines. This leads the eye horizontally across the picture and right out of the frame. Also, there’s no sense of depth.
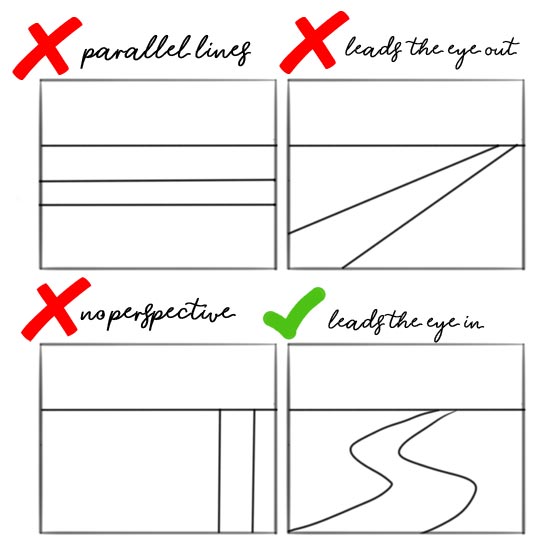
In the second example there is some perspective but the viewers eye is led in from one corner and straight out of the frame again.
In the third example, we have a problem that is similar to the first example. This time though, we have straight vertical lines meeting a horizontal and no perspective at all.
The fourth example, in my opinion works best. The viewers eye is led into the painting but not along a straight path, there is also perspective creating a sense of depth.
Easy Watercolor River: Step By Step
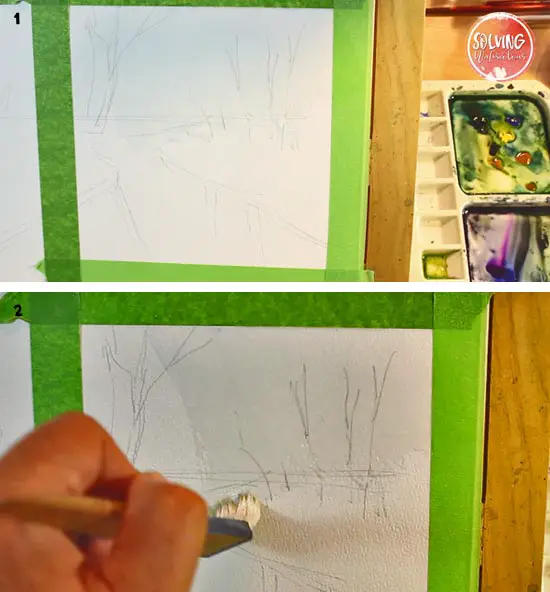
- After drawing your loose compositional sketch onto watercolor paper, place it on your easel and tilt your painting up at an angle of 25 degrees or more, so that the flow will flow downwards. For clean white borders, mask off the edges of your paper with easy release masking tape. We are going to paint from background to foreground, starting with the lightest tones and progressing to the darkest.
- Prepare to paint a wet in wet sky by first wetting the paper thoroughly with clean water.
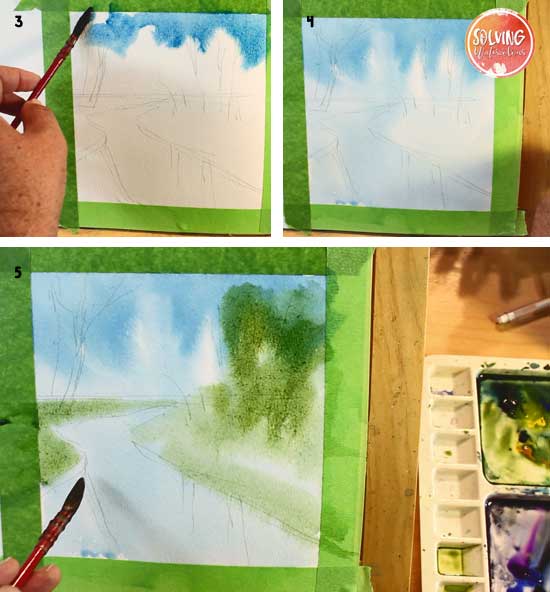
- Take a no. 4 mop brush and drop in some Pthalo Blue. You can see that I’ve left some cloud shapes i.e. unpainted white paper. The color of the sky will be reflected in the water so bring some blue down into the river too. Don’t worry if this becomes really blurry and diffuse. We’ll be giving the river much more definition in the later stages of the painting.
- As the wet paper dries, the cloud shapes soften and the strong Pthalo Blue color lightens considerably as it dries. Creating a soft subtle sky. Allow the paper to completely dry.
- Once the paper is dry, wet the areas where the trees and grass will go. By only wetting these areas you are limiting the area where the paint can flow. Mix a range of greens by combining Gamboge Hue and Ultramarine initially for a light to mid green, then add Prussian Blue and Paynes Grey to create darker tones. I like to have three or four distinctly different tones of green. This creates a natural looking variety rather than having just one uniform green.
For an in depth exploration of how to mix your own greens for any situation, check out my blog post How to mix perfect greens.
- For an autumnal look and to create a visually interesting color contrast to break up the green. I’ve added some Dioxazine Purple on the left side. Don’t worry if the purple naturally bleeds into the green but avoid actively brushing the purple into the green, as this will just create a muddy neutral color. My post how to mix watercolors the best way explains why this happens and how to use the color wheel to avoid muddy color combinations.
- While the paper is still wet, drop in some greens and purples into the river. Wet in wet painting like this, is perfect for creating blurry looking water reflections.
- Here, I’m tilting the paper to encourage the colors to flow where I want them.
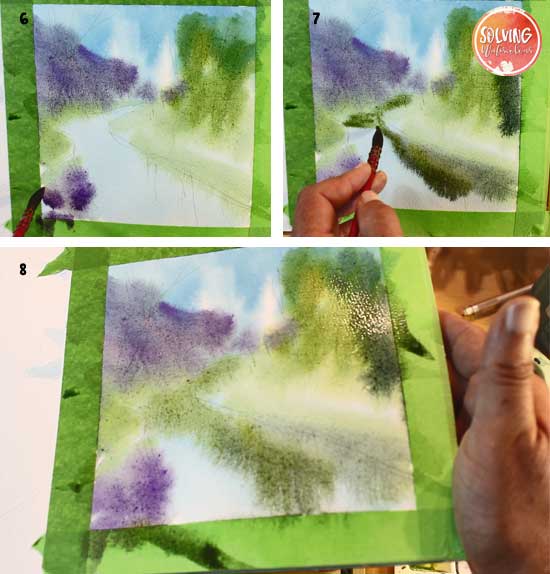
- So far, so blurry. It’s time to bring in a little more focus with some hard edged highlights. Gently press a small piece of scrunched up dry tissue paper to your paper and strategically lift out the paint in various spots. Now you have some realistic looking “Sky holes” and water sparkles to contrast with those soft fuzzy tree shapes.
- Let the whole thing become stable and totally dry before moving onto the next phase which will be to add some darker mid ground trees and bushes. You’re basically repeating the process that you did earlier, with a new layer. Paint some clean water only in the area where the bushes will be.
- Take a natural haired round brush or bamboo brush like the one I’m using and drop in some greens into the mid ground. You probably won’t need to darken them much if at all because the transparency of watercolor means that the previous layer will show through. In watercolor, successive layers always become progressively darker.
- Add some purple on the opposite side.
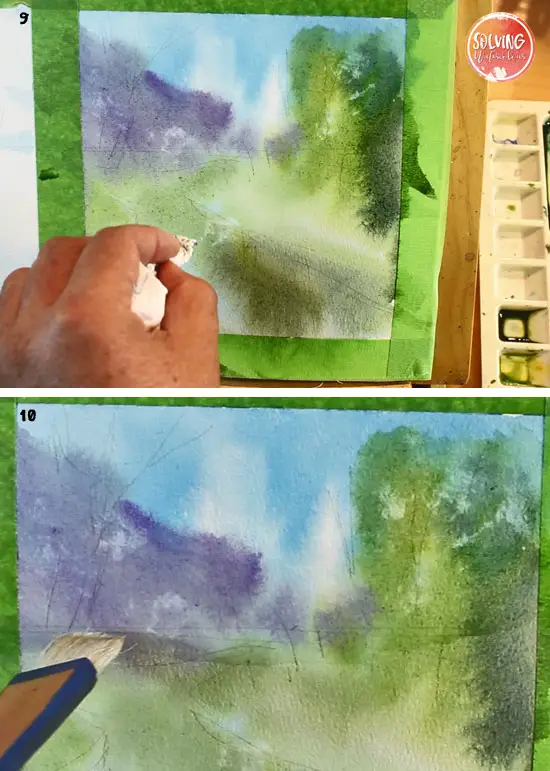
- Allow the paper to dry and put in the banks of the river with a bamboo, or round brush. Don’t let the edges be come too regular. Remember to enhance the illusion of perspective by making the lines become thinner as they recede in to the distance.
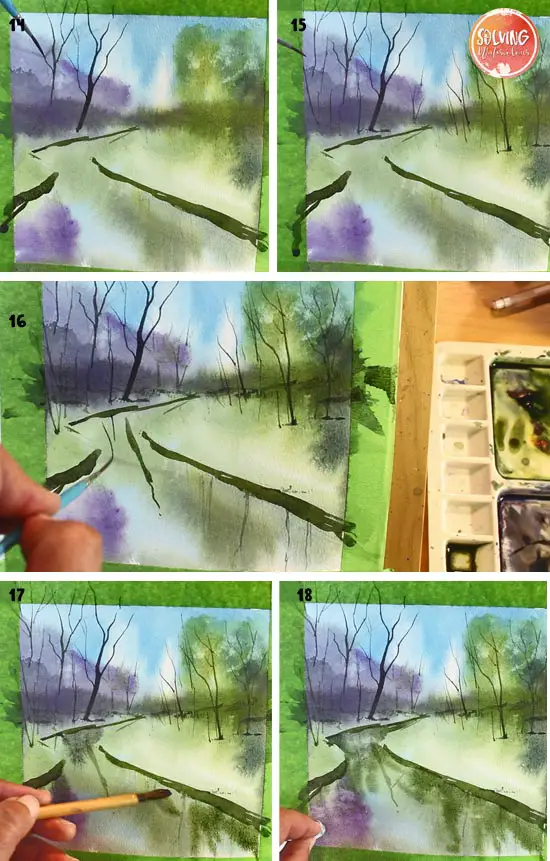
14 – 15. Use a Rigger brush to paint in the trees. I’m using a mix of Burnt Umber and Ultramarine to create the dark cool neutral tones of the trees rather than black which tends to make a painting flat and dull.
16 – 18. Start adding water reflections of trees and bushes into the river. Some can be kept as hard-edged shapes by painting wet on dry but you will also want to wet just the river with clean water and drop in some color wet into wet. You can lift out some more highlights with a piece of tissue to create the effect of dappled light on the river’s surface.
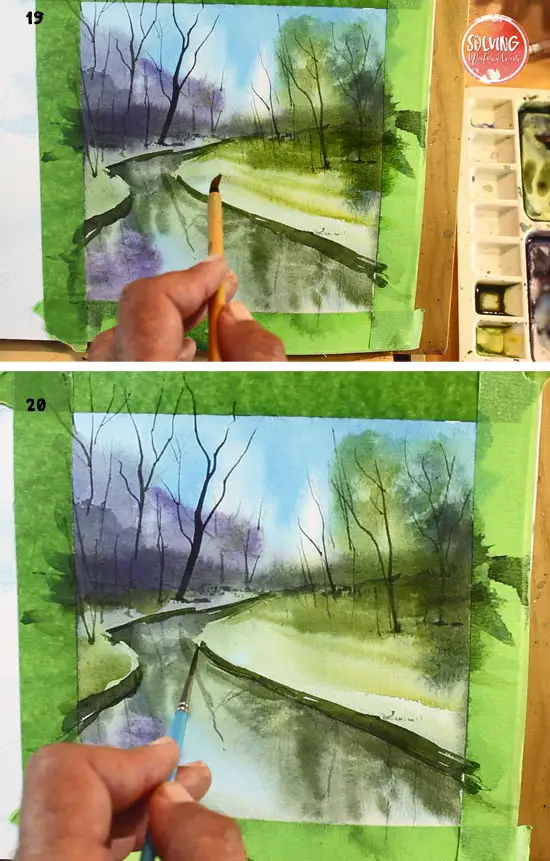
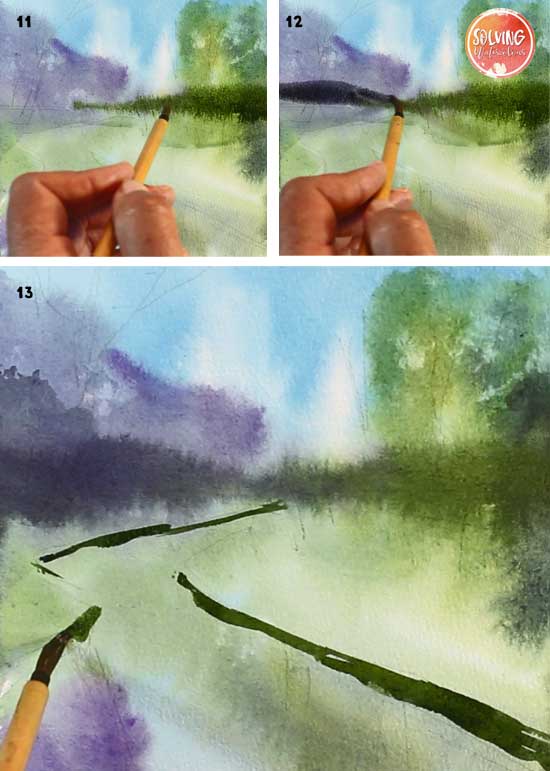
- Add some light greens where necessary on the river banks.
- Finally add the darkest darks and small details. Here I’m adding some thin dark lines with the Rigger You could add some more thin tree branches, basically save these small dark expressive marks till the very end, just to add a little texture and suggestion of detail.
Watch The Video
Here is a time lapse video of this painting that I produced as a one minute YouTube short.
