Materials List
Paints
Ultramarine Blue: Winsor & Newton | Daniel Smith
Dioxazine Purple: Winsor & Newton | Daniel Smith
New Gamboge: Winsor & Newton | Daniel Smith
Burnt Umber : Winsor & Newton | Daniel Smith
Paynes Gray: Winsor & Newton | Daniel Smith
Alizarin Crimson: Winsor & Newton | Daniel Smith
Cadmium Red: Winsor & Newton | Daniel Smith
Brushes
Rigger Brush (For thin tree branches etc) Buy from Amazon
1″ Hake Brush Buy from Amazon
Synthetic Squirrel Flat Brush Buy From Amazon
Princeton Synthetic Kolinsky Mop Brush Buy from Amazon
Paper
Arches watercolor paper block, cold press, 9″ x 12″, 140 pound Buy from Amazon
Miscellaneous
Easy release painters masking tape Buy from Amazon
Adjustable desktop easel Buy From Amazon

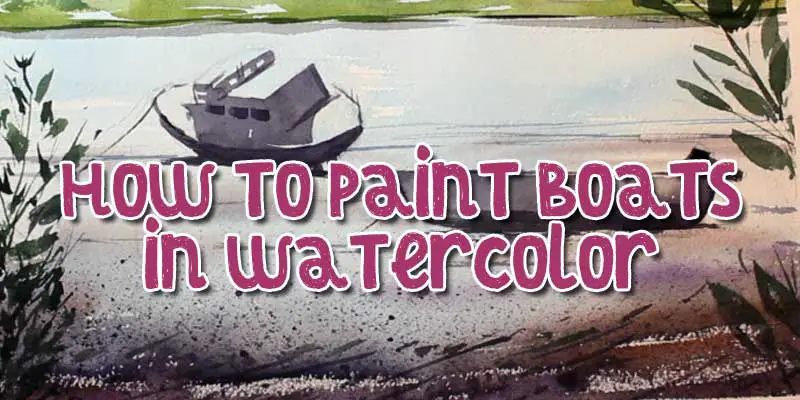
How to Paint Boats In Watercolor: Simple Rowing Boat

This simple rowing boat can be painted with just one brush. A 1/4″ flat brush.
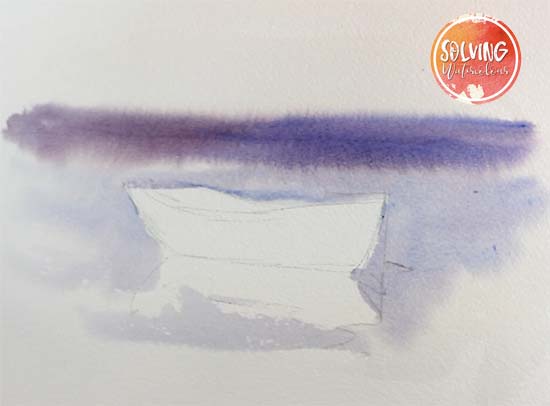
Begin by painting a loose background wet into wet using Ultramarine and Dioxazine Purple. Leave the paper dry where the boat will be as the paint can only flow only where the paper is wet.
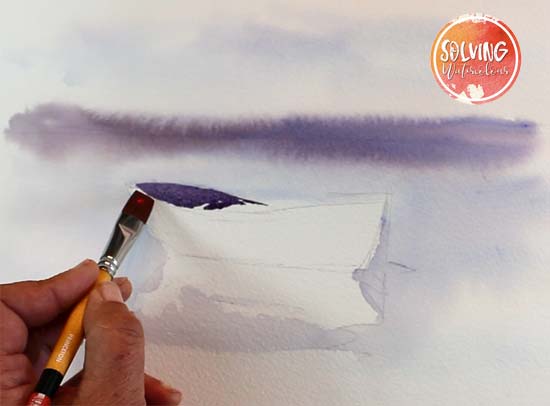
With the edge of your flat brush, paint the darker interior of the boat with a flat wash of Dioxazine Purple and Payne’s Grey.
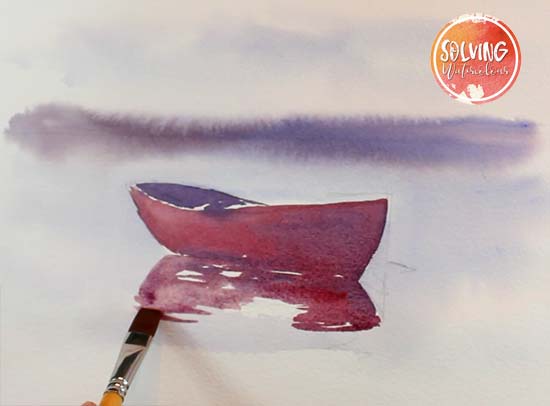
Paint the exterior of the boat with Cadmium Red. Thin your paint mixture with water as you progress down to the boat’s reflection in the water. The reflection should be lighter and have a less saturated color than the boat itself.
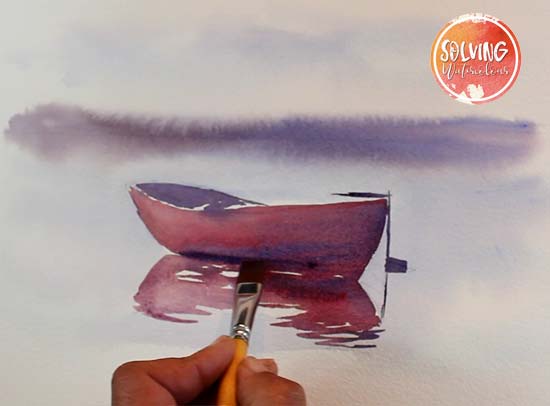
While the paint was still wet I dropped in some shadows along the rear and particularly around the bottom of the boat.
Here’s a pro tip for painting shadows. Never use gray, or black to darken your colors as this just makes them dull and lifeless. In this instance I’ve added Ultramarine to my Cadmium Red. This darkens the color, as well as cooling it, making for a much more convincing shadow color. For more on this this see my detailed post on color theory and how to mix watercolors for the best results.
How to Paint Boats In Watercolor: “Boats In The Harbor”
Here is the original reference photo for my painting “Boats in the harbor” taken from a video that I took.
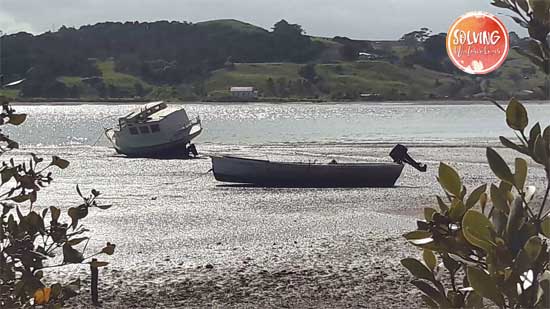
Although the final painting was actually completed in the studio, I also did some tonal Plein Air studies on location. A tonal study is a monochromatic painting, or pencil sketch that is done to help understand just the light and dark values. I was also trying to get a feel for the structure and perspective of the boats.
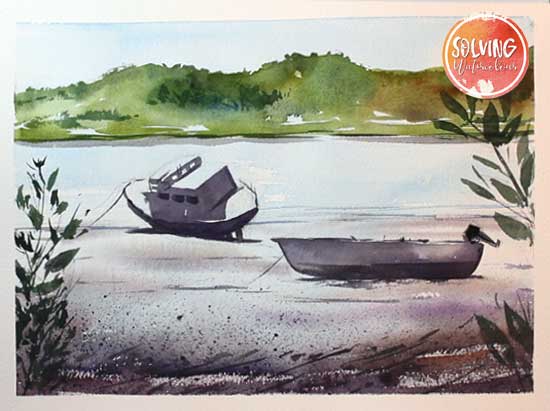
This painting of a couple of boats anchored on the Kaipara Harbor in New Zealand, shows how it’s possible to portray a convincing looking boat with only a few brush strokes and a couple of tonal values.
Total Time: 45 minutes
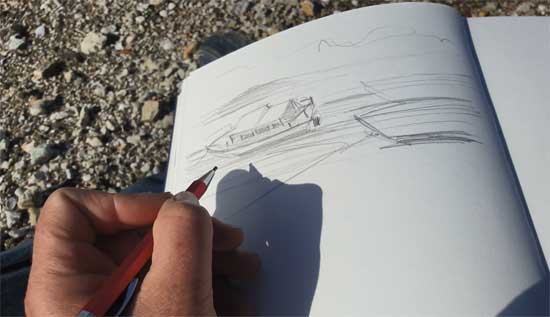
Step 1: Initial Sketch
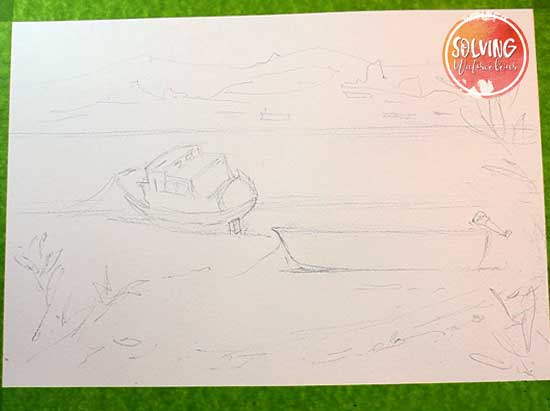
My initial sketch, is quite rough, as you can see but there is just enough detail to show the structure of the boats. The rowing boat in the foreground is just a few simple lines but the little cabin cruiser at the water’s edge has a deceptively complex shape and took a bit longer to get right as it is positioned in such a way that makes it necessary to add perspective.
When drawing three dimensional objects in perspective I find that it try and visualize them as collection of simple geometrical shapes such as stacked boxed and then I add the finer details after.
Step 2: Painting The First Wash
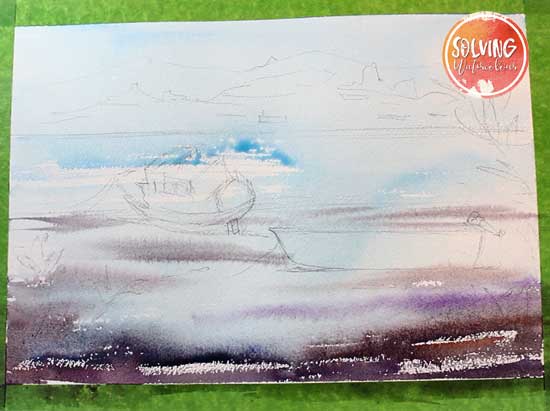
I began by painting the sky and water in simple broad strokes. The painting was set up on my desktop easel angled at about 45 degrees.
For the first wash I used a 1/2 inch Hake brush with Cerulean Blue diluted to a weak tea consistency. I left plenty of white paper showing through especially around the boats. For the dark wet sand and mud in the foreground, I brought the wash down to the bottom of the paper. I picked up some Dioxazine Purple, Payne’s Grey and Burnt Umber and allowed this to mix and blend on the paper.
Step 3: Painting The Background
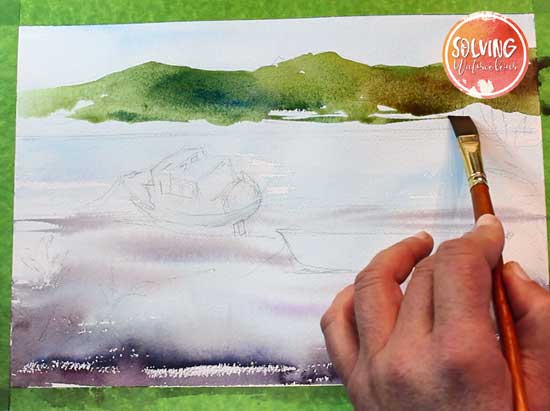
The boats will be the main focus of this painting. They are the elements with the strongest contrast and strong contrasts tend to draw the eye immediately. To keep things simple and uncluttered, I’m going to keep the background elements quite loose and undetailed.
With a 1/4 inch Flat brush I painted a variegated wash of Greens mixed from New Gamboge and Prussian Blue and Burnt Umber.
Step 4: Painting The Boats
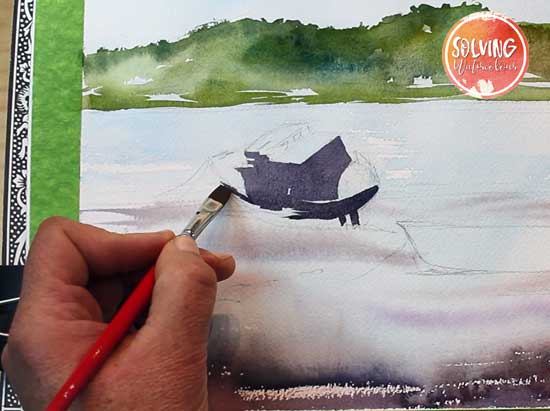
A flat brush is perfect for creating the sharp straight edges needed for the clean lines of the boats. Begin by blocking in just the boat’s shadows, with a 1/4 inch flat brush. I used a strong gray-violet which was mixed from Payne’s Gray, Ultramarine and Alizarin Crimson.
Step 5: Foreground Boat & Cast Shadows
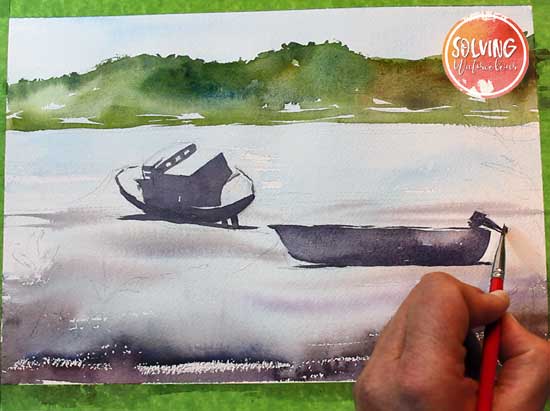
I gave the foreground rowing boat a little more detail and tonal variation than the cabin cruiser, as it is closer to the viewer. Here I am adding the finishing touches to the outboard motor. Don’t forget to indicate the cast shadows on the sand as this little detail will really serve to make the boats feel solid and well grounded in the scene.
Step 7: Adding Foreground Texture
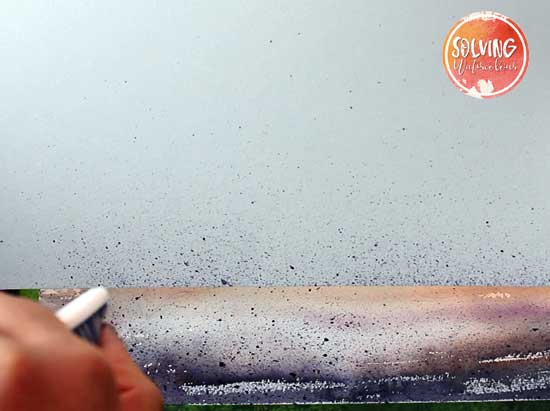
Add the texture of sand and stones by flicking paint with an old toothbrush. I’ve used a sheet of paper as a mask to ensure that the paint doesn’t go into other areas of the painting. Ensure that the paper is at least an inch above your painting, otherwise it will create an unnaturally straight line of spatter.
Step 8: Foreground Foliage
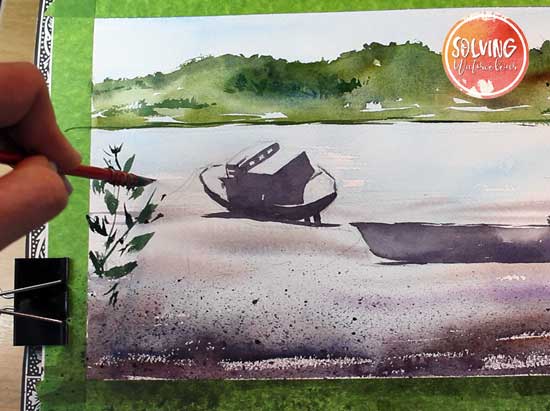
Use a small mop brush to paint the leaves and foliage in the foreground. A mop brush is perfect for creating leaf shapes. It also forms a sharp point, which is ideal for thin branches.
Step 9: Final Details
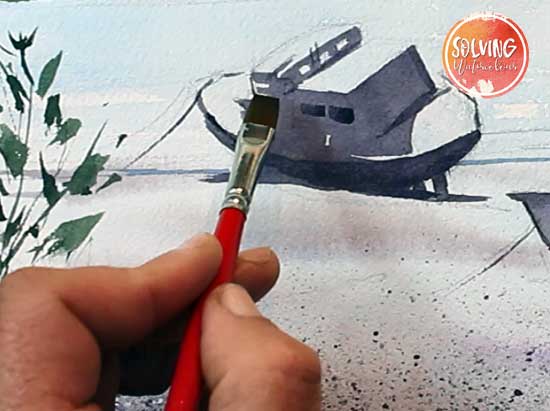
With 95% of the painting completed, all that’s necessary now is to add the darkest details such as the anchor lines and other small lines (often referred to as calligraphy) with a Rigger. Here I am adding the windows to the cabin cruiser with the edge of a flat brush.
Watch The Video


If you found this post useful check out the links below
How To Start Watercolor Painting: Essential Beginners Guide
