
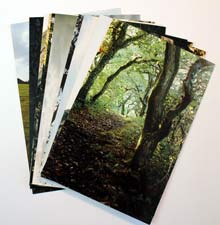
While having a clear out recently, I came across some old photos that I’d taken in Ireland and Cornwall, over 20 years ago. The one on top below shows a path through trees in a forest. I remembered that I’d taken all the photos with the intention of using them as painting reference but had never actually got round to doing it. So I decided that today would be the the day to make a start.
I’m always interested in how different artists render the complexities of foliage in their paintings and forest trees and woodland can be a great subject for trying out some experimental techniques.
As always, in watercolor, we want to work from the lightest values first and then add progressively darker values. This is because once a dark value has been put down on the paper there’s no going back, we’re stuck with it. This often means thinking about how to do the background before anything else. This is particularly true when considering how to paint a forest in watercolor, as the lightest tonal values tend to to be the ones that are furthest away from the observer.

Materials List
Ultramarine Blue: Winsor & Newton | Daniel Smith
Pthalo Blue: Winsor & Newton | Daniel Smith
Cerulean Blue: Winsor & Newton | Daniel Smith
New Gamboge: Winsor & Newton | Daniel Smith
Cadmium Yellow: Winsor & Newton | Daniel Smith
Burnt Umber : Winsor & Newton | Daniel Smith
Alizarin Crimson: Winsor & Newton | Daniel Smith
Paynes Gray: Winsor & Newton | Daniel Smith
Brushes
Winsor & Newton Series 150 Bamboo Round #6 Buy From Amazon
Rigger Brush (For thin tree branches etc) Buy from Amazon
Synthetic Squirrel Flat Brush Buy From Amazon
1″ Hake Brush Buy from Amazon
Paper
Arches Watercolor Paper Block, Cold Press, 9″ x 12″, 140 pound Buy from Amazon
Miscellaneous
Winsor & Newton Art Masking Fluid Buy From Amazon
Royal Sovereign Color Shaper Buy From Amazon
Misting spray bottle Buy from Amazon
Easy release painters masking tape Buy from Amazon
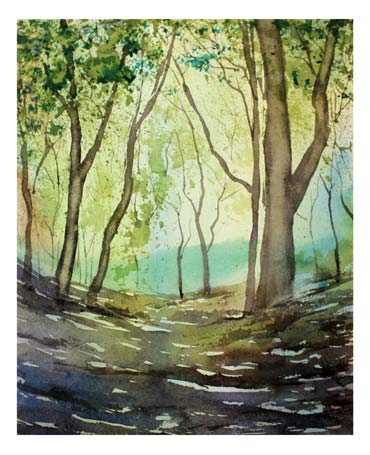
Here’s a picture of the painting finished now let’s go through the process.
When trying to create the illusion of depth, it helps to make the background more blurry and indistinct than the rest of the painting. So my general plan is to start with a background that has variation in it but is also quite light and out of focus with lots of soft edges.
Start by mixing up some greens and a warm neutral for the foreground. I used Prussian Blue, New Gamboge, Ultramarine and Cadmium Yellow to get a wide range of greens from pale yellow green to a dark blue green.
For the earthy foreground color, I used a mixture of 40% Ultramarine and 60% Burnt Umber.
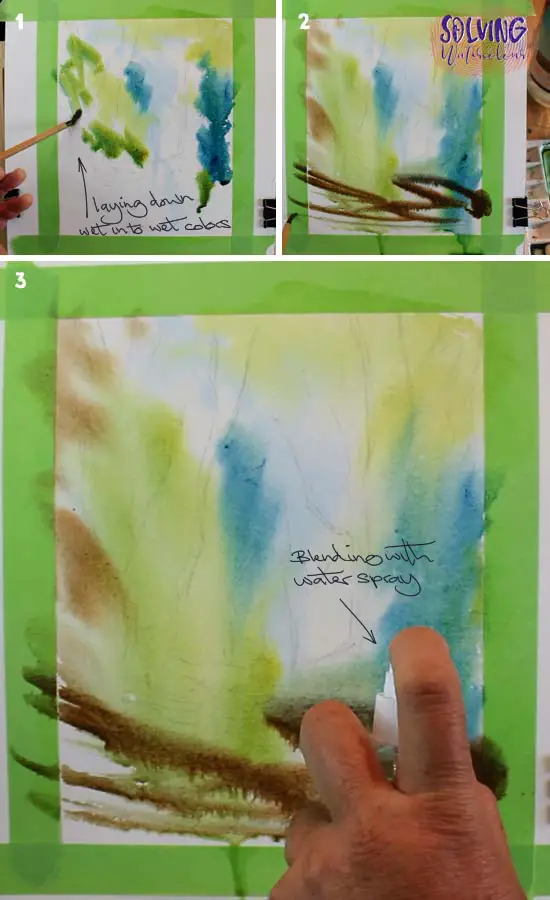
Steps 1 – 3
let’s create a background that’s blurry and indistinct, full of soft edges and undefined shapes but with a lot of color variation, make sure that your paper is thoroughly wet before starting. Take a natural haired brush like the bamboo brush I’ve used here and start to place random patches of green allowing them to flow and mix together on the paper. Don’t try to fill every white space with color it’s fine to have patches of white here and there. They will add to the variation and give your painting interesting areas of contrast.
Roughly indicate where the ground will be by making some brush strokes with the Ultramarine/Burnt Umber Mix.
Pic 3: Let’s really get things moving by using a fine mist spray bottle to add more water, It’s helpful to have some paper towels handy to mop up the water as it runs off your painting.
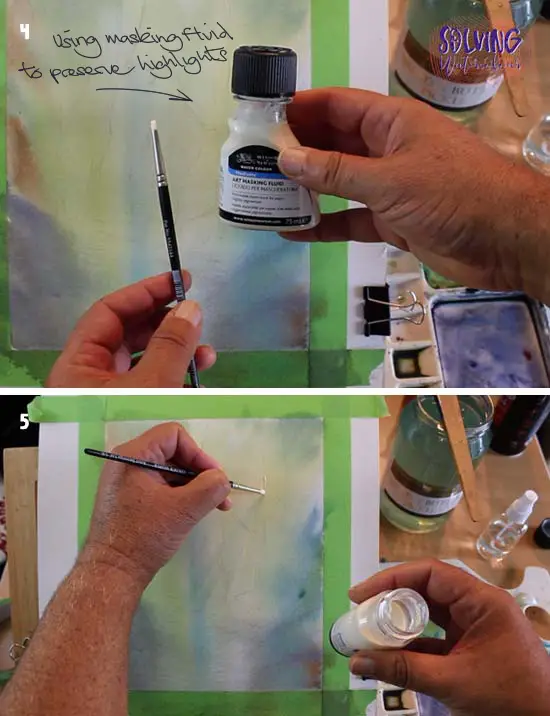
Steps 4 – 5
In watercolor painting, it’s important too always be thinking ahead to the later stages so now that the painting has dried (Note how much lighter it has become in Pic 4 compared to Pic 3) Preserve whatever highlights you feel you may need with masking fluid now as you may not be able to avoid painting over them in later stages.
I’m using a rubber tipped color shaper to apply the masking fluid. See related Blog Post, Tips For Using Masking Fluid for more details on this.
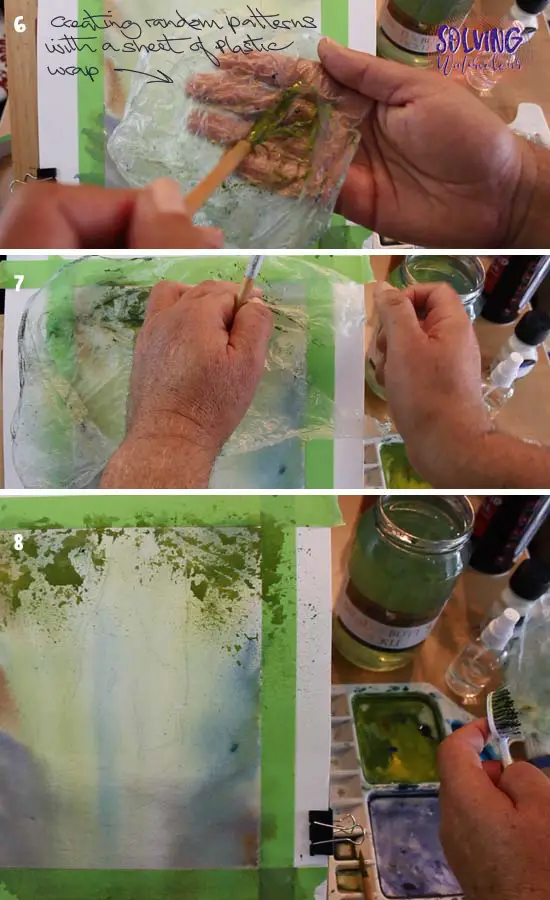
Steps 6 – 8
Now for some foliage. In forest and woodland scenes such as this one there’s no point trying to paint every single leaf. In reality we tend to perceive the broader shapes as a mass of color and tone rather than lots of tiny individual leaves. So lets approach it that way. I’ve taken a tip from Japanese watercolorist Kanta Harusaki and I’m using some wrinkled plastic wrap as a random pattern making device to create a mass of foliage.
You can also add some additional specks of color by flicking on paint with an old toothbrush.
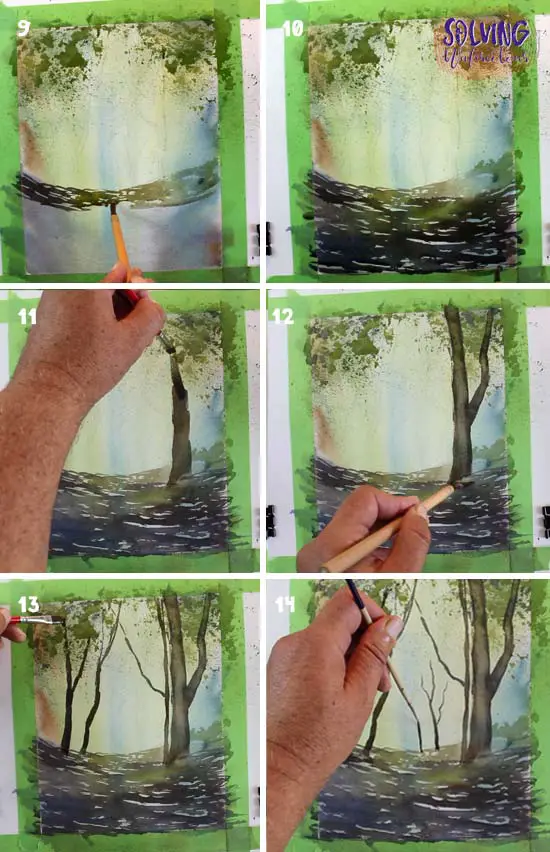
Steps 9 – 14
Pics 9 & 10: Start painting the foreground with a bamboo brush. Start with greens and then add more and more of the Burnt Umber/Ultramarine mix as you work your way down the paper. Make sure that you put plenty of variation into the color as this will help give it a more natural appearance. Leave plenty of white highlights, this will create the impression of patterns of shadows and light as the sun shines through canopy of tree foliage.
Pics 11 & 12: Using a flat brush with the Burnt Umber/Ultramarine mixture, start painting in the largest tree trunks. Pulling the brush from the low foreground in an upwards direction. To give the trees roundness, lift out a highlight from the center of the trunk with a damp brush, use a tissue or paper towel to wipe excess paint off the brush and lift out some more paint until you are happy with how it looks.
To avoid having the tree cut off abruptly with a hard edge at the base of the trunk. Soften the base of the tree with a brush loaded with clean water to blur and blend it with the foreground. You can achieve a similar effect by smudging the base of the tree with your finger.
Pics 13 & 14: For the thinner trees and branches, switch to a Rigger brush and start to detail these.
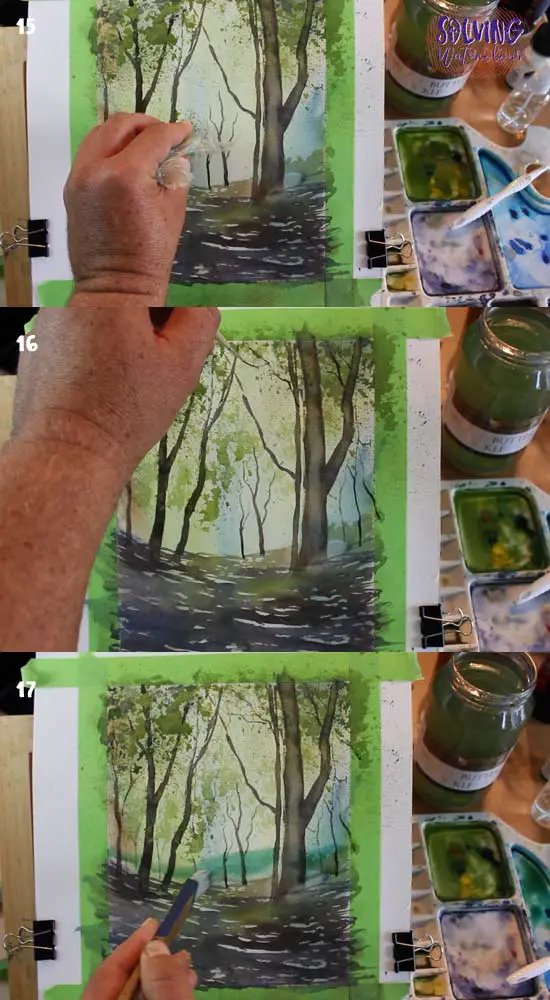
Steps 15 – 17
Pics 15 & 16: Take the plastic wrap and scrunch it up into a ball and dab in some more leaves around the tops of the smaller tees that you have just painted. Leave gaps here and there and start to detail areas of thin branches spreading out from the main branches.
Pic 17: I decided that I would like there to be a distant hill in the background. Strictly speaking I should have put this in earlier with my other background elements but the transparency of watercolor allows me to just about get away with putting one in now as long as I’m careful and don’t allow it to interfere with my foreground. Sometimes ideas just occur to you and you just have to go with it and improvise.
To create the effect of of a distant hill, I made sure that the painting was completely dry and first painted a strip of clean water then with my hake brush I painted in a band of pale green and allowed it to diffuse out, knowing that it wouldn’t spread beyond the confines of that wet band of water.
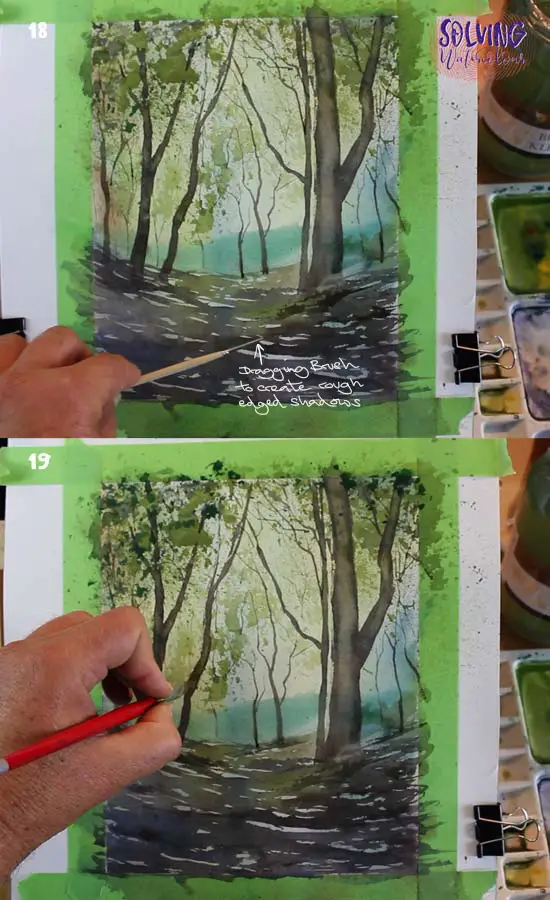
Steps 18 – 19
It’s time to put in the final touches, which as always, are the darkest tones. If your Burnt Umber/Ultramarine mix is a bit too light, darken it with some Paynes Grey rather than using a pure black. Take a rigger and lay it on it’s edge and drag it slightly upwards to create some rough edged shadows. Add these shadows at the base of trees and mainly in the close foreground to help bring a sense of depth to your painting.
I hope you had fun with this one. Don’t forget to remove the masking fluid at the end as it will start to bond with your paper if left on for too long. Gentle rubbing with a small eraser should loosen it enough in order to peel it away revealing the highlights underneath. All that’s left then is to remove the masking tape for the final reveal of your painting with nice crisp white borders.


Well done and thank you very much for the lesson
You’re welcome Carol
This is a useful little lesson, with some new tips for me to try out. Many thanks.
Thanks Fran
Hello! Thank you for this! I am just not sure where you placed the masking fluid. Thanks!
Thanks for the question. It was just a thin highlight on the left side of a couple of the trees.