
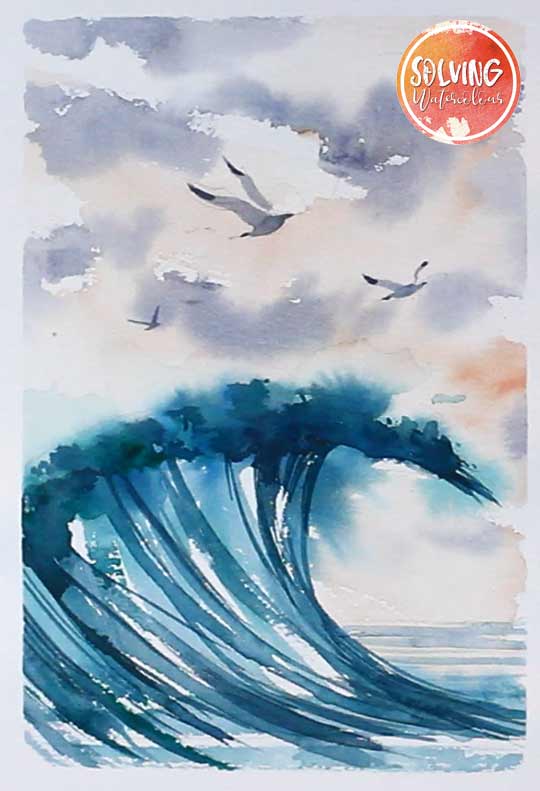
How To Paint Waves In Watercolor
As a mediocre but enthusiastic surfer, I’ve spent a lot of time observing, riding and being pounded by waves, so it was only natural that I would enjoy painting waves in watercolor too. Waves are never still and that makes them a tricky subject to capture. The ever-shifting nature of the sea lends itself to a loose semi-abstract treatment. I’m a great believer in using media that suits the subject matter and what could be more appropriate than watercolors for portraying the essence of the motion of waves and water? So how does one paint a watercolor wave exactly? We’ll take a detailed step by step look at that but the general method I like to use is as follows.
Start with a loose sketch of the wave and use a Bamboo brush, to paint an initial wet into wet wash of Pthalo Blue with a touch of Viridian Hue. This will establish the rough shape of the wave. After the first wash of color, allow it to dry completely and then continue to paint the wave in stages by building up thin layers of transparent color. Leave white highlights of unpainted paper to help create the effect of a translucent wave breaking with a bright sky behind it.
Materials List
Brushes
Paper
Miscellaneous

How to Paint A Breaking Wave in Watercolor
Total Time: 20 minutes
Step 1: Painting The Background Sky
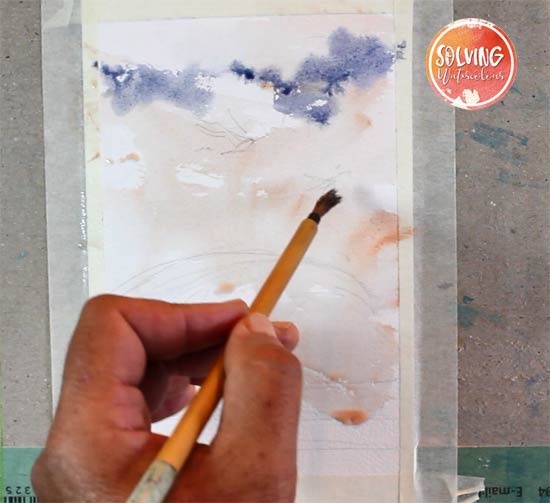
For the background, I wanted to created a loose warm summer sky. I began by loosely wetting my paper with clean water with a Hake brush. I was careful to leave some small dry areas here and there. The reason for this is that clouds tend to have a mixture of soft diffuse edges and hard well-defined edges. The wet areas allowed the paint to flow and bloom, whereas the dry spots on the paper remained white and hard edged .
The colors I used for the sky were Burnt Sienna and a blue purple mixed from Ultramarine, Alizarin Crimson and Paynes Grey. I took a Bamboo brush and painted an initial wash of Burnt Sienna, touching the brush here and there and allowed the colors to flow in a natural random way. While this first wash was still wet I dropped some spots of purple into my wash and allowed them to bloom out. The white patches of dry paper created some interesting areas of strong contrast. Skies shouldn’t be planned too carefully, half the fun is just letting the paint do what it wants, without trying to control the outcome too much.
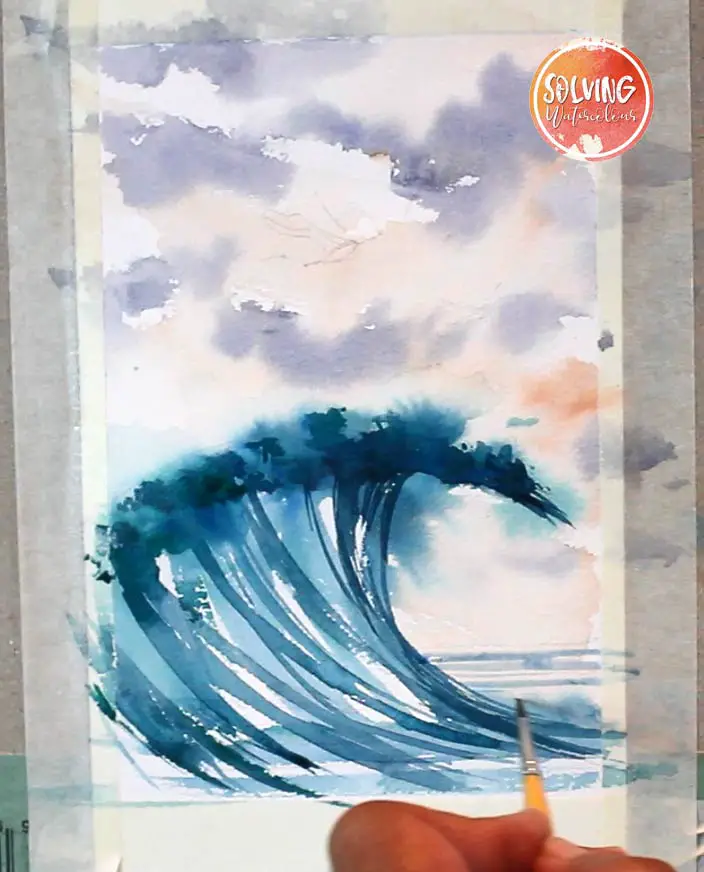
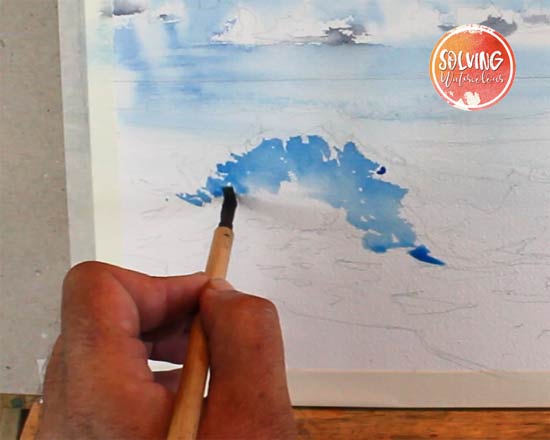
Step 2: Rough Wave Shape
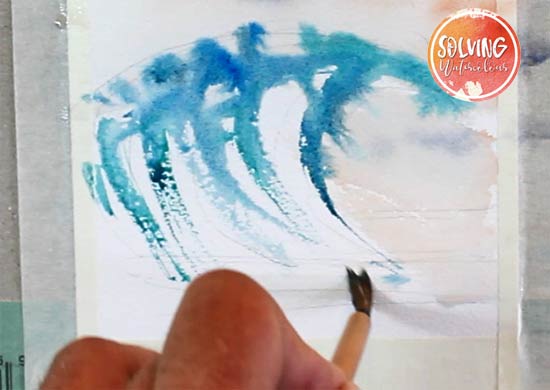
While the paper was still wet, I took a mixture of Pthalo Blue and Viridian Hue. These are both strong staining colors that I rarely use in their full unmodified glory but a painting like this is a welcome opportunity to use them liberally. To create a more natural effect allow the colors to mix on the paper rather than thoroughly mixing them on the palette this will create a more subtle and visually interesting variegated wash of blues and greens. I started with the crest of the wave and pulled the paint down in curving strokes.
Step 3: Drying The First Washes
Just like the clouds, the wave is a mixture of wet in to wet diffused colors and hard-edged strokes. I dried the paper completely, with my hairdryer in preparation for adding more glazes of transparent color over the top.
Step 4: Layering Color

I used a thinner mixture of Viridian/Pthalo Blue and added more definition to the crest of the wave and more downward curving strokes with the Bamboo brush. It’s important to leave areas of white and not completely fill in the wave as a solid block of blue. This adds sparkle and creates the illusion of foam, and light reflecting on the wave face.
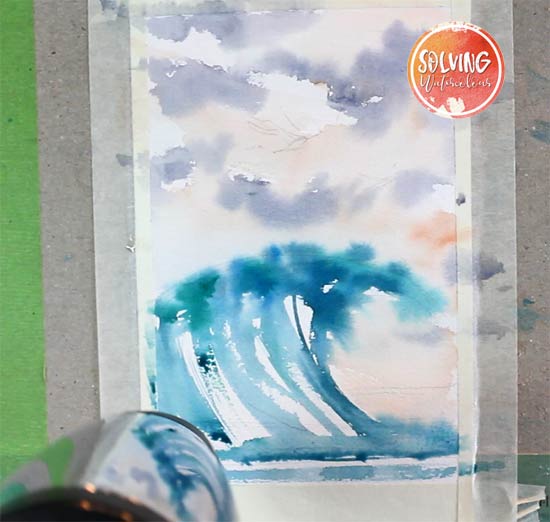
Step 5: Painting The Background Waves
Waves break in shallow waters. Here I’m adding ripples of deeper water in the distance with a few horizontal strokes of my No.2 Round brush. This establishes the horizon line and helps to create a sense of depth for the viewer.
Step 6: Finishing Touches
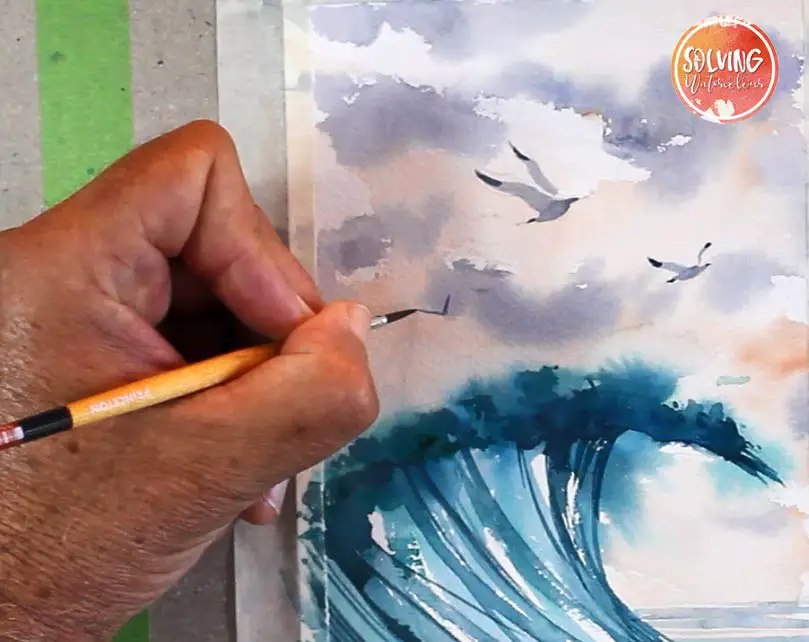
What would a picture of the sea be without some seagulls? There’s a natural center of interest created by the white patch of cloud in the sky. It’s an area of high contrast that draws your eyes so I’ve placed the largest of the three seagulls there.
Tip
It’s become a bit of a cliche to paint the letter “V” as a universal symbol for seagulls and other birds in flight. Search Pinterest and Google Images for actual photos of flying birds. By Studying them and practicing painting their silhouettes, you will start to come up with your own unique bird shape symbols.
Watch The Video
Waves Breaking On A Beach
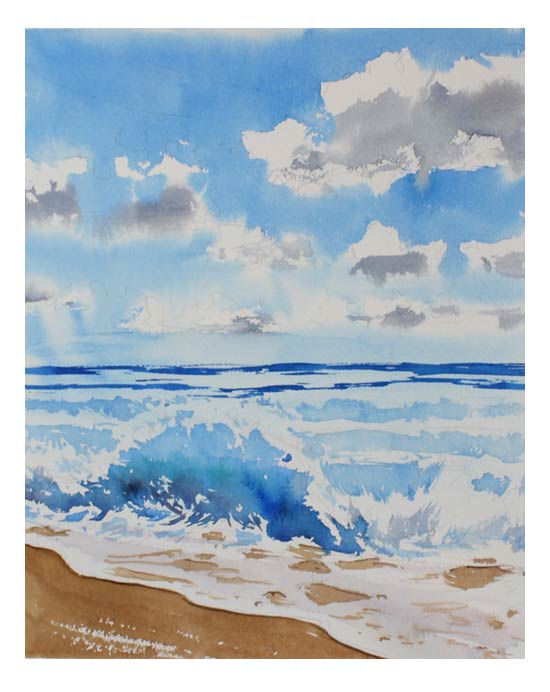
The previous painting showed a wave breaking from the dramatic viewpoint of an observer in the water but we more commonly see waves breaking on the shore viewed from a vantage point on the page beach. Such as in the painting below.
Step 1: Painting A Graduated Wash
This painting required a detailed sketch for the wave itself but the sky was painted fairly loosely. The main breaking wave in the foreground has a lip with more light shining through it than at the base. So it’s necessary to paint a graduated wash going from light blue at the lip to a darker shade of blue at the base.
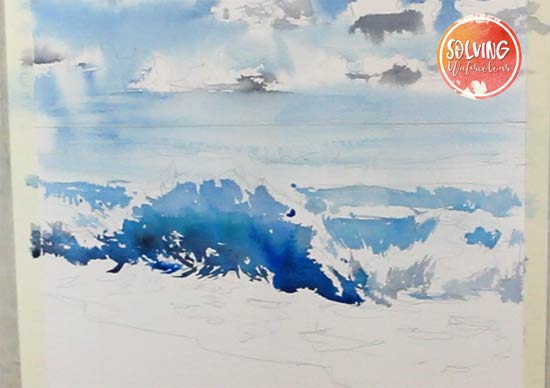
To achieve this I began painting with a thin consistency of Pthalo Blue using the Bamboo brush again wihich was ideal for creating those rough foamy edges . Darker colors such as Prussian Blue and Paynes Grey were then dropped into the lower portion of the wave while it was still wet
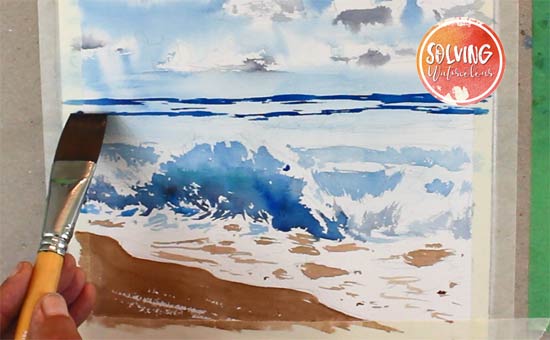
Step 2: Painting The Sea Foam

As the wave breaks and hits the sandy shore, white foam is created. For the areas of white foam it’s important to preserve the white of the paper. The foam has lots of bubbles and holes through which the sand is visible. The sand was painted with a Burnt Umber warmed up with some Burnt Sienna. I added “Foam holes” and some random squiggles with my No.2 Round brush.
Step 3: Adding distant Waves
There are more waves in the background forming lines with ragged white foamy peaks in between. The edge of a 1″ Flat brush is ideal for creating these lines of surf. Ensure that the brush has a generous quantity of paint and move the brush horizontally along the paper, lifting it and touching it down again to create lines which are fairly straight but are uneven enough to look natural.
Step 4: Adding Shadows And Final Details
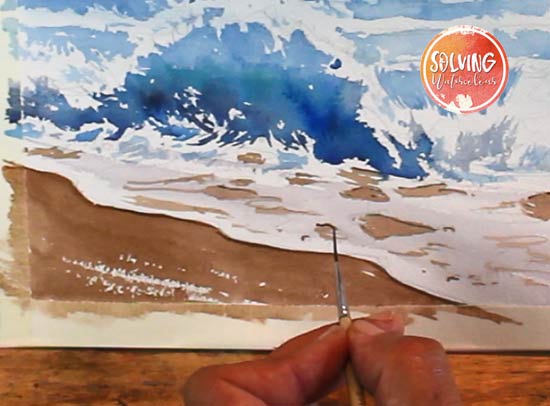
There are thin shadows cast onto the sand by the surf. Add those with a Rigger around the edges of the surf and foam holes or a small round. Remember that shadows will only be cast in one direction so they will only appear on one edge of the foam.
That concludes this post on painting waves in watercolor. If you enjoyed this post, you may also find the following posts useful.
Painting a watercolor seascape step by step
Paint seascapes and beaches in watercolor
How to mix watercolor grays
How to put simple figures in your watercolors

Hello Andy,
Greetings from Dorset actually beautiful Christchurch, not to be confused with the Christchurch in NZ !
I am so pleased to have discovered your amazing online school.
I am particularly interested in the sea and surrounding areas , as I live right beside the quay with boats and the river on my doorstep . Will this be something you may consider doing as well as your landscapes course ? or perhaps a combination would be great.
I will go through your free courses first and then consider the landscape course. I have been painting with watercolours for soo long without success, I do have some memory issues so the fact that I would be able to download information is invaluable to me. Thank you . Lesley Ann ANDOW
Thanks Lesley, a seascapes course is definitely something I’d like to produce in the near future, when that happens I’ll certainly let all my newsletter subscribers know!