You want to start painting watercolours but you’re not sure where to start this list of my top 22 tips for beginner watercolour painters will get you up and running in no time
Tip #1 Understand That Watercolour Is Transparent
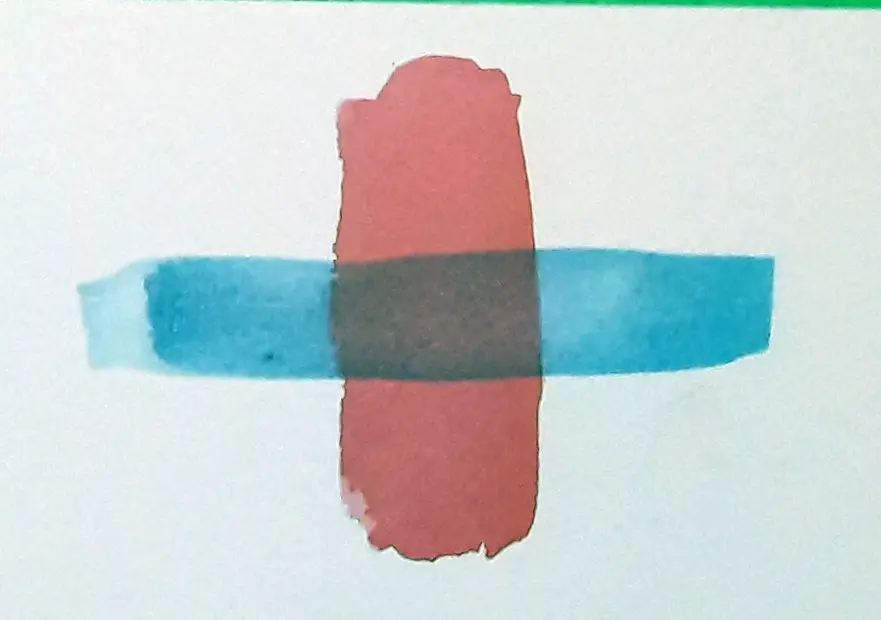
Watercolour isn’t like other traditional painting media such as Oils or Gouache. The first thing to understand and remember is that watercolour is primarily a transparent medium. This means that you can’t lighten or brighten colours by adding more paint. You can only make it darker and muddier.
Tip #2 Paint From Dark To Light
Because watercolour is transparent, the lightest tones we can have in a watercolour painting are the areas with no paint at all. i.e the whiteness of the paper itself. That’s why it’s necessary to begin with the lightest tones and build up to the darkest in that strict order.
There are various ways of preserving the white of the paper including negative painting (Painting around the subject and masking fluid ( A thin rubbery solution that repels paint and can be removed later)
Tip #3 Tilt Your Paper
To paint watercolour you need to paint with your paper at an angle of at least 30 degrees. When I first started with watercolour painting I didn’t do this. I was used to painting with Gouache and Acrylics and had always painted on a horizontal surface.
I didn’t see any reason why watercolour should be different but the fact is, watercolour is different. It flows and moves in unpredictable ways, like… well .. you know… water. When you angle your paper, the paint will always flow downwards, bringing a much needed element of predictability to the whole chaotic process.
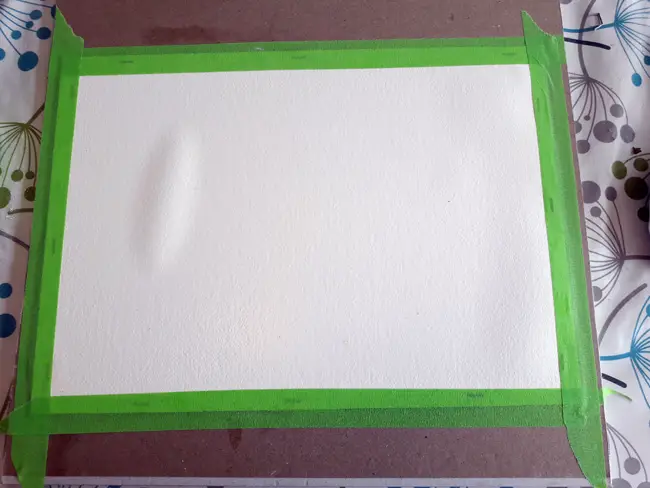
Tip #4 Learn How to Paint a Flat Wash
If there is one fundamental skill you need to learn in order to paint successful watercolour, it’s painting a flat wash. This really is the basis of everything. To quickly summarise, if you’re not sure what a flat wash is. It’s the ability to paint a large even area of colour with no streaks or blotches. It sounds like it should be easy right? In practice, it’s a little bit tricky and surprisingly easy to mess this up. The basic method is as follows.
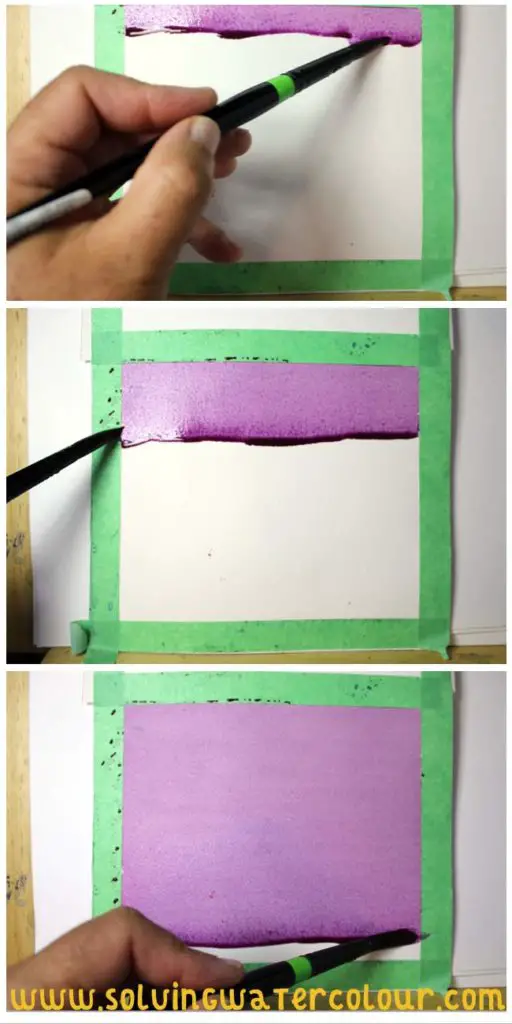
First, tape off a square section of your paper approximately 4″X 4″.
Tilt your paper at about 30 degrees. Mix up a nice juicy puddle of colour and thoroughly load up a brush. I’m using a size 8 round brush but a flat brush would work just as well.
Paint a horizontal stroke at the top of the square. The paint will run down and stop where it meets the dry paper, forming a bead of wet paint. Load your brush up again and paint another horizontal stroke directly underneath but painting into that wet bead and pulling it down and across with the stroke. Continue down the paper until you’ve painted the whole square.
When you’ve finished you should have a nice even square of colour with no streaks or blotches. That’s essentially it.
Give it a try, if you have problems, then I’ve written a whole blog post about painting flat washes which you can read here.

Tip #5 Use Clean Water
It sounds obvious doesn’t it? Keeping your water clean and fresh will help keep your paintings clean and fresh. but it’s tempting when you’re in the middle of a painting to just keep going and not interrupt the flow.
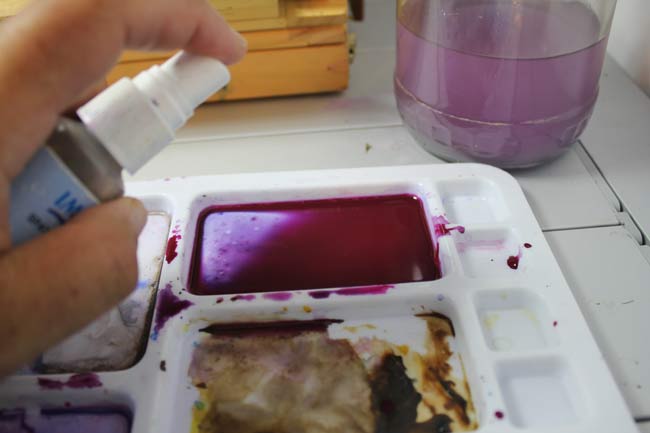
Have a couple of jars of clean water if necessary. One for cleaning your brush and one for adding clean water to your palette.
Alternatively. What I personally do is keep a little spray bottle to hand and use it exclusively for wetting my palette. The advantage of this is you don’t need to use your brush at all to add water to your paint. Every time you pick up water on your brush you are also putting paint in the water jar and diluting the strength of the paint on your brush.
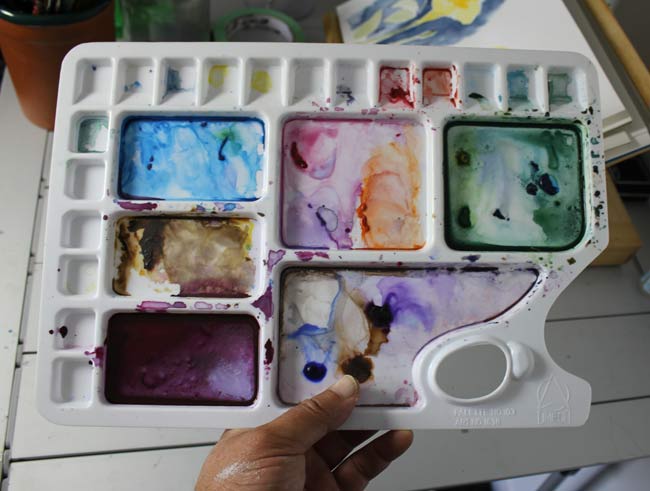
Tip #6 Pre-Mix Your Colours
Because watercolour is a fast drying medium. Speed is of the essence. So, having your colours pre-mixed on your palette in generous quantities is a good idea. You don’t want to be half way through painting a flat wash and then run out and have to mix up a whole new batch of paint in order to complete it. If the wet edge dries you will be left with an ugly streak across your painting and no one wants to see that.
Tip #7 Don’t Use Black Or White
In my opinion, watercolour looks best when you use the white of the paper as your only white. It gives your paintings a certain luminosity and freshness. That tends to be lost when you apply a white straight from the tube such as Titanium White. Having said that there are no hard and fast rules that you have to follow. Think of it as a guideline.
The colour Black doesn’t really exist in nature and using it tends to make your paintings dull and lifeless. Far better to use cool, or warm darks. Having said that, there’s an exception to every rule. The great landscape painter Rowland Hilder used black constantly and it didn’t do him any harm! If you’d like to learn more about mixing watercolours and colour theory in general be sure to look at this post which goes into the subject in depth.
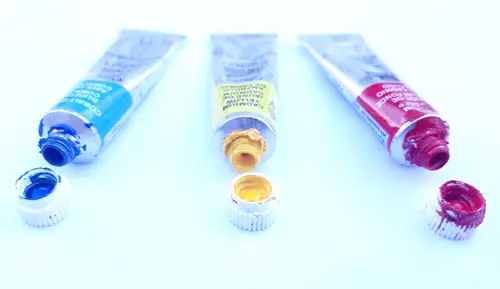
Tip #8 Use Tubes Not Pans
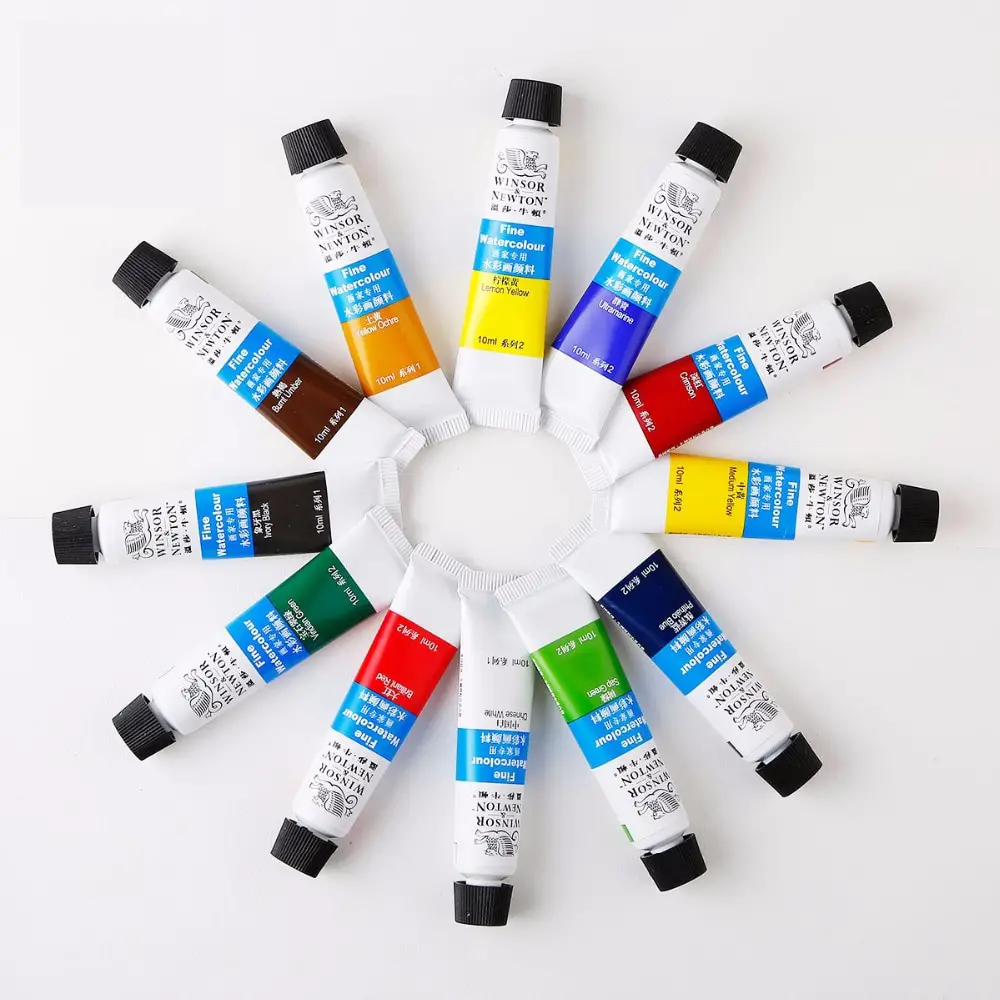
There’s nothing wrong with pans as such. I love using pans, particularly when painting plein air, as it’s really convenient to put a tin of pans in your rucksack. However, when you are trying to mix larger quantities of paint. It helps to be able to simply squeeze it straight out of the tube on to your palette. It’s much less time consuming than trying to reactivate a dry block of paint sitting in a pan. It’s also much less fiddly and puts way less wear and tear on your brushes.
Tip #9 Put Your Palette In Order
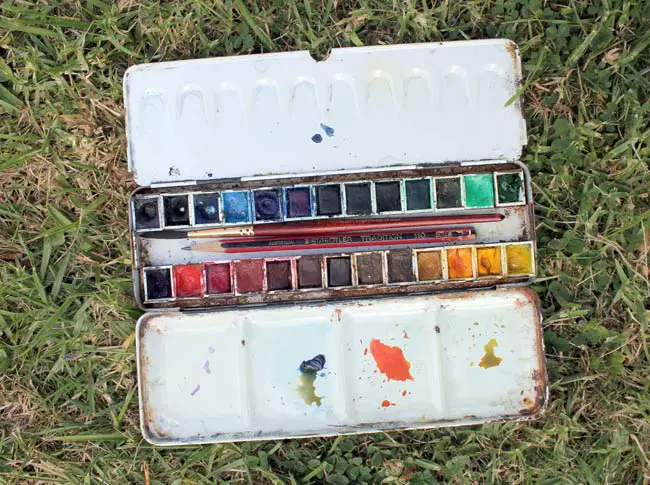
What do I mean by putting your palette in order? I simply mean arrange your tubes, or pans in the order of the colour wheel. Warm colours on one side and cool colours on the other side. i.e. red, orange, yellow, green, blue, indigo, violet. Again this is a great time saver as you won’t be wasting time hunting for colours while your half complete flat wash is drying out. I also find, particularly with pans, that it can be difficult to tell very dark dried colours apart. Is that Violet, or Viridian? If you place your paints in the same order as the colour wheel then you won’t have to guess. For more on the colour wheel see this post.
Tip #10 Use The Best Quality Paper
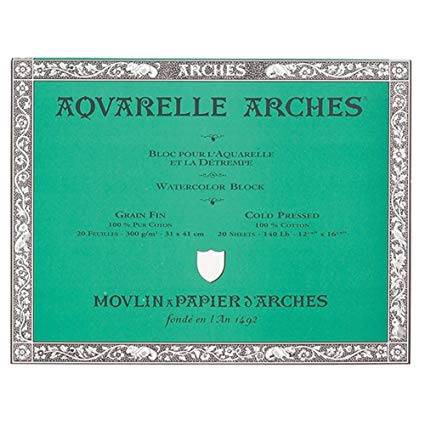
With watercolour paper you tend to get what you pay for. The best quality papers are made from 100% cotton. Wood pulp papers are much cheaper but they’re not the same. Using cheaper paper can actually hinder your progress and lead to frustration, as you simply will not be able to achieve good results. For a more in depth look at watercolour paper, how it’s made, and what you should expect from it, please read my blog post Watercolour paper: Everything you need to know
Tip #11 Don’t Stretch Your Paper
“What!” you say. “But I’ve just read ten other lists of “Beginner’s” watercolour tips and seen the exact opposite of this advice!” Bear with me a moment, I can explain.
When watercolour paper gets wet, it tends to “Cockle” i.e. it warps and curls. Stretching is the process of taping down your paper and wetting it and then allowing it to dry so that it minimises this cockling. If you want to try it, my post Watercolour paper: Everything you need to know goes into much more detail about the process and has photos too!
There are a couple of reasons why I say, don’t bother with stretching paper. If you use 140lb watercolour paper or thicker, then it’s simply not an issue. the paper may curl a little but if you keep it taped down to a flat hard surface it really shouldn’t bother you too much. Remember you can actually iron your paintings (Iron them on the back and don’t let the iron get too hot) if you need them super flat for framing. Or just place them under a pile of books.
There’s another more serious problem that results from stretching your paper, one that isn’t immediately obvious.
Good quality watercolour paper is expensive. This can lead to a sort of performance anxiety known as “The tyranny of the white page”. All writers and artists experience this at some point. Basically, it means you’re too scared to make a mark, or at least, very tentative when you do.
If you’ve invested a significant amount of time and effort into stretching a sheet of paper on top of paying a small fortune for it. you’ve just raised the performance anxiety bar through the roof! Then if you mess up. You have to start the stretching process all over again, very demoralising! Don’t do it to yourself.
To summarise this tip. Invest your time in painting not stretching.
Tip #12 Save Your Paint
You don’t need to clean your palette after every painting session. Unlike Oil, or Acrylic paint, Watercolour can easily be reactivated with a little water even after a significant length of time. I have some watercolour paints which are 40 years old and they can still be used.
Tip #13 Limit Your Palette To 10 Colours or less
It’s tempting to acquire every colour under the sun and have them all at your disposal.
Limiting yourself to ten or less basic colours will serve you so much better in a number of ways. You will earn how to mix your paints and create all the variations you need. The resulting colours you put down will also naturally tend to be more harmonious with each other.
My recommendation for a basic palette is known as a “Split Primaries” palette. The three primaries being red yellow and blue. They are “Split” because you have cool version and a warm version this gives you a great range of mixing options. A warm red e.g. Cadmium Red, a cool red e.g Alizarin Crimson. A warm yellow e.g Cadmium Yellow, a cool yellow e.g lemon yellow. A warm blue e.g Ultramarine, a cool blue e.g Cerulean Blue. To this you could add a “Neutral” such as Paynes Gray and a “Tertiary” such as Burnt Umber. If you really must. Maybe add a Purple or a Prussian Blue.
For a detailed explanation of those terms and to learn all about colour mixing see my post How to mix watercolours.
Tip #14 Mix Your Own Greens
You may have noticed that I didn’t include any greens in the last tip. That’s because most of the greens that you buy pre-made in tube form are not very natural looking unless you add another colour to modify and tame them.
Mixing your own greens is the way most watercolour painters prefer to go. There are many ways to mix green besides the obvious Yellow + Blue formula. Again take a look at my post How to mix watercolours for ways to mix a variety of natural looking shades of green.
Tip #15 Make Thumbnails
The two things that makes watercolours difficult, are the need to work very quickly and the fact that it can be hard (If not impossible) to successfully fix a mistake. (Though there are ways, see my post on this subject) I think most watercolour painters would agree that the easiest way to fix a mistake in watercolour is not to make one in the first place.
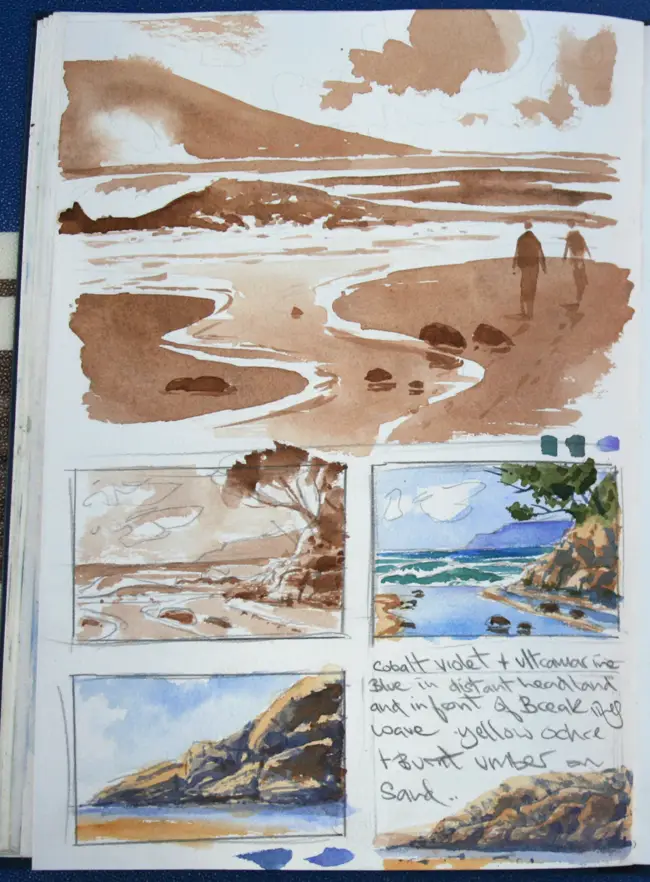
A thumbnail is a mini version of your painting. “Business card” is closer to the actual size it needs to be. Creating a thumbnail shouldn’t take more than five minutes. It’s not going to be the same when you paint at full size but it’s well worth taking this extra step just to work out composition and colour. You will find that your failure rate for your paintings will dramatically reduce.
Tip #16 Separate Your Values
It can be tempting when first starting to learn how to paint to give everything equal weight. This makes it difficult for the viewer to know what to focus on. Think in terms of trying to separate every painting into three distinct tonal values. Light medium and dark ; and three distinct layers. Foreground, midground and background. Assign one value to each layer. For an in depth look at this and all the possible value patterns that result, read this post on how to paint landscapes in watercolour.
Tip #17 Use Less Water Than You Think
Watercolours tend to dry about 25% lighter than they appear when wet. When dry they are much less vibrant. Using good quality paints mitigates this somewhat, as the pigments tend to be more concentrated.
For this reason , you probably don’t need as much water as you think you do. The tendency of many watercolour artists too use too much water is probably why watercolours have developed an underserved reputation for being pale and wishy washy.
Tip #18 Be Bold
As I just mentioned, watercolour doesn’t need to be anaemic and wishy washy (Unless that’s what you’re trying to achieve of course!) Actually watercolour is the perfect medium for creating work with strong dramatic contrasts and bold vivid colours. For some inspiration, Just check out the work of Alvaro Castagnet. Don’t be timid.
Tip #19 Stop Fiddling With It!
It can be very tempting to “Overwork” watercolour paintings. Overworking occurs when you feel that something isn’t quite and you try to fix it by adding just a little bit more detail. In a medium such as Oils, or Acrylics you can paint over and over the same area lightening it here and darkening there but watercolour seems to work best the less you actually do. Fiddling and overworking usually only results in a muddy mess.
Tip #20 Finish Before You Judge
If you’re anything like me , you enjoy watching watercolour painters giving demonstrations on YouTube. How often have you watched one of those videos and thought “This painting looks terrible”. Until it suddenly all comes together in the last five minutes.
Watercolour painting is like that. I think it’s to do with the process of working from light to dark. It’s only at the very end when the darkest tones are added that suddenly everything comes right. I’m not saying it will always come right in the end, I’m just saying that it’s always worth reserving judgement till the very end.
Tip #21 Use Bigger Brushes
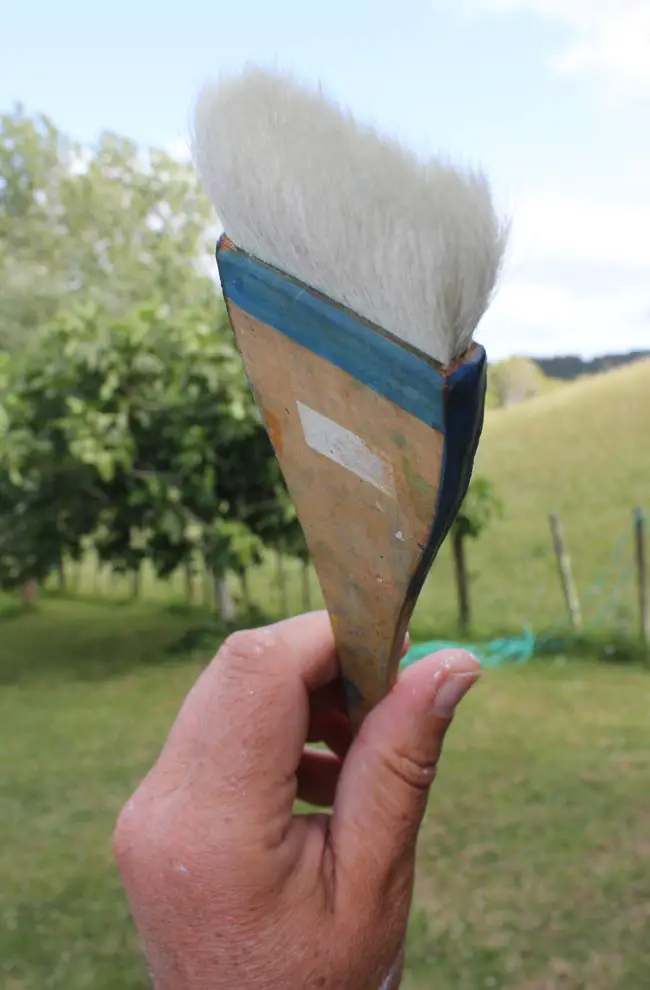
As a general rule, always use a brush that’s a bit larger than the size you think you need. Using larger brushes reduces the temptation to fiddle and forces you to be bold and direct. This will result in fresher cleaner confident looking paintings.
Tip #22 Dive In!
You can only learn so much from reading and watching videos. At the end of the day, you are your own teacher and you can only really learn by doing. You’ve got to get your feet wet and paint as much as possible, so make that commitment to yourself, starting now.
Want to take up watercolour but not sure what you need to buy? Check out my list of recommended watercolour supplies here.

Very helpful article